Growing Blog
Growing Mushrooms in the Garden: The King Oyster
There is something inherently satisfying about walking into your garden and harvesting fresh gourmet mushrooms for your next meal.
Growing mushrooms outdoors in garden beds is low maintenance, produces quality food and provides a unique and beautiful addition to your yard.
Many different species can be grown outdoors, but I am going to highlight one of our favorites: the King Oyster.
King Oyster mushrooms can be vastly different depending on growing conditions.
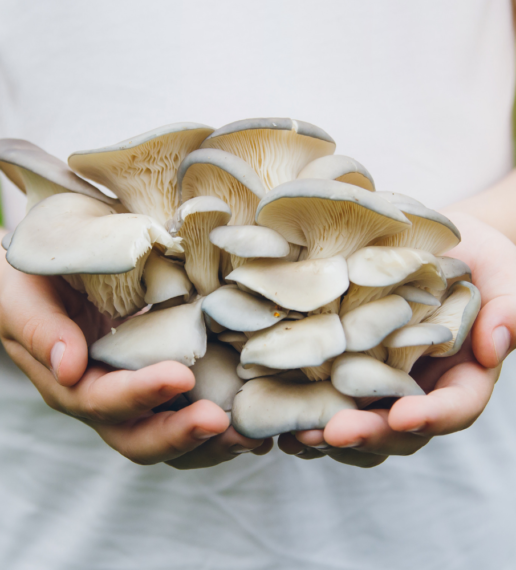
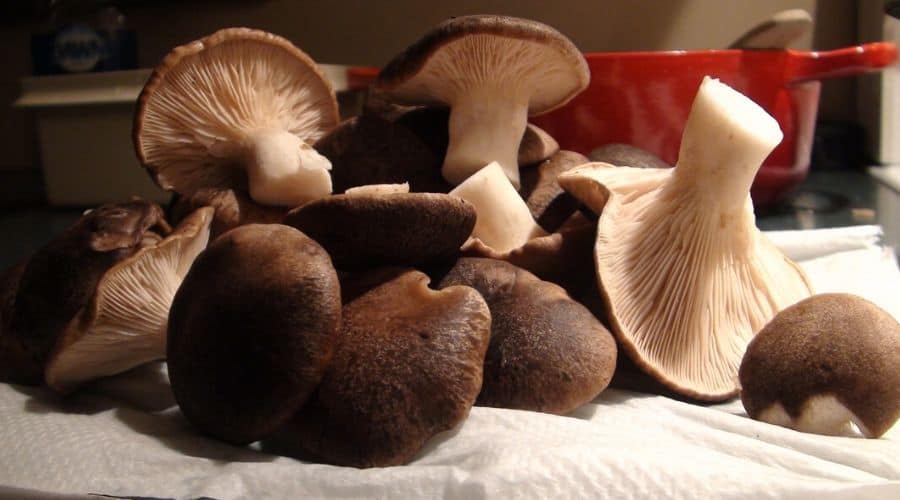
The difference is most obvious between outdoor and indoor king oyster mushrooms. Outdoor king oysters tend to have much larger, darker caps, and almost no stem. They also have a meatier texture.
In contrast, indoor grown Kings can have fat stems and small pale caps. This is due to the large amount of fresh air and light outdoors that is tough or almost impossible to match in an indoor environment.
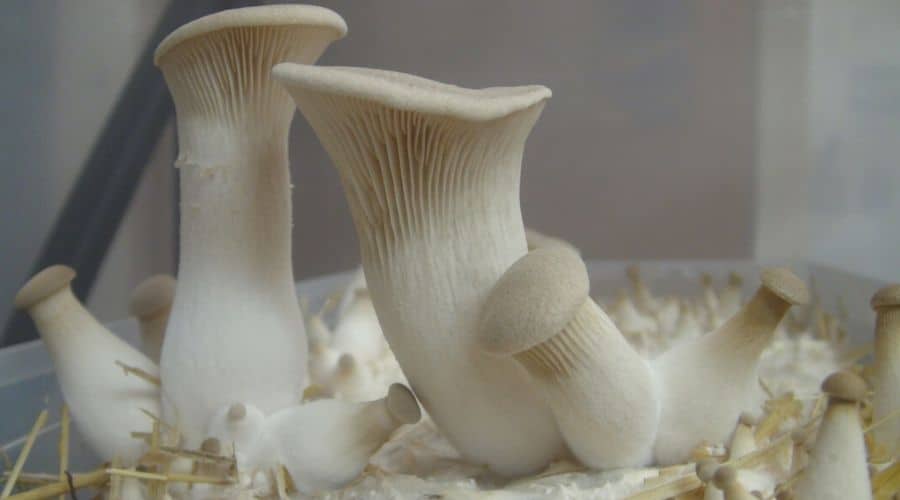
King Oyster grown indoors with not much fresh air.
Genetically identical to previous picture, same substrate, but grown outdoors. Note the shorter stem and larger caps.
Basic Method for Growing King Oysters Outdoors
Growing mushrooms in an outdoor bed is a pretty simple process and doesn’t need to be anywhere near as sterile as that required for indoor grows.
Basically, you need to add grain spawn or sawdust spawn to a substrate, keep relatively moist and wait for the mushrooms to fruit.
Good substrate for king oysters is a mix of straw and hardwood chips. Spawn should be added at 5-10% to the substrate. (Spawn weight to wet weight substrate).
Mix the spawn thoroughly and evenly with the substrate.
You want a bed depth of about 4-8 inches, so select an appropriate area based on how much spawn and substrate you have. You also want to ensure that the area you choose for your mushroom garden does not receive too much direct sunlight which can dry out the mycelium.
A good area will have lots of shade, and be surrounded in tall grass or trees to help maintain moisture in the bed.
Once you have mixed in your spawn, it is beneficial to add a layer of non-nutritious material to act as a casing layer.
This is basically a layer that will protect the mushroom as it grows through the substrate, keeping it moist and helping it to pin. I have found that not using a casing layer results in a way lower yield.
With this method, the results are much less predictable than indoor grows. You may also have to wait for several months for the bed to fruit, depending on time of year, amount of spawn used and the climate in your area.
I have however found an alternative method for growing outdoors involving used straw logs that has shown to be much faster, more predictable and produce larger yields.
Using spent straw disks for better results
For this method you will need to use straw logs. You can either use logs that have colonized completely but have not fruited, or even better, use straw logs that have already been harvest once.
I discovered this method by accident after I had a straw log that pinned excessively and never developed proper fruits. I decided to make a garden bed with incredible results.
Step 1: Select an Area for your mushroom garden
As said above, you want to choose an area with lots of shade and other plants that can help retain the humidity. For two straw logs I built a 3 ft x 6 ft garden bed. You can make this any size depending on how many straw logs and extra yard space you have.
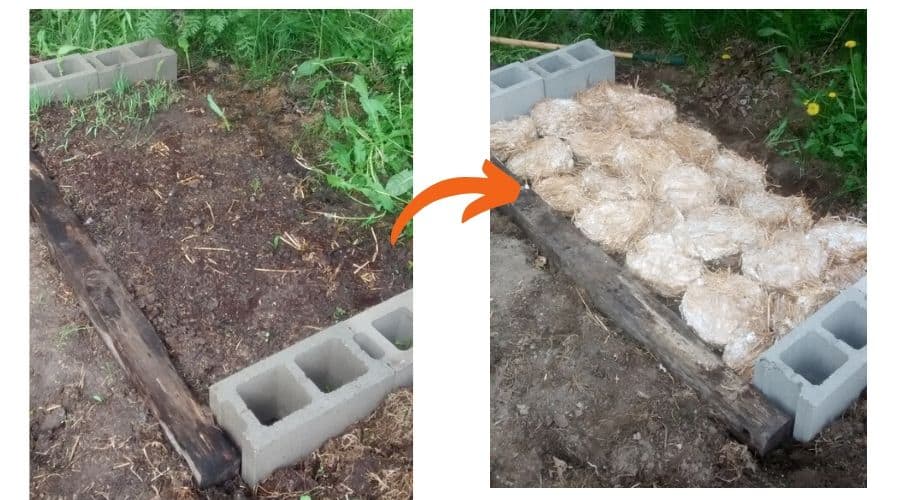
Step 2: Break logs into straw discs
After removing any remaining mushrooms, stems or pins from your log, break the logs into 2-3 inch thick straw “discs.” Lay the discs out horizontally in your garden bed. Use half discs to get even, flat edges and break up a few discs to stuff into any extra space or big holes between discs.
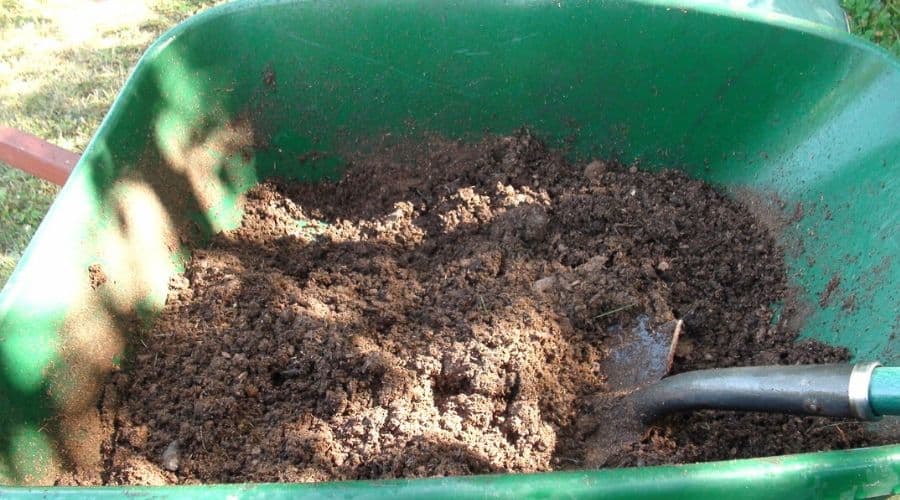
Step 3: Apply a casing layer
A casing layer makes all the difference with this method. Without a casing layer, the straw discs will dry out and yields will be significantly reduced, if anything at all.
You can use many different non-nutritive materials for a casing layer, but I prefer to use a mix of half peat moss and half garden soil or dirt.
Moisten the mix until it reaches what is known as field capacity. When your casing layer is at field capacity, squeezing a handful of it really hard will cause a small stream of water to come out, but just holding it in your hand causes no water to run out at all.
You don’t need to get this exactly right, but the closer to true field capacity you can keep the casing the better.
This mix of peat and soil seems to have the right properties for moisture retention and pin formation.
If using just peat moss, the mix seems to stay to wet and invites trichoderma molds on the casing layer. If using just soil or dirt, the casing layer tends to dry out too fast, preventing the mushrooms from pinning.
Step 4: Keep moist and wait
Try to keep the garden bed relatively moist by watering at least once a day with a light shower or mist.
You don’t want the bed to be logged with water, but it needs a certain level of moisture to initiate mushroom formation.
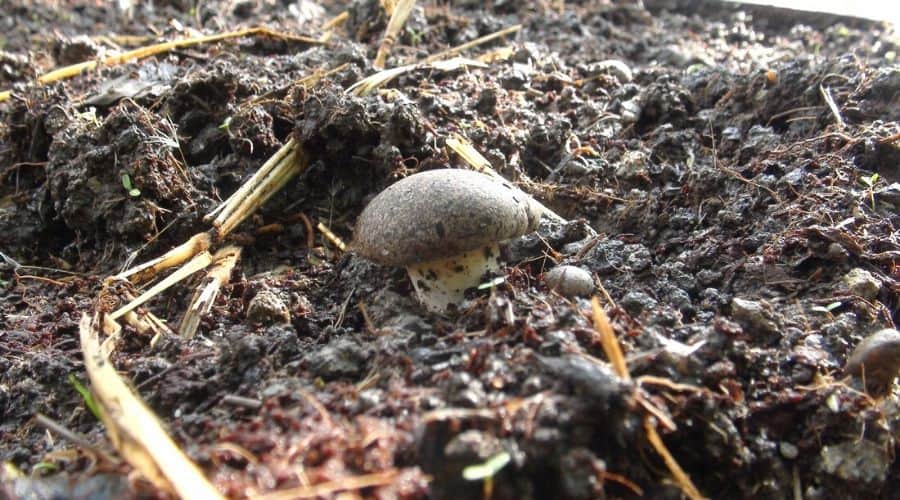
You should start to see the first few brave pins in about two weeks.
After that, the mushrooms will form relatively quickly. Depending on weather, you bed should be ready for harvest about 7 days after the first few pins appear.
Feel free to harvest individual mushrooms as they come, since you don’t have to worry as much about maximizing the first flush when growing outdoors.
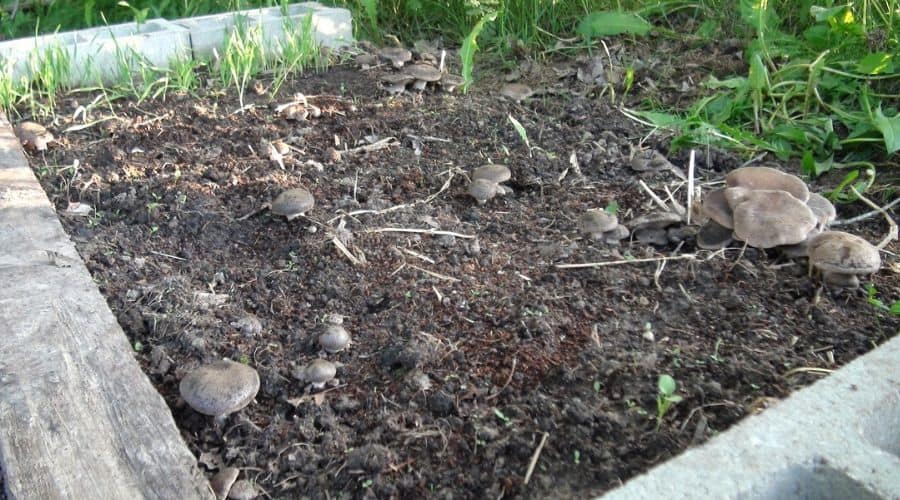
A well deserved harvest. I picked 4 lbs of mushrooms of this bed in two harvests.
Look out for fungus gnats
The one big disadvantage of growing outdoors is competing with all the other critters that want your mushrooms just as much as you do. Fungus gnats will burrow into the caps of your kings and lay eggs in the stems. The result is a number of worms and maggots in your mushrooms, making them completely unappealing. You can avoid this by harvesting your mushrooms early, and always check the stems for worms. If the mushroom feels light and it has a hollow stem, it was likely infested with fungus gnats. You could also try covering your garden with a hoop screen.
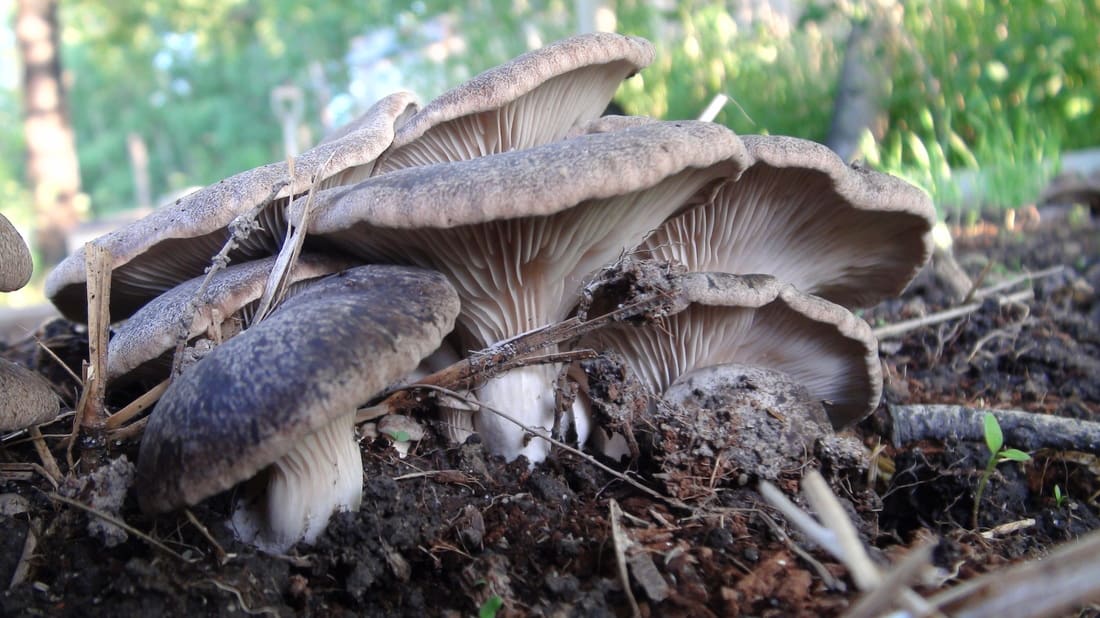
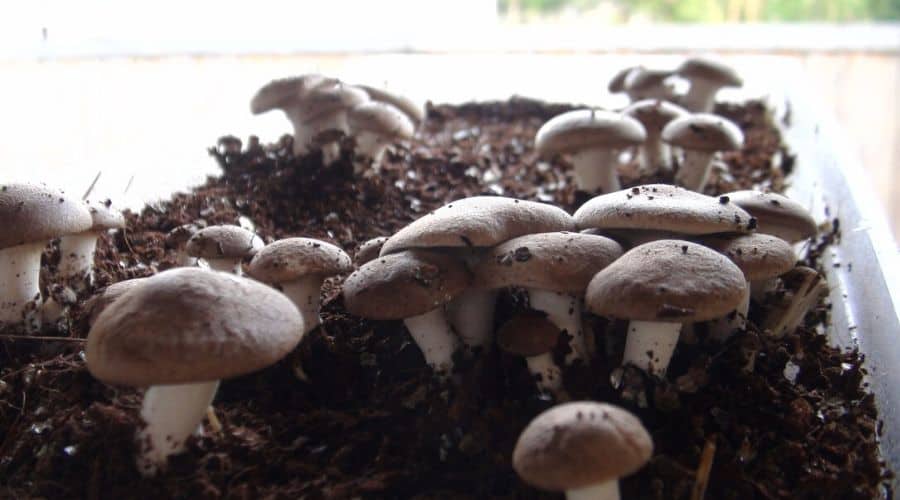
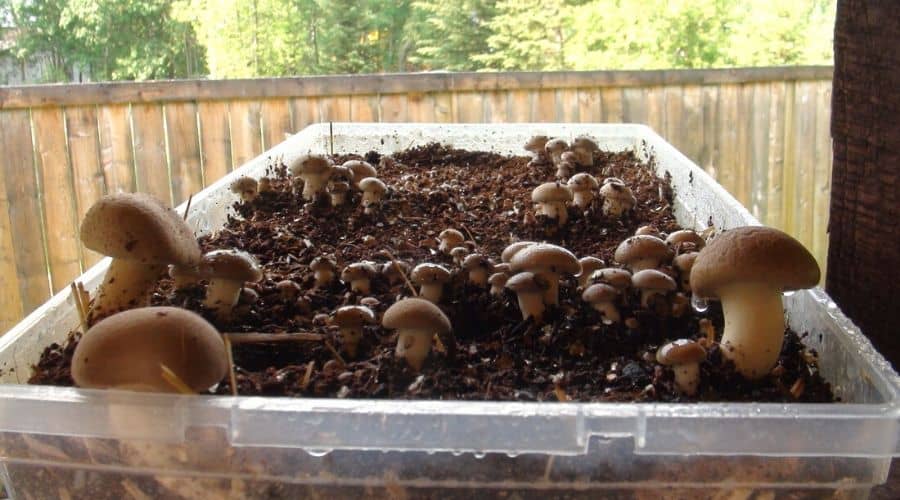
Smaller scale outdoor grows
You dont need a lot of space to grow nice mushrooms outdoors. It can also be done using smaller containers and simply placing on a patio or anywhere in the yard. The following pictures where from a small grow, using pasteurized straw in a small tote and cased with a mix of peat moss and vermiculite.
I hope you can enjoy growing mushrooms outdoors! The process is relatively simple and hugely rewarding. If done right, you should have more fresh mushrooms than you will know what to do with.
Thanks for reading! Post your comments, questions or stories of your own mushroom garden below!

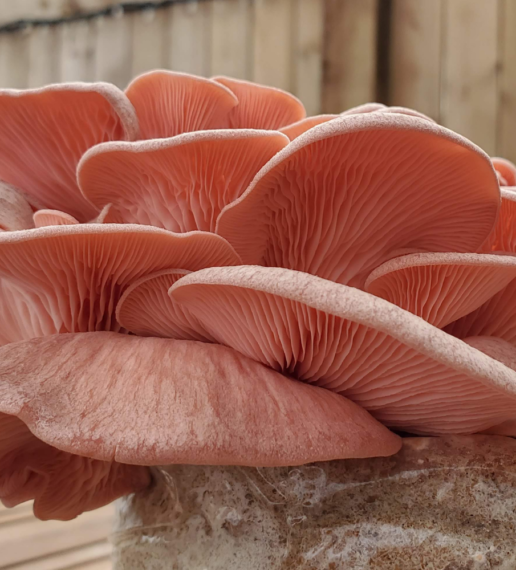
Growing Pink Oyster Mushrooms At Home (Easy Backyard Grow)
Pink Oysters mushrooms are one of the easiest species to grow. They are fast to colonize, produce a ton of fruits and aren’t at all afraid of less than perfect conditions. I just recently finished a fun backyard grow, and wanted to share how easy it is to produce a fresh bounty of one of
7 Tips for Beginner Mushroom Growers
New to growing mushrooms? If so, you may just be a little mystified – which is totally understandable. There is a ton of information to try and digest and make sense of. Terms like inoculation, agar transfers, laminar flow- what does all of this mean? And what of all this do I really need to know? I just want