Growing Blog
How To Grow Oyster Mushrooms

Looking to grow Oyster Mushrooms?
You’ve come to the right place!
This guide will show you everything you need to know to start growing Oyster mushrooms- whether you’re looking to grow as a hobby, or have aspirations to start a small farm.
So- you’ve decided that you want to try and grow mushrooms…
That’s awesome! (Personally, I can’t think of a more worthwhile pursuit.)
Maybe it’s because you want a small but reliable supply of fresh mushrooms to enjoy at home.
Maybe, you’ve come across a mushroom growing kit, and the process has piqued your interest. Or just maybe, you’re thinking bigger… and have a dream of starting your very own commercial mushroom farm.
Either way, you’ve probably already written off the idea of growing traditional button mushrooms.
Button mushrooms are cultivated at a commercial scale- they’re cheap, ubiquitous, and widely available. Why bother growing them when you can probably get them cheaper at the store?
It’s hard to argue with that logic…
BUT… there is another type of mushroom that is definitely worth growing on a small scale.
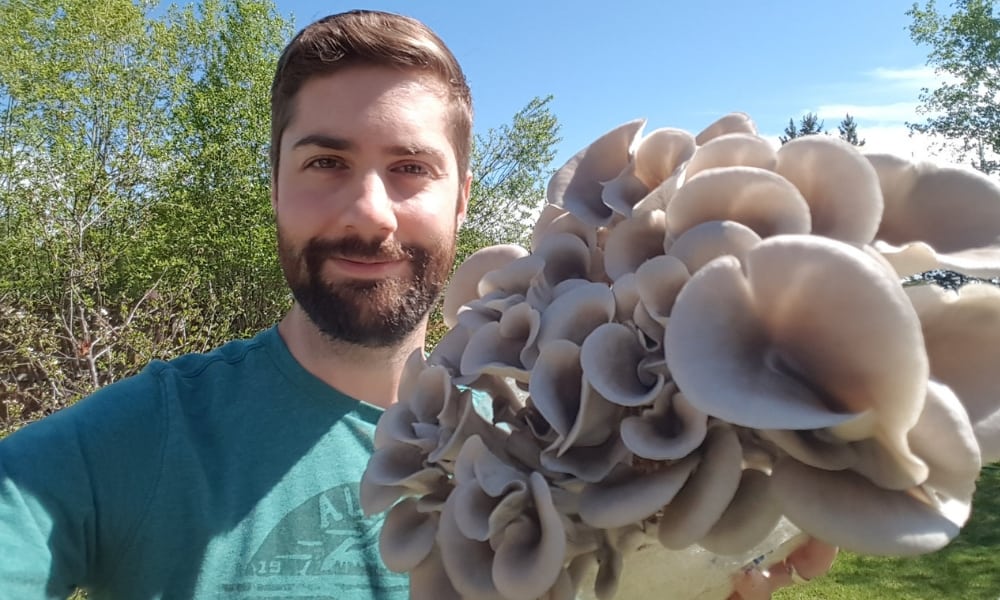
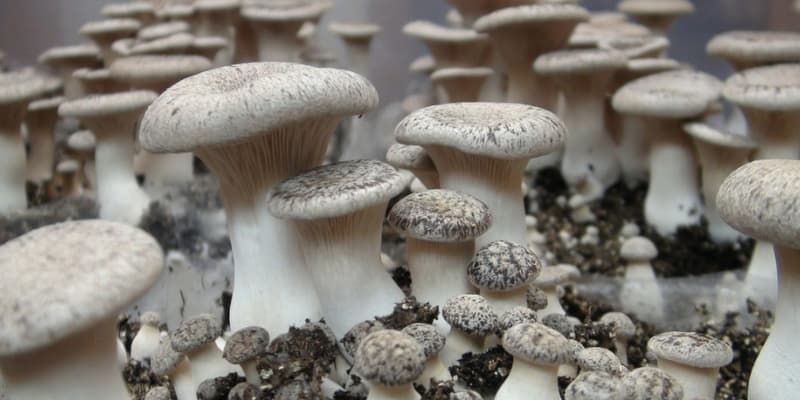
A mushroom that is available in a bewildering number of varieties, including yellow, pink, blue and grey. One that is delicate and has a shorter shelf life- meaning sometimes the only way to get it is to grow it yourself. One that has marketable potential, even for small scale growers, and even has the possibility of being grown profitably on a small scale farm.
Of course, I’m talking about Oyster Mushrooms.
Learning how to grow oyster mushrooms is a crucial skill for anyone wanting to get into the hobby of mushroom cultivation. Once you know how oyster mushrooms are grown, you can use those skills to foray into all other areas of mycology and mushroom cultivation.
This guide was put together to help you understand everything you need to know about how to grow Oyster Mushrooms– from getting started with noob-friendly techniques, all the way to advanced cultivation.
Let’s get started!
Why Grow Oysters Mushrooms?
There’s no doubt that Oyster Mushrooms are the #1 choice for new growers, hobbyists and even small scale farmers.
In fact, almost any small scale farm will inevitably be growing some version of the Oyster Mushroom.
And for good reason!
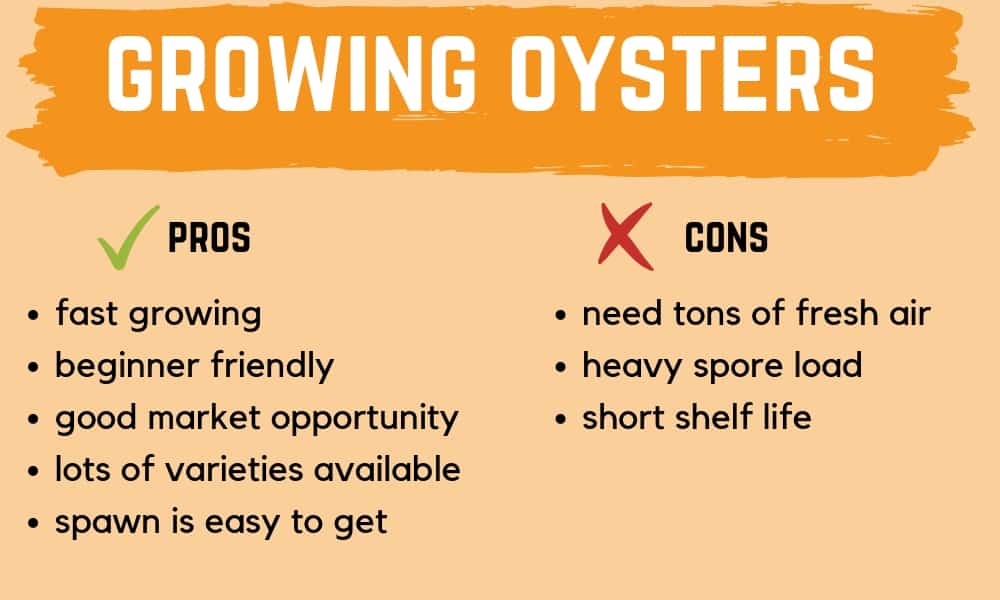
Oysters are by far one of the easiest mushrooms to grow.
They can be grown on a bewildering variety of substrates, including hardwood sawdust, soy hulls, wheat straw, sugarcane, coffee grounds, banana leaves, cardboard, coco-coir… the list goes on!
Being “primary decomposers”, oyster mushrooms have the ability to breakdown any “linginous” tissue and use it for food. They can even feed off of straight motor oil! (although I wouldn’t recommend using that as a substrate…)
Not only do they grow on many different materials, but they also grow really fast. In fact, most available oyster strains can produce mushrooms in as little as 2 weeks from spawning. This rapid growth allows Oysters to outrun many potential competitors, helping to avoid issues with contamination.
As mentioned, Oyster growers get to choose between a wide variety of different types of Oysters.
Some are heat tolerant, and can be grown in tropical areas. Some are cold tolerant, and can be grown in more temperate climates. Some are resistant to high levels of CO2 and can be grown in small grow rooms.
Some need fresh air, and are more suitable to be grown in large grow rooms. Basically, no matter where you live in the world, and what conditions you are facing, there is likely a strain of Oyster mushroom that will work for you.
Most species of Oysters have delicate fruit bodies, and a relatively short shelf life.
At first, you might think this is a disadvantage… but it should really be viewed as an opportunity.
They do not do well being shipped long distances, so large commercial operations have a harder time providing fresh, good looking Oysters to grocery stores around the country.
Because of this, there is an opportunity for small scale local growers to provide better quality mushrooms than the big guys!
That’s why the best gourmet mushrooms are always found at the farmer’s market.
Of course, it’s not all sunshine and rainbows.
Growing Oyster mushrooms do have distinct disadvantages as well.
Although some are tolerant of high CO2, most species of Oysters require HUGE amounts of fresh air intake. If they don’t get enough, they’ll form really thin stems and tiny little caps. Trying to provide enough fresh air for normal looking fruits while at the same time providing a high relative humidity can be a problem for many small growers.
Oysters also have a relatively high spore load. If left too long before harvest, they’ll cover your grow room with billions of tiny little spores. In general, this is harmless- but there are many reports of people with high exposure developing allergic reactions to the spores. Also, really high spore loads can clog up fans and other equipment.
Remember how I said a short shelf life is advantageous?
Well… this could work the other way as well. Some species of Oyster mushrooms actually need to be enjoyed within 3-5 days of harvest- otherwise they will start to smell and be hard to sell.
If you’re trying to sell at the market, it can be extremely hard to time your harvest with the days you are able to sell your mushrooms. Of course, if you are only growing for your own consumption, this will not be a problem.
Types of Oyster Mushrooms
Before you can start thinking about growing Oyster mushrooms, you first have to decide exactly what species you want to grow.
The right species for you will depend on a number of things- where you live, what method you plan on using for cultivation, and your experience level.
That being said, there really is an Oyster mushroom for every occasion.
From the standard Oyster (Pleurotus ostreatus), to the head-turning Yellow Oyster (Pleurotus citrinopileatus), you’re sure to find something that suits your needs.
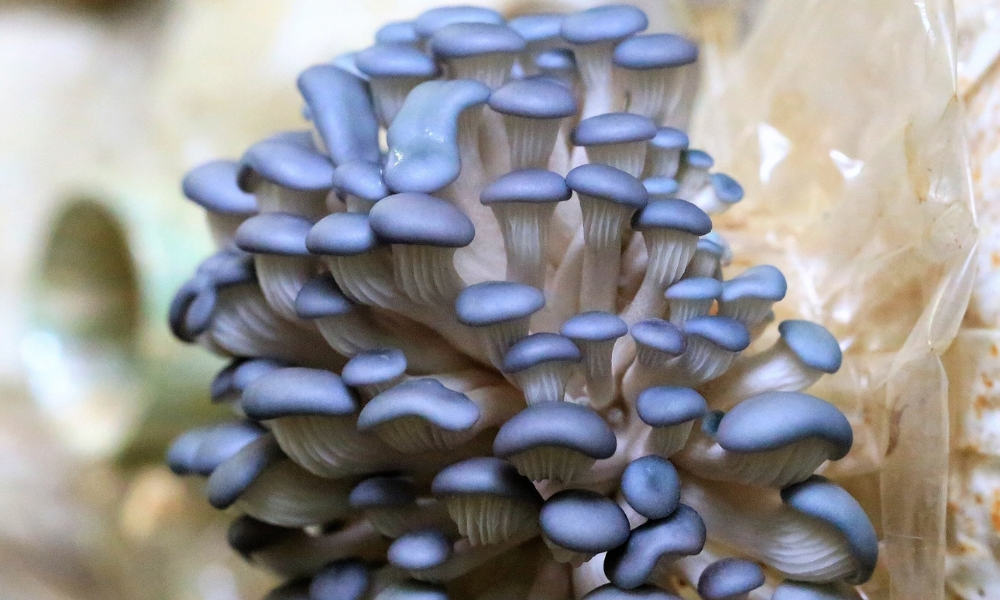
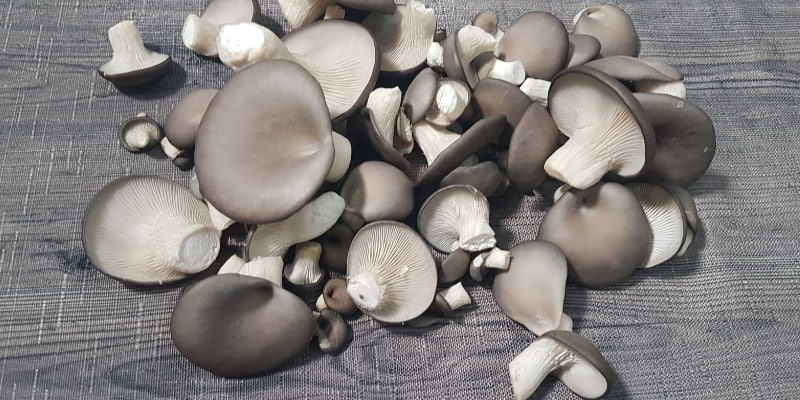
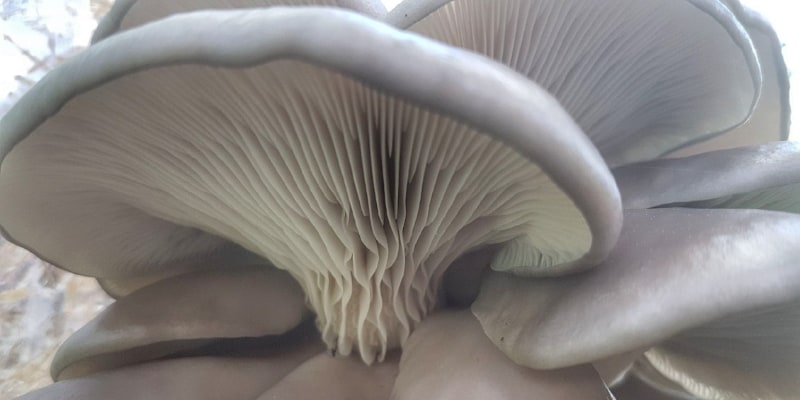
1. Blue Oyster (Pleurotus ostreatus var. columbinus)
Highlights: Good for cooler temperatures, fast growing
Lowlights: Needs TONS of fresh air for normal looking fruits
The Blue Oyster mushroom is a good choice for new growers, and is perfectly suitable for cooler temperatures.
In fact, the colder the temperature during fruiting, the more distinctly blue this mushroom appears. Either way, the blue is most noticeable in the early stages of growth- but turns to grey as the mushroom matures.
2. Yellow Oyster (Pleurotus citrinopileatus)
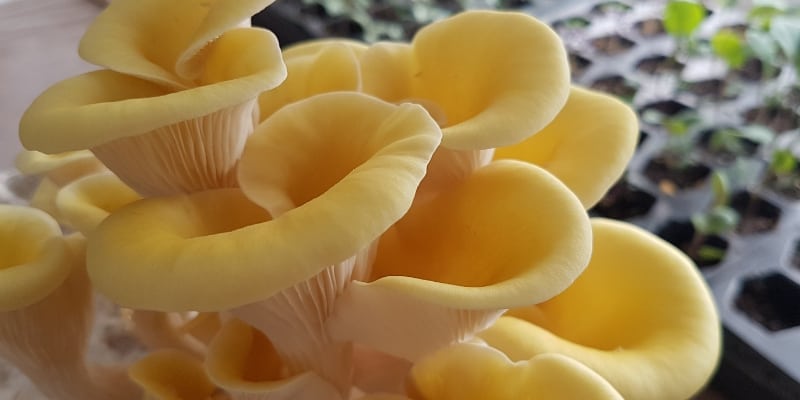
Highlights: Beautiful yellow color through entire growth cycle, fast growing, high CO2 tolerant
Lowlights: Delicate fruits, shorter shelf life, so-so flavour
The Yellow Oyster is a real head turner.
It produces beautiful but delicate “bouquets” of thin capped yellow mushrooms.
They also smell distinctly like citrous fruit when fresh. The yellow oyster is fast to fruit and easy to grow, being much more tolerant of low fresh air intake than many other types of Oyster.
Unfortunately, the yellow color is lost during cooking, and the flavor of yellow oysters is nothing to write home about.
Further, yellow oysters have a terrible shelf life, only lasting a few days in the fridge before starting to smell a little like urine. That is likely why they aren’t common at the grocery store- and are better enjoyed as fresh as possible.
Although the Yellow Oyster can grow on a wide variety of substrates, I have never had good luck when trying to grow it on straw.
It seems to do much better on hardwood sawdust amended with bran, or with the masters mix.
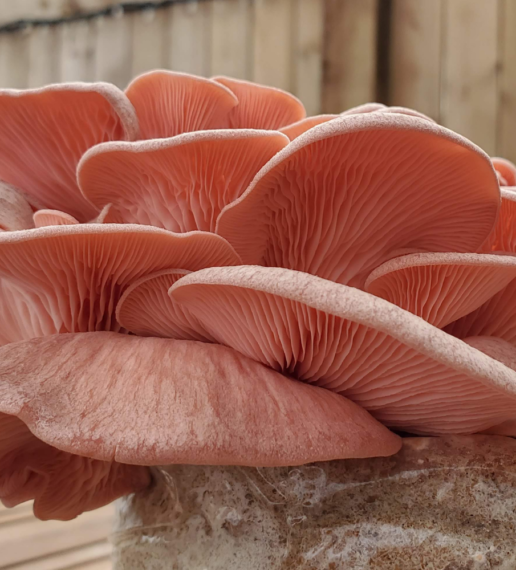
3. Pink Oyster (Pleurotus djamor)
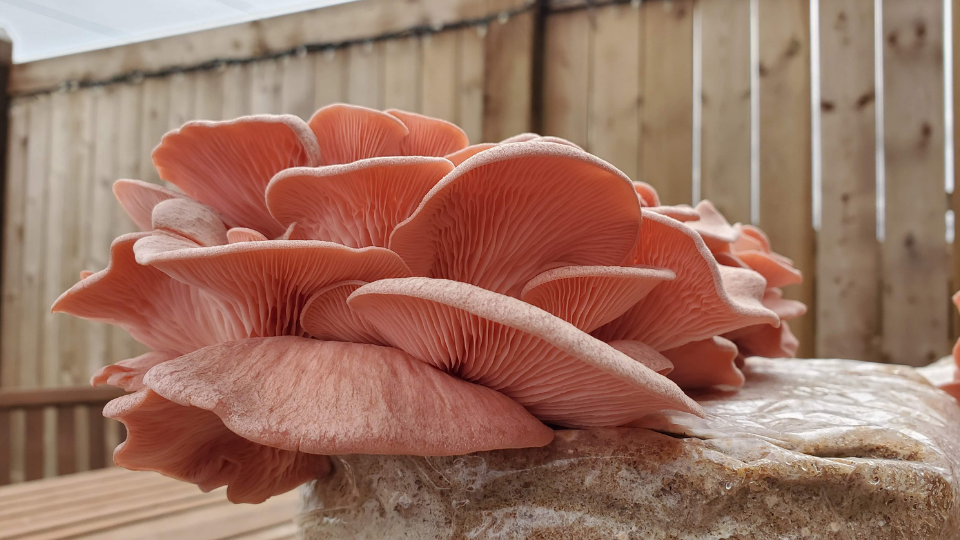
Highlights: Striking pink color, nice thick fruits, easy to grow on straw, heat tolerant
Lowlights: Short shelf life, can die in cooler temperatures
Much like its Yellow cousin, the Pink Oyster is strikingly distinct and beautiful. The vibrantly pink mushrooms burst off the substrate in huge floral bouquets, and are a favorite among passers by at the farmers market. The fruits are usually large, and nowhere near as delicate as the Yellows.
Pink Oysters are also famously heat tolerant. They are suitable to be grown in places where grow room temperatures exceed 30 deg C. Cold temperatures can easily kill the mycelium of Pink Oysters, making it a difficult species for storing spawn or cultures in the fridge.
That being said, the shelf life for Pink Oysters is extremely stunted. After harvest, they’ll last but a few days in the fridge before no longer being viable for consumption.
Because of this, they need to be sold almost immediately after harvest- a difficult challenge for many small growers!
4. Elm Oyster (Hypsizygus ulmarius)
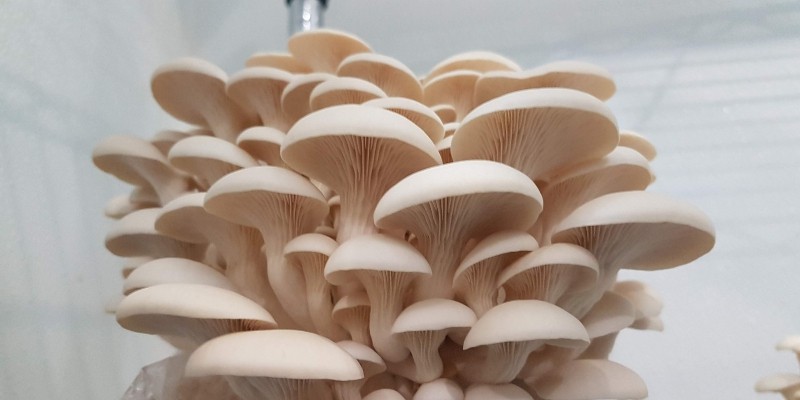
Highlights: Well adapted to high CO2, high yield, low spore load
Lowlights: No striking color, short shelf life
The Elm Oyster is not a “true” oyster in that it is not in the “Pleurotus” family, although it is a closely related cousin, and most growers still refer to it as an Oyster.
That being said, it does have a few advantages over most other Oysters that make it worth your consideration.
The Elm Oyster is much better at forming normal looking fruits in high CO2 environments, which makes it an excellent candidate for indoor growers, or grow rooms that have a hard time managing the high fresh air requirements of other Oysters. It also has a much lower “spore load” than most other Oysters, which can save lots of clean-up and clogged fans.
The Elm Oyster is typically white-beige in color, and forms nice large caps in dense clusters. It grows well on hardwood sawdust or the masters mix. It is fast to colonize, and very friendly to beginners.
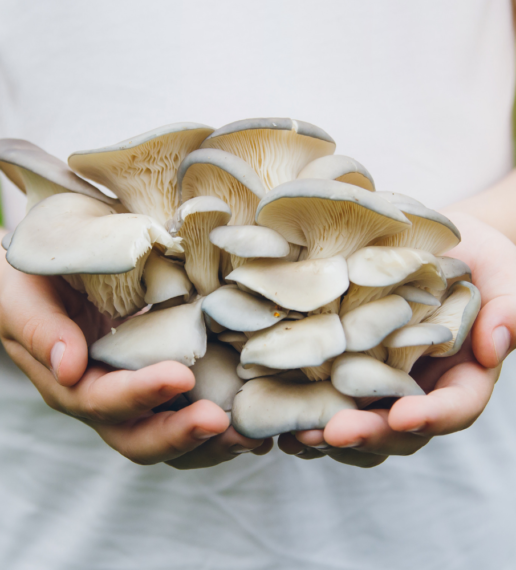
5. Pearl Oyster (Pleurotus ostreatus)
Highlights: Easily available, easy to grow, decent shelf life, good in cooking, grows on many substrates
Lowlights: High fresh air requirement
This is the “standard” archetypal Oyster mushroom, widely grown all over the world. Pearl Oysters grow fast, and fruit heavily- often achieving biological efficiency of over 100%.
They can grow on a variety of substrates, including hardwood sawdust, hardwood chips, wheat straw, oat straw, grass clippings, coco-coir, and almost any other linginous material. The shelf life for Pearl Oysters is decent- better than Pinks or Yellows, but not as good as Kings.
Aside from the fresh air requirement, Pearl Oysters are an easy entry to growing for new growers, and because of that, they are quite popular in mushroom growing kits like the super popular Back to The Roots mushroom growing kit.
6. Phoenix Oyster (Pleurotus pulminarious)
Highlights: Good for warm weather, fast growing, widely grown, good yield
Lowlights: Short shelf life, high spore load, in-vitro pinning
The Pheonix Oyster, also known as the Lung Oyster, Indian Oyster, or the Italian Oyster, is very similar to the standard Pearl Oyster mushroom. The major difference is that Phoenix Oysters can withstand warmer temperatures than Pearl Oyster. In nature, they typically fruit much later in the summer.
They will also have smaller, thinner caps and a slightly different color. Still, Phoenix Oysters are a very popular cultivar for all types of growers.
7. King Oyster (Pleurotus eryngii)
Highlights: Best shelf life, versatile, meaty texture
Lowlights: Susceptible to bacterial blotch
Most Oyster species will grow in large clusters, forming multiple shelf-like fruit bodies, all folding over one another.
King Oysters are distinct, in that they typically grow singly instead of in clusters. Depending on growing conditions, they can sometimes resemble a button mushroom.
Commercially, King Oysters are often grown in high CO2, low light conditions, which causes the mushrooms to form huge fat stems and tiny caps. Unlike many other Oysters, the stems of King Oysters have great texture and flavour, and are often purposely grown to maximize stem size.
If grown in low CO2, well-lit conditions, they will form large, dark caps- somewhat resembling a portobello.
Due to the thick, meaty texture, King Oysters have the longest shelf life of any Oyster species. They can sometimes last in the fridge for up to two weeks, making it much easier for smaller growers to manage production schedules to match market days.
King Oysters will grow on straw, but they are most often grown on sawdust to get a better yield and better quality fruit. A common method of growing King Oysters is to apply a casing layer and “top-fruit” the block.
Managing the humidity for this species can be finicky, and many growers run into issues with “bacterial blotch”. Hobby growers are not likely to run into this issue.
How To Grow Oysters
Growing mushrooms is both an art and a science.
In fact, even after growing mushrooms for many years, I still find myself learning new things on a regular basis. Just when you think you have it all figured out, the mushrooms decide to teach you something new.
So, how do we figure out exactly what they need to grow?
Of course, you’ll see mushrooms growing in nature- maybe fruiting on the side of a dead log or flourishing on a cow patty. It doesn’t seem like anything special needed to happen to get them to fruit. But nature has a way of making things seem easy.
Trying to grow mushrooms on your own terms- where you want and when you want- can prove to be a difficult task. Still, if you learn to give mushrooms exactly what they need, at the right time, your chances of success are really high.
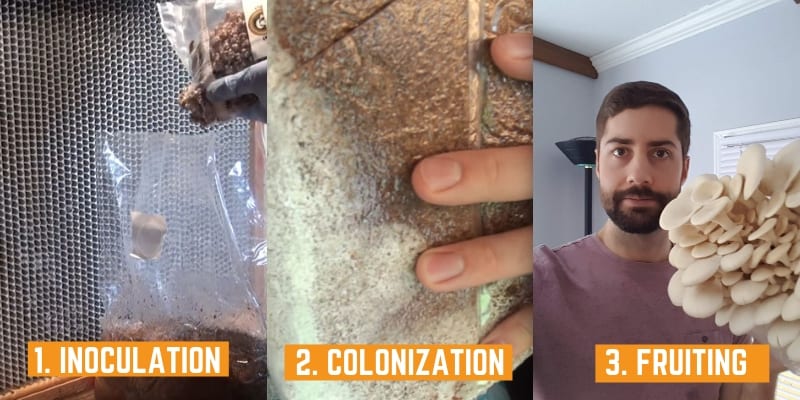
3 Basic Steps
There are 3 basic steps to growing Oyster mushrooms, although you can jump in at any one of these stages depending on how technical you want to go. (more on that later)
1. Inoculation
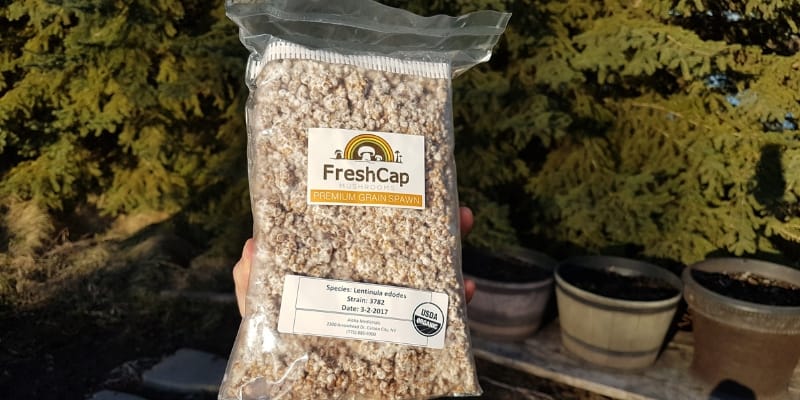
The first step is inoculation, where you add mushroom grain spawn (think of it like seeds) to a suitable substrate (think of it like soil).
Grain spawn can either be made at home, or bought pre-made.
You’ll want to add the spawn at a rate of about 10%.
That means if you have 20 lbs of substrate (like wet straw) you’ll want to add about 2 lbs of spawn. The spawn needs to be mixed thoroughly in order to get the most possible “inoculation points”.
2. Colonization (Incubation)
Once the spawn is added to the substrate, it will start to expand and grow over its new territory, spreading out and devouring nutrients.
This process is known as “colonization”. After a couple of weeks, the mycelium will have completely engulfed the new substrate and is said to be “fully colonized”
3. Fruiting
Once the substrate is fully colonized, it will continue to get thicker until it is fully consolidated. Eventually, little pins will start to form.
These pins will eventually turn into fully formed mushroom “fruits” which if grown correctly can be harvested and enjoyed.
General Growing Requirements
There’s a common misconception that all mushrooms grow on manure in the dark.
Although that’s mostly true for common button mushrooms, it is completely false for almost all other types of gourmet and medicinal mushrooms.
For oyster mushrooms to form proper fruits, they need the right combination of light, humidity, and fresh air throughout most of the growing process.
Maintaining adequate levels of both humidity and fresh air can be a challenge. If humidity is too low, pins will not form, and the ones that do manage to form will quickly dry out and abort.
If you try and maintain humidity by keeping the mushrooms in a sealed humidity tent, the air will quickly build up high levels of CO2 (mushrooms respirate like humans, opposite to plants) and the mushrooms will end up looking seriously malformed, with long skinny stems and super small caps.
The Mushroom Life Cycle
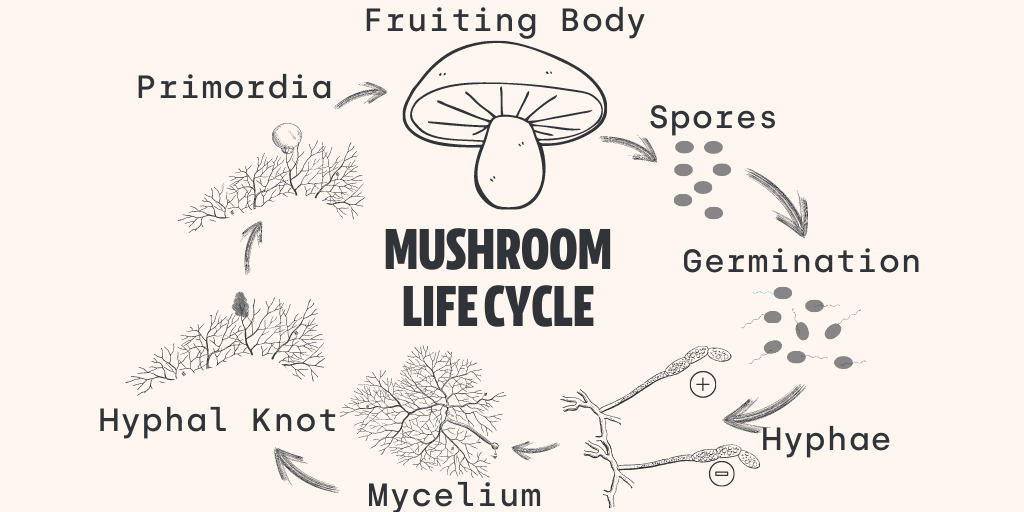
Before we get too deep into the nuts and bolts of growing Oyster Mushrooms, it makes sense to to first understand the general mushroom growing process. That way, we can extrapolate what the mushrooms need to reproduce and try and help them along that path in an artificial environment.
The life of an oyster mushroom starts off as a spore. Billions of spores actually. When these spores land in a suitable environment, they will “sprout” out single celled strands called “hyphae”. Each strand of hyphae contains exactly half of the genetic information that a mushroom grow.
When two compatible hyphae meet, they will merge into a new growth- now called mycelium. This mycelium will continue to grow and expand across a substrate, devouring nutrients along its path.
This mycelium will continue to grow until it is triggered to start producing a fruit. This trigger can be a sudden change in temperature, a competing fungus, or simply when the mycelium has run out of nutrient rich substrate to feast on.
The fruit starts out as a “mycelial knot”, which is basically just like little tight balls of mycelium. These knots will continue to get bigger, eventually differentiating into individual tiny “pins”, the first thing that kind of resembles a fruit body.
Oyster mushrooms will typically form little clusters of pins, where one large knot differentiates into dozens of pins at once. Once at this stage, the pins start to grow really fast, often doubling in size every day.
The mushrooms continue to grow until eventually they are full blown mushrooms, complete with stems, caps, and most importantly for reproduction- the gills. For these gills, the mushroom is able to produce more spores, which starts the cycle all over again. By mimicking and optimizing this natural process, we are able to grow mushrooms much more predictably than can be done in the wild.
The Mushroom Growing Process
When growing mushrooms indoors, the process is almost never started from spores. The results would just be too unpredictable.
Instead, the process is started from the mycelium of a reliable strain of mushrooms, also known as a culture.
These cultures have been selected and bred over many years to be optimized for commercial cultivation.
Starting from cultures has a lot of advantages. First of all, the results are generally predictable. It’s not a genetic crapshoot every time. Also, mycelium is easily stored and propagated, so the same strain can be preserved and reused for many many years.
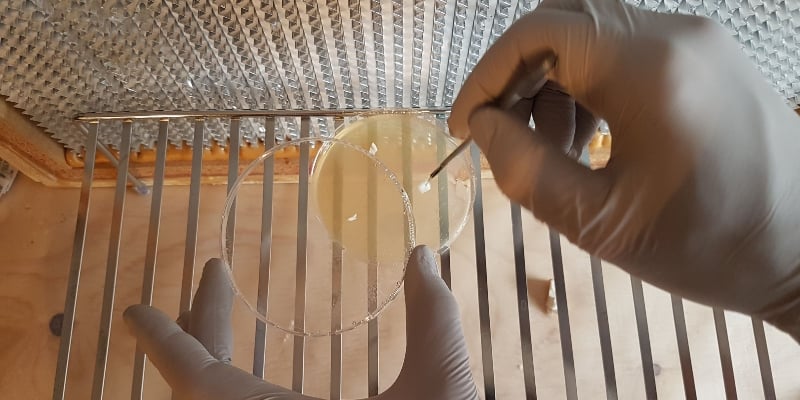
Mushroom “cultures” can take on many forms- liquid culture, culture on agar, culture “slants” or even grain spawn. It all depends on where you want in the growing process, and how deep you want to go.
The Mushroom Fruiting Environment
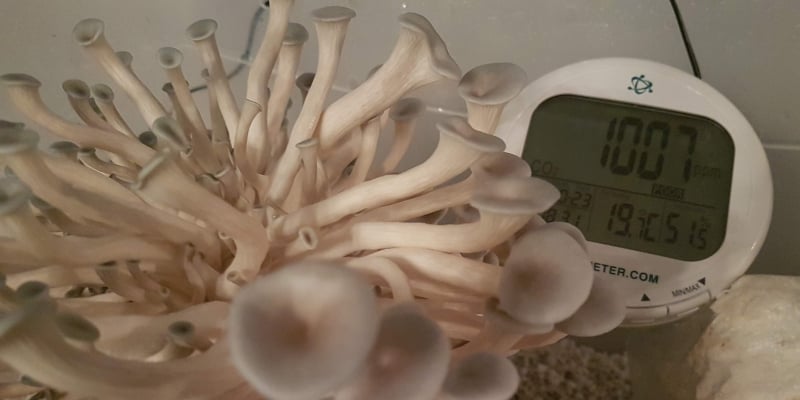
As a mushroom grower you need to maintain high relative humidity (80-95%) while consistently providing fresh intake of air.
This is especially true for Oysters mushrooms, more so than any other species.
They need TONS of fresh air.
Like whatever you think they’ll need, double that. Then double that again.
The high humidity is often achieved by using a combination of a humidifier and a fan. You can do this pretty easily by dropping a floating pond fogger in a bucket, and pointing a fan to it. You can also get custom “humidifans” specifically made for this purpose.
Of Course, if you wanted to go low-tech, you can always use just a tent and a spray bottle- although you may have a hard time maintaining the proper fresh air.
A standard “shot gun fruiting chamber” can also yield pretty decent results.
How Deep Do You Want to Go?
So, now that we covered the basics, it’s time to get into the nitty gritty… let’s actually grow some mushrooms!
There are many levels of mushroom growing.
- Starting from a kit
- Starting from pre-made spawn
- Starting from a culture
The best place for you to start really depends on how deep you want to go.
Option 1: Starting From A Kit
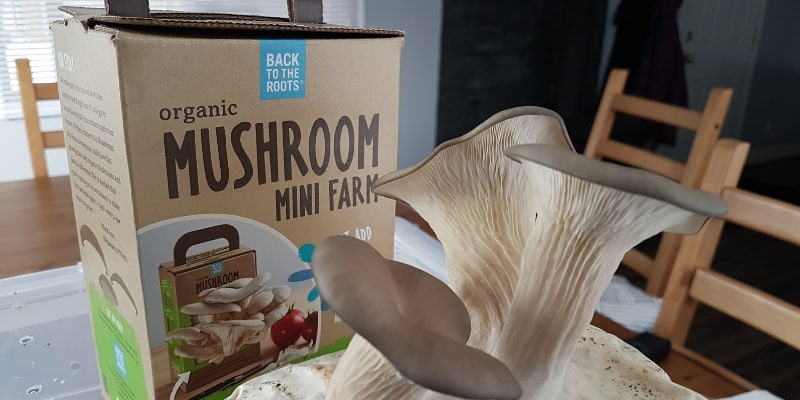
This is the best option for people who have never grown mushrooms before.
It requires very little equipment (except for the kit) and can give you a really good idea of the mushroom growing process.
Growing mushrooms from a kit act as a good launch pad for learning more advanced techniques later on.
Mushroom kits are usually just pre-made “fruiting blocks”, colonized blocks of substrate that are ready to fruit as soon as you get them home.
Types of Kits
Kits can be found in various places online, or even from local grocery and hardware stores. One kit I have used before was from “Back To The Roots”, and it works really well. There are also many other options on Amazon.
Also- beware of the reviews!
A lot of kits will get poor reviews, but that is often because the people trying to grow them didn’t take the necessary steps to ensure success with their kits.
How To Grow From a Kit
The process is pretty simple. Usually, you just need to cut a slice in the plastic, re-hydrate the block, and keep the area relatively humid.
What You’ll Need
- A Mushroom Growing Kit
- A bowl for re-hydrating the block
- Spray Bottle
- Bag with slits, or a pre-built shotgun fruiting chamber
Step 1: Cut a Slice in the Bag And Rehydrate
The mycelium had been sitting dormant for a while and needs to be re-invigorated in order to fruit. The best bet is to cut a slice in the bag exposing some of the block and placing it upside down in a bowl of water. Leave it there to rehydrate for 12-24 hours.
Step 2: Place away from direct Sunlight
You don’t need a fully fledged grow room. Just place the block on a shelf away from direct sunlight. Make sure it does not dry out by misting the slit and the block several times per day with a spray bottle.
Step 3: Grow, Harvest, Enjoy
After a week or so, you’ll start to see small Oyster pins forming on the block. At this time, make sure the area stay humid and watch them closely so that you can harvest them before they drop spores. After the pins form, you should have fully formed mushrooms in less than a week.
Option 2: Starting From Spawn
This is a great option for the DIYer’ that wants to get more involved in the process. There are even plenty of small farms and commercial operations that grow their mushrooms by starting from pre-made commercially available spawn.
Choosing a Substrate
First, you have to choose a substrate. Oyster mushrooms can grow on a ton of different materials, including hardwood sawdust, supplemented sawdust, straw, the masters mix, coffee grounds, paper, and pretty much any other liginous material.
The two most common substrates are hardwood sawdust and straw.
Buying Pre-Made Spawn
Oyster mushroom spawn is easily commercially available for many different species. It ranges from $5-$10 per lb depending on how much you order and your source. Keep in mind that spawn is a living, breathing organism, and will sometimes not service being shipped long distances, especially in hot conditions.
Grain Spawn
This is the most common type of spawn, and is made from allowing mushroom mycelium to grow out on sterilized grain. It can be made from many different grains including rye, milo, sorghum, oat, wheat berries and even rice. Grain spawn has more nutrition than sawdust spawn, but is more likely to contaminate.
Sawdust Spawn
The is the same concept as grain spawn, but is instead made by growing mycelium out on sawdust. It contains less nutrition, grows slower, but is less likely to contaminate.
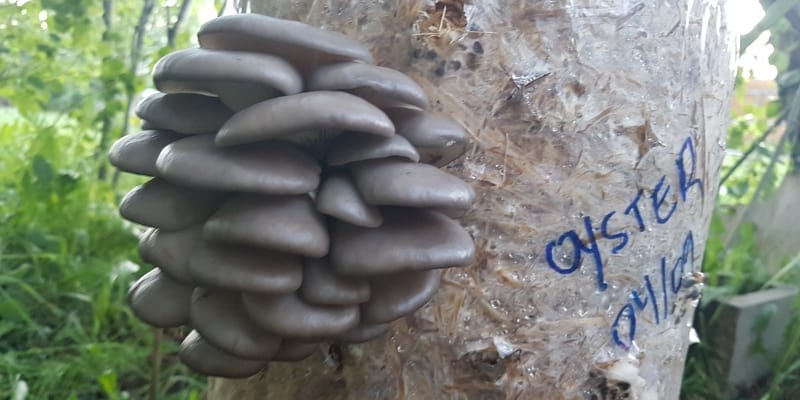
Growing Oyster Mushrooms on Straw Logs
This is one of the most common methods for growing Oysters. You can see the step by step guide to this process here.
In general, you add the spawn to pasteurized straw at a rate of ~10% and stuff into plastic tubes. After about 10 days, the mycelium will have grown over the straw and will be ready to fruit. You can fruit it by placing in a fruiting chamber, or if you live in the right climate, can just grow them outside.
Growing Oyster Mushrooms on Fruiting Blocks
Another common method for growing Oysters is to use the “fruiting bock”. This is commonly made from sterilized hardwood sawdust and bran, and requires some more specialized equipment such as a pressure cooker. It is also made much easier with a laminar flow hood.
Check out this article for a good recipe for fruiting blocks.
The Masters Mix
If you have access to Soy Hulls you may also want to consider the “Masters Mix” It’s a combination of Soy Hulls and Sawdust that works amazing well for Oysters. It is actually my go-to substrate for Oysters at the moment.
You can learn more about the Masters Mix here.
Growing Oyster Outside
If you have access to premade spawn, but don’t have access to an autoclave or sterilizer, you might want to consider growing mushrooms outside.
Often, you can get away with using wood chips or straw, and not worrying about contamination at all.
The results will not be as predictable as when you’re growing indoors, but it is an easy way to grow and has a pretty good chance at success. Growing mushrooms outside are one of my favorite methods.
It’s just so easy, as long as you can avoid the bugs.
Outdoor Garden Beds
This is by far the simplest method for growing Oyster mushrooms outside. Simply mix the spawn (either grain spawn or sawdust spawn) in a bed of straw or wood chips.
Wet the bed and cover it with perforated poly sheeting and allow it to colonize.
The bed should be colonized and ready to fruit in a few months, depending on the climate and the time of year.
During this colonization period, be sure to check the bed every couple of days to ensure that it is not drying out.
Once you start to see mushroom fruits in the bed, remove the poly sheeting and watch them grow.
You’ll want to harvest them relatively early in order to avoid the bugs.
Outdoor Straw Logs
Making outdoor straw logs is very similar to making outdoor garden beds, except the straw is contained in a sleeve of poly tubing. The basic process involves stuffing pasteurized straw and spawn into poly tubing, perforating, and allowing to colonize for 10-14 days.
Once fully colonized, the log can be placed in a suitable outdoor environment for fruiting.
Growing in logs requires slightly more sterile procedure than growing in beds, but the success rate should be considerably higher.
Growing Oysters On Coffee Grounds
There’s a lot of talk about growing mushrooms on spent coffee grounds.
I get it- it’s a cool idea.
First of all, you are making use of a waste product. Secondly, used coffee grounds are technically already “pasteurized” from brewing.
The problem is, coffee grounds are seriously prone to contamination. If you’re trying to grow Oysters on straight coffee grounds, there’s a really good chance that the project will fail from green mold or other contaminants.
Still, if you have spawn and spent coffee grounds, it may be worth a shot. Just don’t be disappointed if you get mold!
Option 3: Making Your Own Spawn
This option is the most complicated, requires the most skill and equipment, and takes the longest time to master.
But, once you can make your own spawn, the mushroom growing possibilities are endless!
If you’ve mastered a few grows using the methods above (premade spawn or mushroom kits) it may be time to make your own spawn and really step up your game.
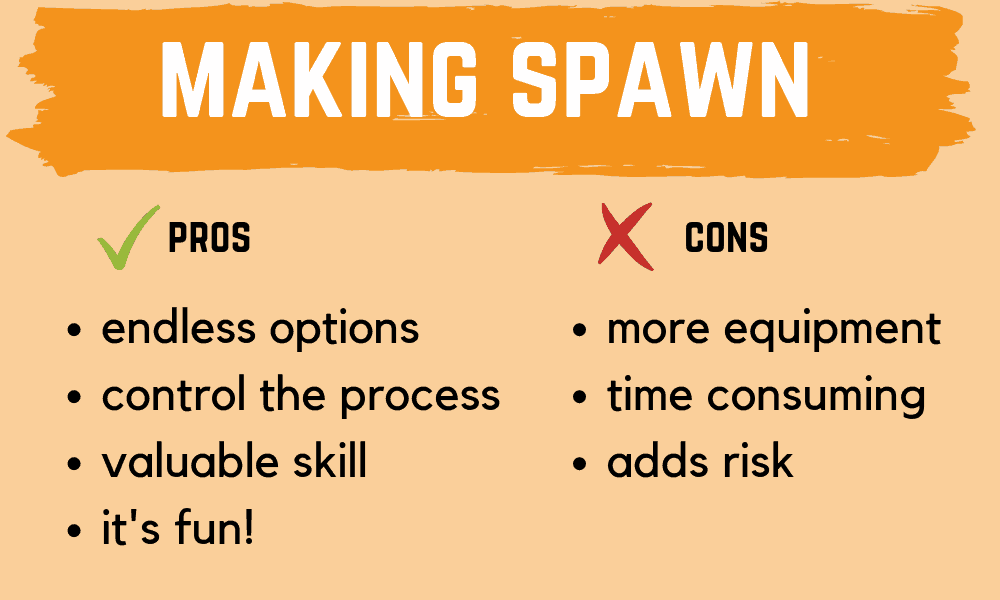
Pros and Cons of Making Spawn
Pros
- Options are endless for what you can grow
- Can be a cost savings (if you are growing commercially)
- A valuable skill
- It’s Fun!
Cons
- Requires more equipment (sterilizer, flow hood)
- Can be time consuming
- Adds a level of risk for commercial operations
How To Make Spawn
The process of making spawn involves inoculating sterilized grain (typically rye, wheat berries, sorghum, brown rice, or a combination) with mushroom culture.
The mycelium will eventually overtake and envelope the grain, using up the nutrients.
Once the spawn is fully colonized it can be broken up and transferred to a bilk substrate where it will continue to grow and eventually turn into mushrooms.
The grain solves two problems:
- When mixed well, it provides hundreds of different “inoculation points” which allows the mycelium to quickly colonize the substrate
- The grain provides high levels of nutrition required for large flushes and healthy fruits
The starter culture for grain spawn can be from a liquid culture, a piece of mycelium on agar, or other grain spawn (also known as a grain to grain transfer).
Keep in mind, there are plenty of different ways to make spawn, and eventually you’ll find out what works best for your situation.
Common Problems Growing Oysters
Growing oyster mushrooms properly is both an art and a science. And even when you think you have it all figured out, you’ll eventually run into some issues.
So what are some of the most common problems when growing Oysters?
1. Thin Long Stems
This is probably the most common issue with Oysters.
As mentioned above, most strains require huge amounts of fresh air. If they don’t get adequate air exchange in the fruiting chamber, they’ll end up forming really long thin stems and tiny caps.
To fix this problem, you need to increase the amount of airflow, thereby reducing the amount of CO2. You must ensure that the humidity stays high while doing this, which can be difficult.
2. Drying Out of Caps
This happens if the humidity drops too low. Oysters like high humidity, around 85% or more. Get a cheap hygrometer to monitor the level in your fruiting area. A small humidifier will usually do the trick. You can sometimes even get by with a simple spray bottle.
3. Green Mold
Trichoderma, or simply known as “trich” is the most common issue. It will look like green mold. Once you see it, you can try and cut it out, but chances are you should just toss it and start your project over.
4. Bacterial Blotch
This is a common issue if the humidity in your chamber is too high for too long. Water will pool on your fruits and bacteria will grow. It often presents as a dark spot in the caps, and can sometimes look pretty gross.
If you notice it, get rid of the contaminated fruits, and lower the humidity in the grow area. Make sure your fruits don’t have standing water all day- try and cycle the humidity a bit.
5. Won’t Fruit
If your mushrooms won’t fruit, it could be a number of different reasons. Likely, the fruiting environment is not adequate (too hot, too dry etc.) but it could also be an issue with a poor strain.
6. Mycelium Stopped Growing
If you have mycelium that is tearing across a substrate and all of a sudden stalls, chances are it is running into contamination. You can monitor it, and try to mix it around, but best approach is a wait and see. If it is contamination, that will soon be apparent.
7. Orange Fluid
This is typical with Oysters, you’ll see an orange fluid coming off the mycelium. This is not contamination (although it might be a sign of a fight). It is simply a metabolite that the oyster mushroom is sweating out. Interestingly, these metabolites are being studies for all sorts of functional purposes, and might have serious implications in medicine.
Harvesting and Storing Oysters
Of course, after you have successfully grown Oysters, you’ll want to harvest and enjoy them!
Proper Harvest
Before harvesting, let the mushrooms dry out a little bit, especially if they are being grown in a really high humidity environment.
Harvest your oysters by tearing off the whole cluster at the base. You can also cut them off with a knife. Oyster mushrooms are usually quite delicate, so handle them with care.
Storing in the Fridge
Oyster mushrooms do not have a great shelf life. That’s why they never look that great at the store. Still, the shelf life can be extended by storing them in paper towel or a paper bag in the fridge. Do not store them in sealed plastic containers or ziplocs- they will quickly turn bad.
Are Oyster Spores Dangerous?
Many people worry about the spores from growing and harvesting Oyster mushrooms. Although Oyster Mushroom spores aren’t dangerous, some people can develop allergies to the spores over long periods of time.
That is why it is always advisable to wear a mask when harvesting. It is also good practice to harvest your mushrooms before they drop spores, which is easy to do when you are only growing a small amount.

Growing Pink Oyster Mushrooms At Home (Easy Backyard Grow)
Pink Oysters mushrooms are one of the easiest species to grow. They are fast to colonize, produce a ton of fruits and aren’t at all afraid of less than perfect conditions. I just recently finished a fun backyard grow, and wanted to share how easy it is to produce a fresh bounty of one of
7 Tips for Beginner Mushroom Growers
New to growing mushrooms? If so, you may just be a little mystified – which is totally understandable. There is a ton of information to try and digest and make sense of. Terms like inoculation, agar transfers, laminar flow- what does all of this mean? And what of all this do I really need to know? I just want
Thanks a lot for info
Of course! Best of luck in your growing adventures 🙂
Hi Tony, my question is if I can grow oyster mushrooms in plastic bottles for commercial purposes?
Hey Emilio! Yes, Oysters can be grown quite well in bottles. Whether or not it is commercially viable for a specific situation is hard to say.
Tony, I came across many channels and sources of information the last 6 months and your perspective and dedication is simply admirable.
I’m not the kind of guy who writes comments so often but I just want to thank you from the bottom of my heart all the effort and time you are sharing with all of us.
Big big hug for a big man! You have a fan here.
Wow, thanks so much! That really made my day 🙂 I plan to continue to do my very best to provide content for mushroom growers and mushroom lovers alike!
Amazing very easy to understand information for new growers. I have also seen some of your videos and they are also very well done. It is so nice you take the time to make these videos and articles.
Thank you so much!
Thank YOU for checking it out! Glad you like the videos and articles. I will continue to make more 🙂
This is fantastic info. I really appreciate the clarity and simplicity of your communication.
There is lack of gourmet mushrooms in my area and I have a few possible contacts at local restaurants. I’m looking to start growing as a hobby and hopefully make some money if I get the hang of it.
I will be supporting you at every chance I get through some affiliate links and the like. I’ve been kinda put off by the paywalls for decent info, and the YouTube videos that seem to be geared towards those who already have a good grasp of the procedures.
Thanks a ton and fantastic work. I’ve also noticed your engagement is great too. Keep it up.
These comments make my day!! Really glad you like the article, I plan to continue to “spread the spores” as much as possible. best of luck in your mushroom adventure.
Very well put together article. Videos are well done, lots of good information, good audio and video quality. 10/10
Awesome, glad you like it! Thanks 🙂
Your write ups and videos have best quality information over all the other sources I have visited. Thank you (hu
Awesome to hear, glad you like the site! Happy growing 🙂
Thank you for the review, it really helped me as a beginner in the cultivation of oyster mushrooms.
Glad you liked it! Happy growing 🙂
Hey Tony! Thank you for sharing so much information, it really is helpful. However, I am still so confused whether or not I should poke holes in my fruiting bags before or after the mycelium colonized it. Would it be safe for me to poke holes before it even colonizes the whole bag? Many thanks! 🙂
Hey Gabby! It depends on the substrate and the growing container. Bottom line is yes, mycelium needs to breath. For straw logs, there is not as much nutrition in the logs, so the risk of contamination is less. Poking holes in the log while it’s colonizing works great. When making fruiting blocks, there is no need to do this, because there is already a filter patch on the bag.
Hello, I’m growing yellow oysters from liquid culture and I followed your agar video to make my own plates!
I just wanted to know if I can store my agar plates in the refrigerator for a long time or will they die off like you mentioned the pink oysters do?
Thank you so much for all of the information and helpful tips/methods! This website and your YouTube videos are so amazing and such a big help to aspiring mushroom growers like myself.
Hey Chrissy! Glad you like the videos! You can definitely leave Yellow Oyster in the fridge, I have saved cultures of P. Citrinopileatus in the fridge for many months on Agar. Pinks (and Volvariella volvacea) are the only ones that seem to die off in the fridge. Keep in mind that specific strains might be different, P. Salmon and P. Djamor have different reactions to fridge storage.
Hi Tony, thanks for all your info, very helpful.
What happens if you mix, wheat bran, hardwood sawdust, coffee grounds, and straw, will you get a good yield or will you get contamination.
Roman
Hey Roman! Depends, if it is sterilized, it will not contaminate- otherwise contamination is likely. Happy growing!
get a pressure cooker and sterilise it for at least 3 hours. My first four fruiting blocks got trichoderma due to inadequate time in the cooker. The inside never got to the high temp required in the 1.5 hours they were initially cooked. Or you could try the many different techniques Tony uses in his great videos here and on Youtube.
Thanks for giving of your time to teach newbies. It seems as if a lot of growers don’t want to impart information. Some of those who do act as if I should understand the very technical àspects even after explaining that I am a beginner. I have read what I can find. Even bought a book but it was too technical. Thanks for breaking it down for beginners. We are not all degree holding microbiologists.
What are the main differences with the elm oyster vs the others? Will Masters mix work? Will lime pastorization work with elm?
Hey there! Yes, masters mix will work awesome, in fact, it is all I would use right now. Lime pasteurization will work with straw, but not with the masters mix.
Hello, Tony and Tegan! I’ve been following you guys here and on Youtube for a while and I’m a big fan. You have inspired me to start a small business in my town providing Oysters to the local restaurants. I have built up my supply of bulk spawn and have some cultures going on pitris in a dedicated fridge (all of that thanks to you guys!)
My question is : If I know how many pounds of mushrooms a restaurants wants per week, how do I time the stuffing of new bulk substrate bags? i.e. If i need 20lbs of mushrooms a week, and am growing on 20lbs bags of substrate(b.e. 20% = 4lbs 1st flush) how often should I start new bulk bags? The tricky part is the second and third flushes (their yields and the timing of them).
I hope you understand my question and I hope you are both well. 🙂
Thanks friends!
-Brandon
Hey Tony,
I’ve learned so much from your content – I really appreciate what you do.
I have an outdoor bed of oysters started that is now fruiting quite well. I’m wondering, can I transplant some of the mycelium from the established bed to a new bed instead of using grain spawn?
Growing gray dove oyster mushrooms in five gallon bucket and realize at first Growing well then a few days later my wife and I noticed some of them looks dry and getting dark brown, Humidity is at 90-95, the temperature is at 74-75f not sure what I’m doing wrong