Growing Blog
A Simple Way to Grow Mushrooms Indoors

I’m always looking for simple and effective ways to grow mushrooms at home.
You see, I ‘m a bit of a mushroom growing nerd- so I don’t mind going down the rabbit hole to try and find the best growing methods. Unfortunately, that usually involves specialized equipment and techniques that most beginners do not want to deal with.
But not all mushroom growing has to be so complicated!
In a recent indoor oyster mushroom grow, I wanted to see the minimum viable technique that anyone can do at home- without anything other than some pre-made spawn, some simple materials and a few tools that most people should have kicking around the house.
Growing Indoors
I’ve already shown how a similar method can work for growing oysters outdoors, but for many growers, the climate is just not condusive to year-round growing.
Basically, if you want fresh mushrooms all year, you need to find an indoor growing method that works for you!
However, growing indoors does have its challenges. True, you don’t have to worry about bugs- but getting a suitable and balanced environment that is humid while still providing enough fresh air is a real art. Solutions to this problem vary from a simple SGFC (shot gun fruiting chamber), to simply draping some plastic over your grow or even building a full blown automated indoor greenhouse.
A successful indoor mushroom grow requires that you watch your mushrooms very closely, and being able to respond to their needs as conditions change.
For this particular grow (outlined below), I started in a 4 tier mini greenhouse, but I eventually moved it to a modified SGFC in order to get more fresh air for better looking fruits.
Sterilizing vs Pasteurizing
Different substrates require different preparations before they can be used to grow mushrooms. Most nutrient-rich substrates, like supplemented sawdust fruiting blocks and rye grain, require full sterilization. Without proper treatment, they would quickly fail due to contamination.
For substrates with lower levels of nutrition, like straw or non-supplemented hardwood sawdust, you can get away with simple pasteurization. This means that there is no need for polypropylene grow bags expensive sterilization equipment.
For this particular grow, I used hardwood fuel pellets for a substrate. This allowed for a simple pasteurization using nothing but boiling water from a tea kettle and a small plastic tub. Even though hardwood sawdust is a substrate that is relatively low in nutrition, oysters absolutely love it- and have no problem fruiting prolifically from it.
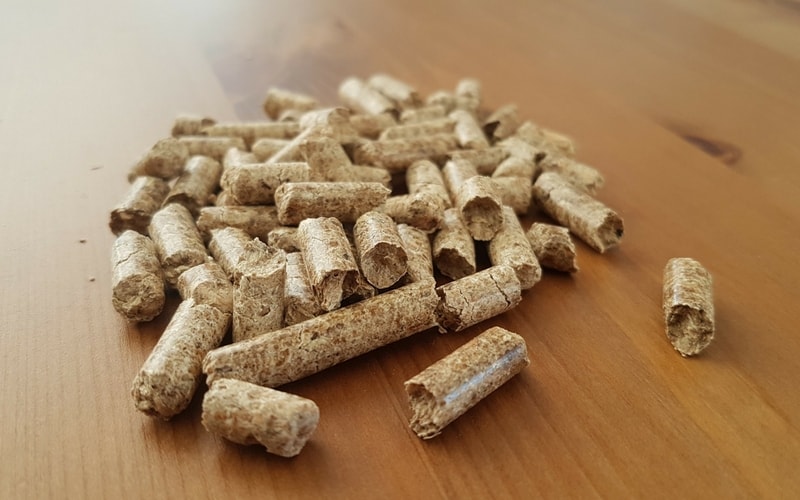
Hardwood fuel pellets, a great substrate for growing oyster mushrooms indoors when used without supplementation.
Step By Step Indoor Grow
What You’ll Need
- Pre-Made Grain Spawn
- Hardwood Sawdust Pellets
- A Small Plastic Container or Tray
- Plastic Wrap (saran wrap)
- Vermiculite
STEP 1: “PASTEURIZE” AND HYDRATE THE PELLETS
Add boiling water to the pellets in order to pasteurize and hydrate the substrate at the same time. Use the same ratio as for supplemented sawdust fruiting blocks– namely 1.25 liters of water for every 5 cups of pellets.
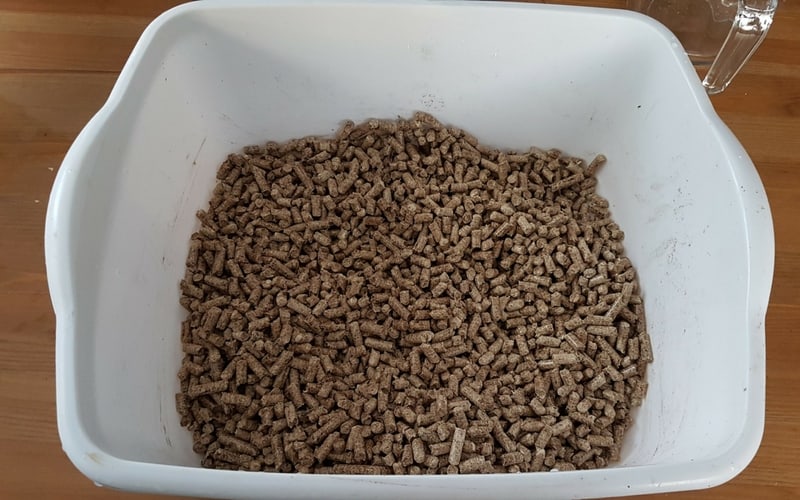
Place the pellets in a suitable container. For this grow, I used a plastic tub that measuring about 12” x 16” x 5” deep. It comfortably held about 6 lbs of substrate.
Bring the water to a full boil and pour directly over the pellets. The pellets will quickly dissolve into loose sawdust, but it helps if you mix them around a bit.
Once evenly wetted and broken up, pack the sawdust tight into a corner so as to try and retain the heat for as long as possible. You could also cover it and wrap it in a blanket for the same effect.
NOTE: I use the term “pasteurization” loosely here, because this by no means a full pasteurization, which is usually done by heating the substrate to between 65-82 Deg C for at least 45 minutes. Hardwood pellets are relatively sterile as is and have a low chance of contamination, so this method of pasteurization works quite well.

STEP 2: ADD SPAWN
Once the sawdust has completely cooled, add spawn.
Add the spawn at a 10-20% ratio by weight to the amount of substrate you have. The higher the spawn rate, the better your chances that the substrate will fully colonize before contamination gets a chance to settle in.
Thoroughly mix the spawn until it is evenly distributed throughout the substrate. The more distributed the spawn, the more “inoculation” points you’ll have, and the faster the substrate will colonize. Although this does not need to be a totally sterile process, it is advisable to wear nitrile gloves or wash your hands thoroughly before spawning, especially if you use your hands to break up the spawn.
For this grow, I used 1 quart (about 1 lb) of Blue Oyster spawn that has been in the fridge for a number of months. It was way over colonized, as you can see in the picture. It took a while to break it up evenly! I was a little bit worried about the viability of the spawn due to it’s age- but as you’ll see it still worked out pretty well.
STEP 3: COVER AND COLONIZE
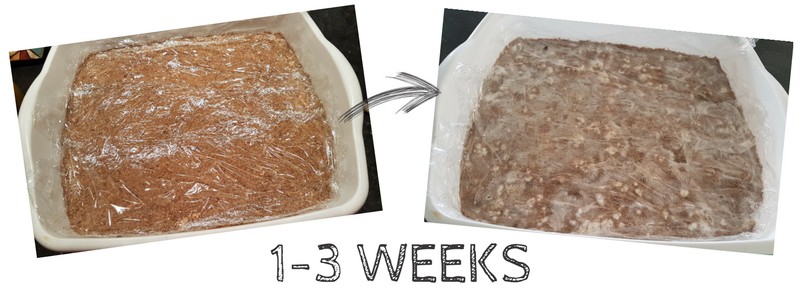
After mixing the spawn, cover the top surface of the substrate with a layer of plastic wrap. Here, I placed the saran directly on top of the substrate. Poke holes in the covering with a knife to allow the mycelium to breath as it’s colonizing. Using the saran wrap- as opposed to using a lid or immediately applying a casing- allows you to watch the colonization unfold.
Simply leave the covered substrate on a shelf, out of direct sunlight. Watch it closely to make sure colonization is progressing normally without contamination, and that the substrate is not drying out. You may have to mist it with a spray bottle if you live in a really dry climate.
The substrate should be fully colonized after 1-3 weeks of inoculation, depending on spawn rate.
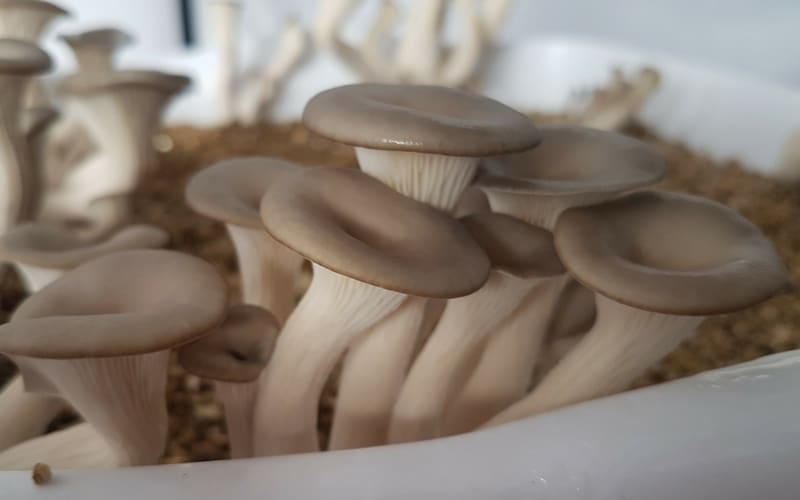
STEP 4: FRUIT!
Once the substrate is fully colonized, it’s time to fruit!
For this particular grow, I applied a casing layer consisting of pure vermiculite. This helps retain moisture in the substrate, which is essential for pin formation and fruiting, but it is certainly not necessary. If you are able to keep a consistently humid environment, then exposing the entire top of the substrate to fruiting conditions should work just fine.
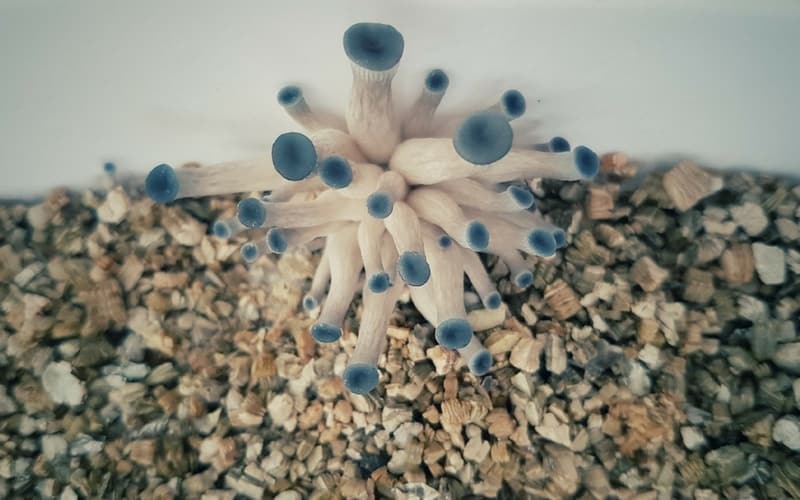
You should expect to see the first pins appear a few days after full colonization, depending on the environmental conditions.
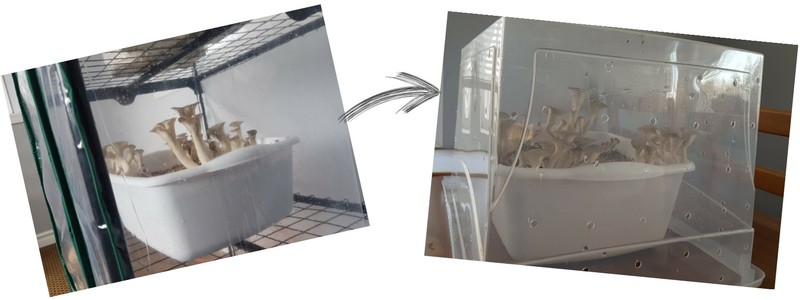
Blue Oysters require a ton of fresh air, and this fact cannot be overstated. I started this grow in a 4 tier mini greenhouse, but the oyster were just not getting enough fresh air. I eventually moved them out of the greenhouse and covered them with a tote peppered with ½” holes (the bottom half of a shotgun fruiting chamber). This provided just enough fresh air for the oysters to develop into better looking, meatier fruits.
Blue Oysters also grow really fast, so you’ll need to check your mushrooms every day to see when they are ready for harvest. Typically this is right before the cap starts to curl upward – a sign that they are about to drop spores.
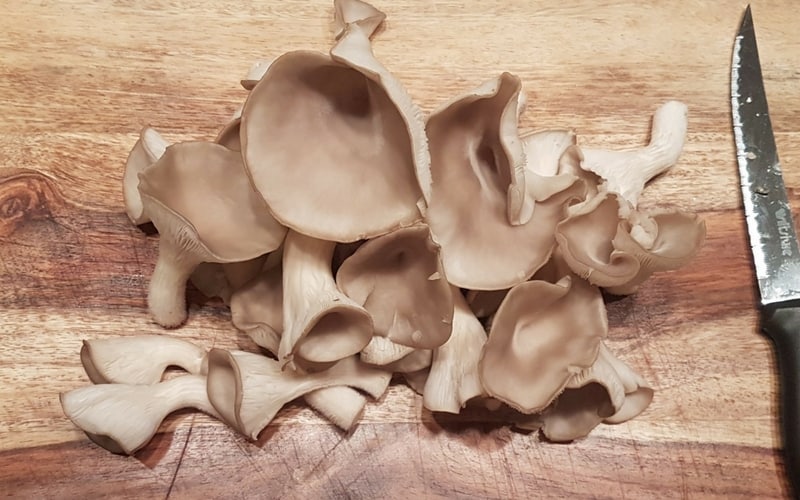
STEP 5: HARVEST AND SECOND FLUSH
When the fruits have reached the size you desire, it’s time to harvest. Do so by simply twisting the stem of the mushroom and pulling up. You’ll get a lot of vermiculite on the stem, but this can easily be brushed off. Oyster stems are not all that desirable, so you’ll probably end up discarding with most of it anyways.
After harvest simply place the tray back in the fruiting chamber, or cover it again with saran wrap so that the substrate stays moist. A new flush should appear in 1-2 weeks. Watch for signs of contamination. If you see any green mold, or anything other than fluffy white mycelium and mushroom pins- then it’s time to throw it out.
Why Oysters?
Oyster mushrooms are some of the easiest to grow. They are relatively resilient to contamination, and can grow well on a variety of substrates. As mentioned earlier, the biggest challenge is ensuring you get enough fresh air to the fruits.
This method should work with all types of oysters (including blue, pink, yellow, pearl ect), and is made super simple by being able to start with pre-made spawn. Making your own spawn is awesome, and should eventually be attempted by any grower- but if you are looking for a quick an accessible way to get into the world of growing, then pre-made spawn is the way to go.
You can check it out here!

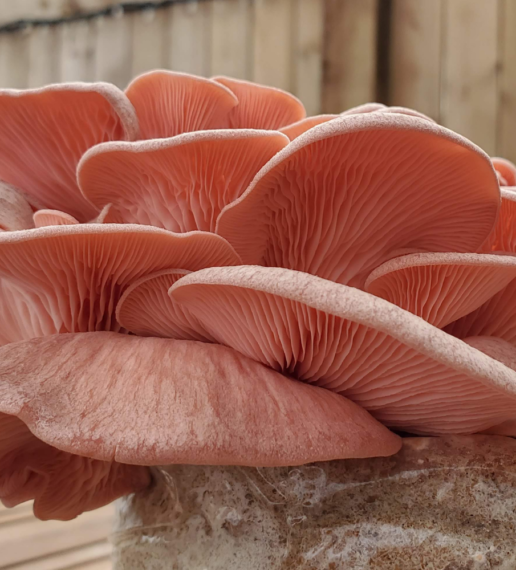
Growing Pink Oyster Mushrooms At Home (Easy Backyard Grow)
Pink Oysters mushrooms are one of the easiest species to grow. They are fast to colonize, produce a ton of fruits and aren’t at all afraid of less than perfect conditions. I just recently finished a fun backyard grow, and wanted to share how easy it is to produce a fresh bounty of one of
7 Tips for Beginner Mushroom Growers
New to growing mushrooms? If so, you may just be a little mystified – which is totally understandable. There is a ton of information to try and digest and make sense of. Terms like inoculation, agar transfers, laminar flow- what does all of this mean? And what of all this do I really need to know? I just want
Thanks for everything you keep putting out Tony! I love your willingness to experiment on our behalf. I have read all your stuff and wonder why you don’t have anything on alternative pasteurization methods specifically for straw. Aloha Medicinals says that lime or ash pasteurization has a much better B.E. than water or steam. I have yet to try straw but am getting ready to get some oyster spawn from you. Do you have any experience with these other methods as they seem like much better beginning options based off of cost. Thanks
Hey Bryan thanks for reaching out! I have very limited experience with cold pasteurization methods, but definitely want to do some experimenting. I agree it can be a lot of work to heat/steam pasteurize straw in most situations. That being said, I have had success with hot water pasteurization simply using a 5 gallon bucket and a pot of boiling water from my stove using aspen wood chips. Bottom line is you have to find something that works for you.
Happy growing!
Tony
Pls. I want to know more about oyster, shiitake, ganodama and order mushrooms,
How can I order for your Agar powder, Barley Malt Extract, Nutritional yeast, and gymson, pls. send details to me on the requirement I will appreciate.
Hey Femi! We do not sell Agar at the moment, we did for a while but have put that on hold. This should change soon so stay tuned!
I am definitely going to try this! I saw your video about the oyster bed outside with straw and am trying to find the perfect spot in the yard. I have a nice shady spot behind the barn that might work well. What other types do you think will work with this tub method? Just so i order enough spawn!
Hey Carl! That is great to hear! Best of luck with it all- I know that Wine Cap Mushrooms can work really well using this method (substitute straw for wood chips, aspen works well)
Hey Tony
Great write up
Just wondering if you think this method would work with Agrocybe aegerita Swordbelt
mushrooms.
cheers
Hey Tom…It might… worth a shot! I like to grow Agrocybe aegerita on supplemented sawdust, fully sterilized.
Cheers Tony ill give it a shot
I am growing pink oysters in straw from five gallon buckets. The first flush was normal but the second flush only grew a few small caps from one of the holes so I did not pick them.
A few days later and they are pinning from the unpicked caps. Anyone seen this before?
Thanks
Dan
Interesting. I am guessing that the substrate dried out too much after the first flush to have sufficient moisture for a good second flush. And you are saying pins are forming on the unpicked caps? That can happen, new mycelium will grow over the old fruit, and can fruit from there.
When you say you added a casing of vermiculite, I’m assuming that means to the top of the inoculated media just prior to fruiting? Did you hydrate the vermiculite before adding or wet it down after adding the layer? Also, how deep of a layer? 1/4″? Thanks!
Hey Sean! Yes, the casing layer was applied right before fruiting. It was not wetted, just sprayed down well after being applied. 1/4″ will definitely do, it just needs to be some non-nutritious layer that can retain moisture and prevent the mycelium from drying out. That is why vermiculite works so well.
Hi Tony, quick question for ya: If I’m trying to grow pink oysters using the bucket method (which i found through you via YouTube, so thank you!) but I live in a dry, cold climate, how do you recommend I maintain humidity? Thanks!
Hey there! You can drape a plastic bag or sheet over the bucket and spray often. This should be enough to help form “pins”. Once it starts to grow, it won’t need as much humidity.
The layer of verm you put on top is dry, correct. Do you spray/mist over it?