Growing Blog
How To Make Agar Plates for Growing Mushrooms at Home
Anyone who really wants to dig into the hobby of growing mushrooms needs to learn how to deal with nutrient agar. Not only is it a way to experiment and learn to grow mushrooms more effectively, it allows you to save and propagate cultures, allows you to create your own spawn and liquid cultures, and best of all… its fun! I want to show you how the best way to make agar petri dishes for growing mushrooms at home. Scroll to the bottom of the article for a video of the process!
Step 1: Mix up dry ingredients
There are lots of different recipes for agar mix, including PDA (potato dexrose agar), MYA (malt yeast agar) and even DFA (dog food agar), but they all consist of essentially the same idea- adding some sort of food source to agar to create a nutrient rich agar media for mushroom cultures. The mix we use most is Malt Extract Agar.
For 1000 ml of water you’ll need to mix up:
- 20g agar agar
- 20g malt extract (we use barley malt extract)
- 2 g nutritional yeast
Agar might be a little hard to find locally. There are various sources online and some grocery stores will even carry blocks of Agar that can be ground up and used for your mix. Malt extract can usually be found at your local brew store. Nutritional yeast can usually be found at organic grocery stores. Alternatively, you can buy premixed Malt Extract Agar powder that can just be added to water.
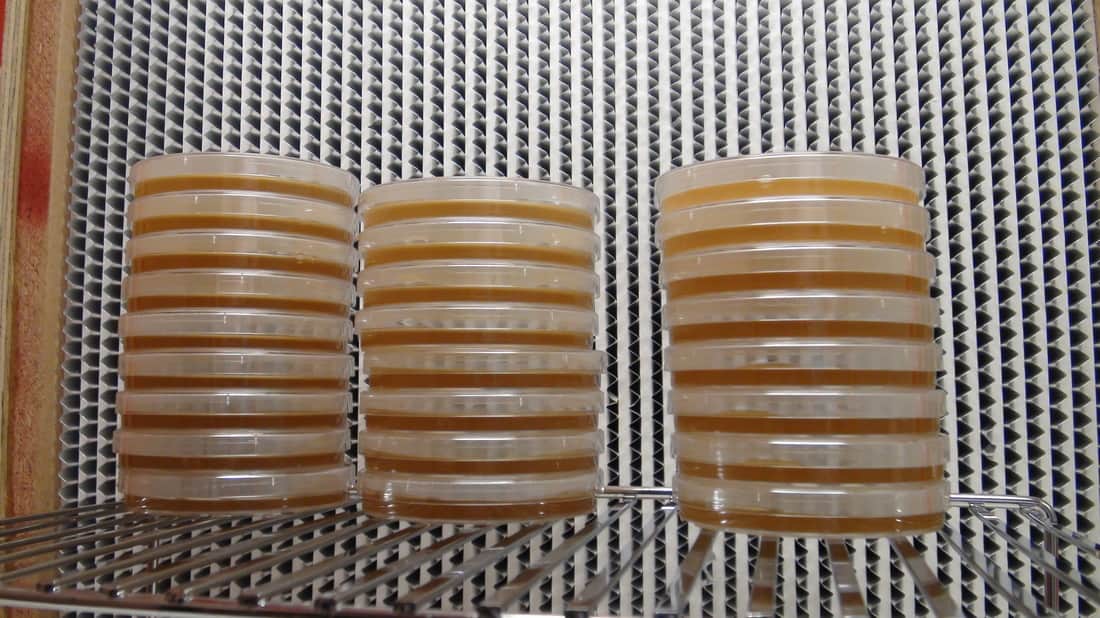
Feel free to modify the recipe depending on how much agar you want. 1000 ml will be enough to pour about 35 standard petri dishes. I usually make up 750ml agar mix in order to pour a sleeve of 25 100mm x 15mm plates.
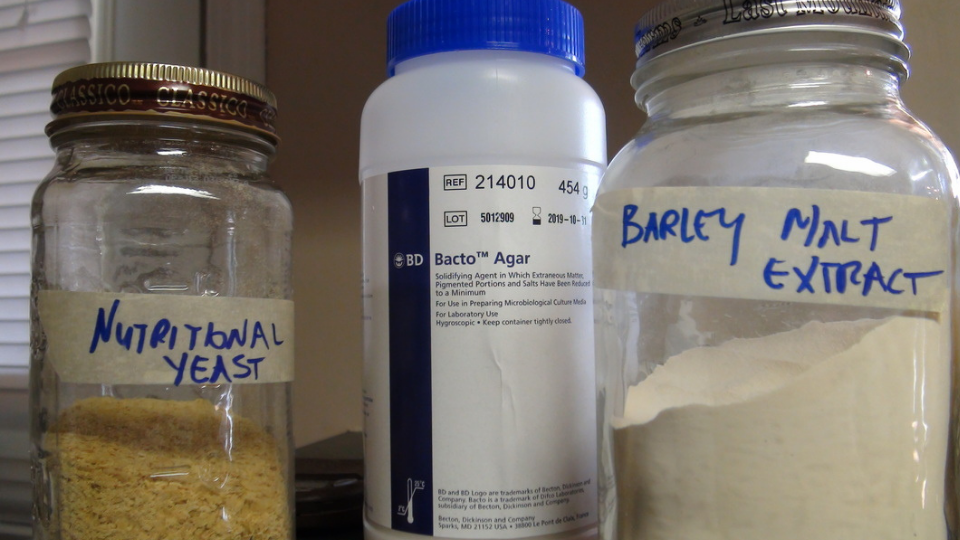
Tools for the job, yeast, agar agar and barley malt extract.
Step 2: Add water and sterilize
Mix your dry ingredients in correct proportions with hot tap water. If the water is too cold it will start to set up right away and will be difficult to mix properly. The agar mix will have to be sterilized at 15 psi for 45 minutes to kill all potential contaminants. I like to use a whisky bottle with a modified lid for sterilization and pouring. To do this, simply drill a hole in the lid and pull some through some pillow stuffing. This filter will allow for sterile gas exchange while the agar cools off after sterilization. Cover the lid with tinfoil and place in the pressure cooker.
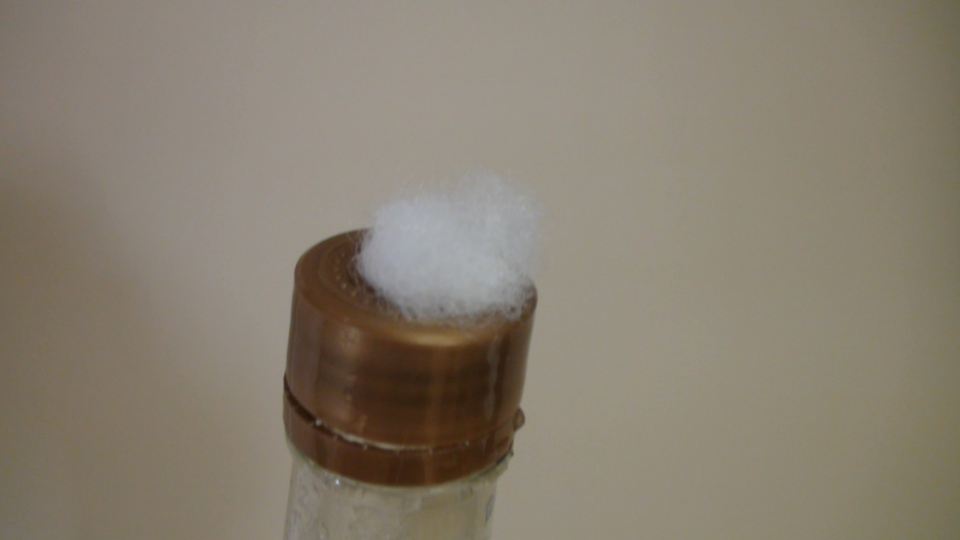
Whisky bottle with modified lid.
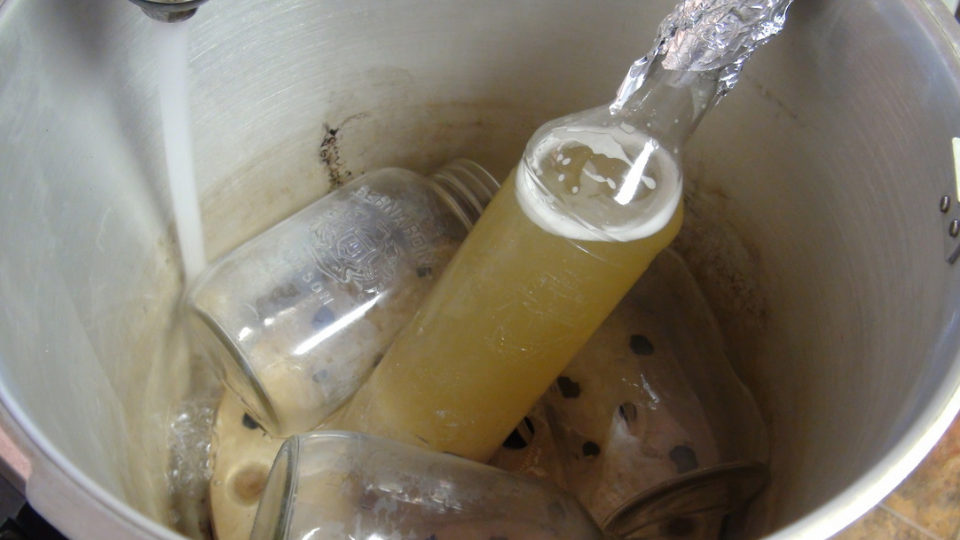
Place in pressure cooker. The extra jars allow the bottle to sit in there at an angle.
A common problem when sterilizing agar in a pressure cooker is boiling over. This caused when the water outside the bottle cools off faster than the agar inside the bottle, which forces the agar to boil over through the filter, making a mess in your cooker. A way to remedy this is by adding lots of water to your pressure cooker so that the cool off rates will be similar. I usually place the bottle in the pressure cooker at an angle so that most of the agar will be at the same level as the surrounding water. Boil over rarely ever occurs if using this method.
Step 3: Cool down
Once the agar is sterilized, it will need to cool down sufficiently to be able to handle it, but be warm enough so that it remains in its liquid form. This usually takes at least a couple of hours. This is a good time to prepare the area where you will pour your plates and washing up for sterile work.
Using agar requires an extremely high level of cleanliness and attention to potential contaminates. Any mold spore or other contaminant in the air, from your skin or fingernails or breath, could ruin your project. If a contaminate lands on your petri dish at any time, it will likely sprout into action, ruining your potential projects and cultures. Wearing hands and arms, wearing freshly laundered clothes, wearing nitrile gloves and even surgical masks can greatly increase your chances of success.
You will also need to use a “still air box” ( SAB for short) or even better- laminar flow hood. These tools will provide a clean area to pour your plates, and without using either of them, it is almost certain that your plates will contaminate. A SAB can be as simple as a clear tote with a lid, and holes cut for arms. Use alcohol to clean the inside of the SAB and make sure that everything that goes in and out are both clean.
If using a flow hood, turn it on a couple hours before intended use to scrub the air. Wipe the surface of the counter with alcohol and set up everything you think you will need.
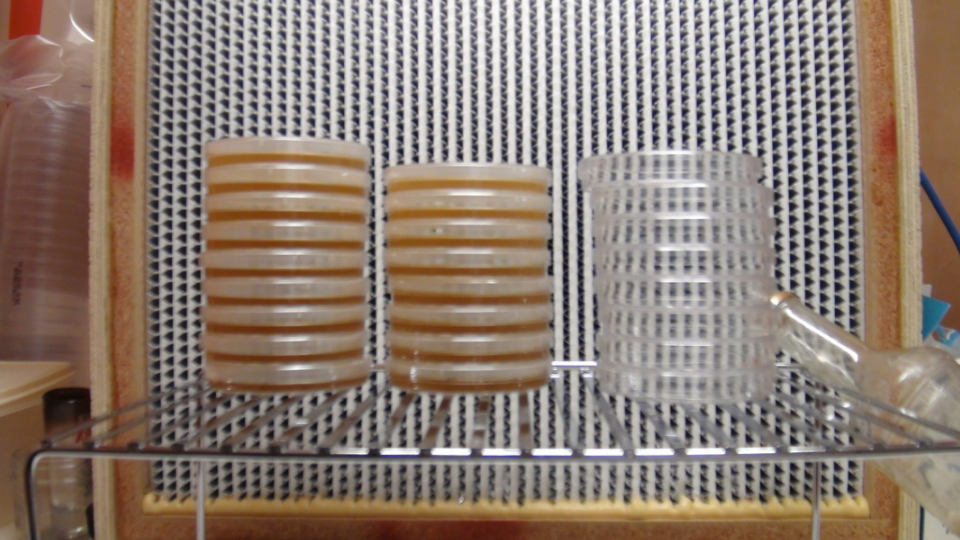
This picture was taken mid pour. Note how the plates are stacked. The plates should be filled starting with the bottom one and working your way up. Also note the open bottle is upstream of everything else.
Step 4: Pour the plates
Start by stacking the plates in front of your flow hood or in your SAB in a sanitary manner. This is where disposable plastic petri dishes work best. They usually come in a pre-sealed and sterilized pack of 25. Clean the outside of the bag with alcohol, cut the bag on the bottom and slide the bag off the plates. Arrange them in about 3 or 4 evenly tall stacks.
Remove the tinfoil from the agar bottle and open the lid. If using a laminar flow hood, ensure that the mouth of the bottle remains in the sanitary flow of the hood. Start pouring the dishes in a rhythmic manner starting from the bottom plate and working your way up. Add just enough agar so that the bottom of the dish is completely covered. Try to leave the lid of the petri dish open for as little time as possible. Also, ensure no part of your hands touches the inside of the dish.
Once all your dishes are poured, leave them to cool. If using a flow hood, leave the hood on while cooling. This will cool them off faster and prevent contaminants from being sucked into the dish while it cools down.
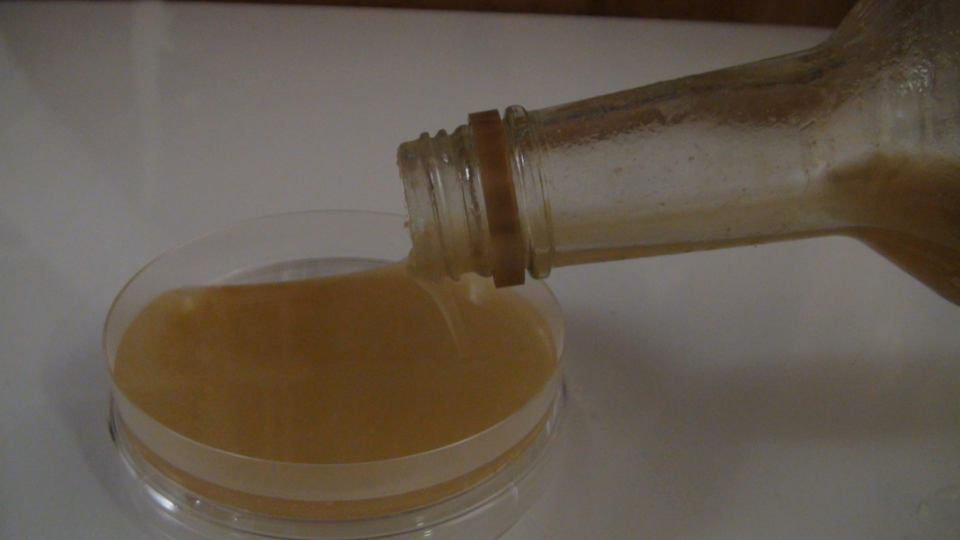
Fill plates with just enough agar to cover the bottom of the plate.
Step 5: Seal and store
It will take about 45 minutes to 1 hour for your plates to cool down and solidify. Some of the plates will have condensation on top. This will eventually dissipate and is not a problem. At this point, you can either use them directly for agar work or seal them for later use. In order to prevent contamination during storage you will need to seal the edges of the petri dish. The best option for this is laboratory parafilm. It provides a breathable but contaminate preventing barrier that easily wraps around your dishes. Simply cut off a slice of about 3-4 inches long, peel off the paper and fold in half. Then wrap around your dish, stretching it enough so that it sticks to the edges of the plate.
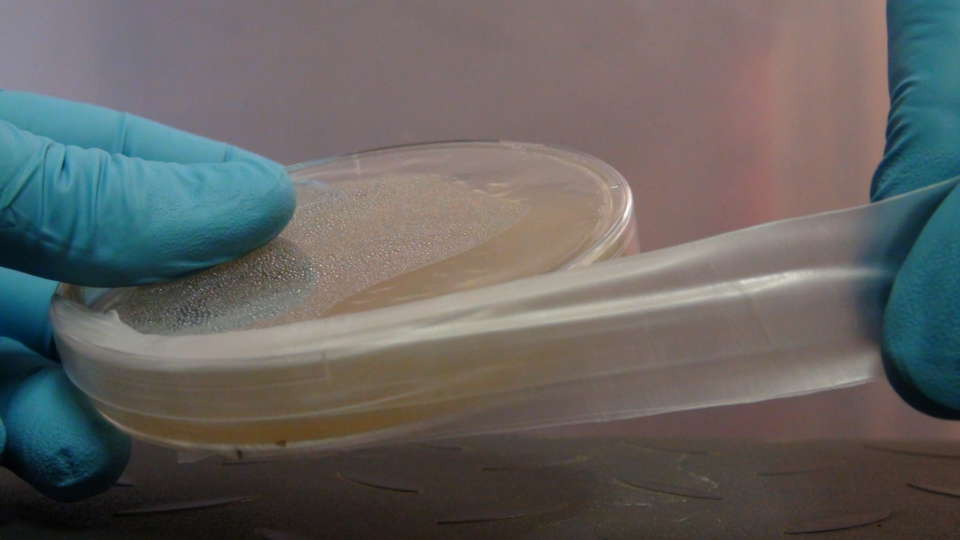
Stretch the parafilm around the edges of the plate.

A freshly poured and ready to go plate.
Now you have nutrient rich agar media! You can use it to propogate cultures, store cultures for long term use, germinate spores and even clone mushroom fruitbodies.
Feel free to add questions or comments below!
Here are some products that you might find useful for agar work. We especially recommend parafilm!

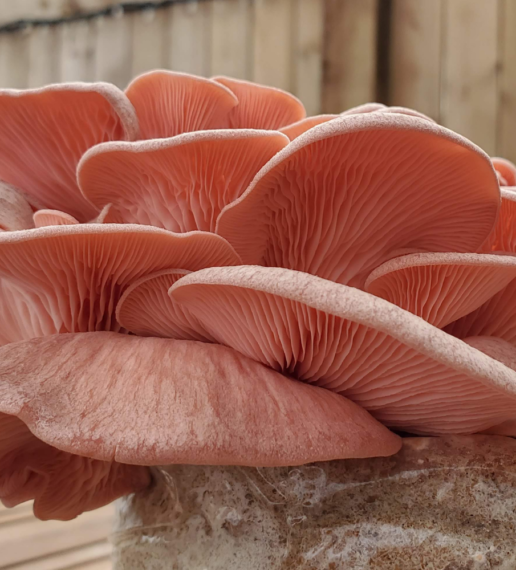
Growing Pink Oyster Mushrooms At Home (Easy Backyard Grow)
Pink Oysters mushrooms are one of the easiest species to grow. They are fast to colonize, produce a ton of fruits and aren’t at all afraid of less than perfect conditions. I just recently finished a fun backyard grow, and wanted to share how easy it is to produce a fresh bounty of one of
7 Tips for Beginner Mushroom Growers
New to growing mushrooms? If so, you may just be a little mystified – which is totally understandable. There is a ton of information to try and digest and make sense of. Terms like inoculation, agar transfers, laminar flow- what does all of this mean? And what of all this do I really need to know? I just want
Hi, How can i order plates you are using? Also the ready mixture of fresh cap 🙂
can i also buy spawn of yellow, blue and pink oyster?
Thanks for the reply.
Hi Cherish! Thanks for reaching out. We will soon be selling spawn of Blue and Pink Oyster, and a few others. Unfortunately we won’t have yellow oyster just yet- but may have that as an option in the future! Sign up to the mailing list, and we will notify everybody when the spawn is available. Or just check the site periodically for updates. We do not have plates or the ready mix available yet, but again, may soon have it in the future. I will let you know! All the best.
Hi ! There are any conditions (like temperature or light) that should be consider when storing ?
Great job !!
Hi there! Thanks for reaching out! That is an excellent question. I have always had good results storing the new plates at near or below room temperature (around 18 degC), and have not been concerned about the amount of light. The plates can stay good for a long time. If there are large temperature swings, you will have condensate build up inside the plate, but it should not be too much of a concern.
Hi Tony,
Thanks for the great write up and video and for the whole Learn section!
I was just wondering about the Parafilm stuff when you wrap petris with nutrient supplemented agar media before they are inoculated – since there is no mycelium/spores/tissue/pins inside yet, is gas exchange really needed (if we have developed a really sterile technique, at this stage there should be no life in the pertis whatsoever, hence no need to import oxygen or export exhaust CO2, right?). I mean can’t we go cheap and wrap “empty” agar plates with saran tape or any other cheap non-breathing media for the storage period (before inoculation), at the same time ensuring an even better contamination barrier?
Thanks!
Hey G, glad you like the site. And ya, you are correct, there is no need to wrap the petri’s in a breathable material like parafilm when there is nothing on the dish. I just use it because I have a bunch, and it works great. But you can use whatever works for you!
Tony,
I am interested in making petri dishes. You explain it very well in the video. However, what tek do you use to inoculate virgin petri dishes? Spore prints, syringes. I am talking about starting from scratch not having a culture already colonized from one petri dish to colonize another petri dish. What would be the easiest method. Can you perhaps make a video of you doing this? I have also read about using an inoculation loop and using a zig zag pattern. Can you elaborate on all this a little. Thank you.
Michael
Hey Mike!
Thanks, I am glad you like the video! You can use either spore prints, liquid syringes or even a piece of tissue from another mushroom. For spore prints, you simply heat up a scalpel, cool it in the dish and scrape the spores onto the dish. For a liquid syringe (spore syringe) simply squirt about 1 mm onto the dish. For a tissue culture, cut off a small piece of tissue from inside the mushroom, underneath the gills and transfer it onto the dish. This produces a clone rather than a new strain.
For all of these methods, you may need to do a number of “transfers” before getting a single clean culture.
Where can I find the metal rack you use in front of the flow hood?
I got that one at WalMart, I think it is usually used to make extra space in your cupboards. They have them at most large retailers.
Hi,
I have several well colonized jars of lion’s mane spawn on rye grain, is it possible to just drop a grain on the petri dish to colonise it ? Thanks for your answer and BTW great video !
Mike
Hey Mike! Glad you like the video! Yup, definitely possible to do that- works great.
I’ve recently been doing my own Agar plates but having an issue with the clarity of the plates, I believe its the malt extract that I’m using. What brand/ product do you use for your malt extract?
Cheers.
Hey Ash! The ones I make are never clear either, they are yellowish… no issues though as the mycelium grows on top and can be seen easily. I usually just pick up the Malt Extract from local brew shops, so not sure of the brand or anything. You could try using dextrose for a clearer mix.
Thank for the info
I’ve found instead of paying almost 30$ for laboratory parafilm, u can buy parafilm grafting tape which is only 10$ and is the exact same thing! Amazon has it for 8$ or so.
Hi;
I do my plates slightly differently. I mix the medium, but don’t pre-sterilize it. I just put it in a nalgene squirt bottle, then fill the plates and stack them in alternating rows in an electric pressure cooker. I use a 4″ tall rack I found on Amazon (actually, an egg steamer rack) that fits the pressure cooker perfectly to raise them high enough that no water or boiling splash touches them, then place them in layers (3 to a layer, offset by 1/3 rotation each layer). I can fit 18 at a time this way. I set the cooker for 30 minutes (timer starts automatically once pressure is achieved). I let them cool completely (overnight) in the cooker without opening, so as to not introduce any contaminants. Then, in front of the laminar flow hood (cheap and dirty, HEPA filter taped to a 20″ box fan which produces ~1300 CFM flow), I seal them using medical paper “Micropore” tape, which breathes while still filtering down to the same level as the filters on grow bags (it’s autoclavable, too, so it can be left in place if I want to resterilize the plates for some reason). Anything left in the squirt bottle gets sealed, and if I need more plates (1 liter of mix makes about 50 plates), I reheat it in the microwave for a few seconds or in a boiling water bath until liquid again, shake, then start as above.
Cool! Thanks for sharing 🙂
Hey Tony, great vid!! Very specific which I greatly appreciate…however you do not specify how much water. You state mix with “some” water…can you clarify. I am going to attempt to do the 3/4 recipe that you show with a 750ml bottle.
Thanks
Hey Benjamin! Glad you like the video! You are correct, 750 ml of water is what you need for 3/4 recipe. That is what I use most of the time and it works great.
Hi Tony,
It’s really awesome and precise article and I thank you for that.
I have one question regarding the yeast that you put in the mixture and than it is sterilized at 15 psi for 45 minutes. Doesn’t the pc temperature kill the yeast during the process of sterilisation or the purpose of the yeast is different?
Glad you like it! Yes, the yeast is not active- it is “nutritional yeast”.
Hi Tony, is adding food coloring helpful to visualize growth? Do you ever use it? If so, which color do you recommend. Thanks
Hey Linda! I do not use food coloring, but have seen people do it… works well!
Am I reading right that you sterilze the agar before the pour but not the whole dish w/agar after the pour? I have seen conflicting advice on this and wanted to check.
Yes, sterilize the agar separate and then pour. It wouldn’t be possible to sterilize in these dishes because the agar would boil over and make a mess 🙂
Great video, is there a Barley Malt alternative that is gluten free? My daughter has celiac disease.
I believe dextrose would work fine, My girl has celiacs and Im looking for alternative ways as well. Do dat research tho!!!!
Some recipes don’t call for yeast. What happens if you don’t use yeast?
Hey Tony, great video. Thank you very much! I followed this process with a SAB and I found that I got condensation on the lids of the dishes. It looks like your plates have none. I don’t have a thermometer to measure the temp of the agar although it was hot to handle when I did it. Is that too hot? also I used micro pore tape if that could be contributing? This time I have Parafilm so I’ll use that. any tips appreciated! Thanks for all your content!
Hi, it’s been a while since you asked the question but if you’re still wondering the condensation is from the agar solution being too warm. I’m usually impatient as well and pour while it’s still hot and get quite a lot of condensation but have never had a problem with mold or anything. Also, the condensation goes away after a few days. I believe the ideal pouring temperature is around 50c but be careful not to let the solution get too cold as that will clump up the agar.
Hi Tony,
I’ve grown a few different mushrooms from scratch and am thinking about growing maitake cultures on agar petri dishes. I know they are tricky to grow (humidity/temp. control, contamination, etc) and I was hoping you could help me with a few questions. How long will the maitake culture petri dishes keep in the fridge? Once the petri dish is fully colonized what would you recommend I use for the grain spawn ( I was thinking of rye grains that I already have). Do you think the maitakes would fruit directly from the grain spawn or should I expand them with oak chips? Any tips would be appreciated! Thank you!
Hi Tony,
I want to ask, what is the purpose of yeast in the mix? Are they (once killed during sterilization) source of nutrient? It seems contraproductive to introduce another living organism to the sterile medium. Thanks!
Hello Tony, what kind of stand do you use for your petri dishes, I have been looking but I cannot find one like this online only smaller ones for baking come up.
Hi Tony, in Ghana where i come from, it is hard for me to get barley malt extract for my mycelium work. what ingredient can i use for substitutes in place of malt extract.
secondly, i would like to watch your video on PDA (Potato dextrox agar). a step by step method for making one.
thirdly from other video i watch on youtube, people use different ingredient for preparing their liquid culture. if you could be specific and concise about the ingredients in a video, i would be grateful. thank you very much
Hello Tony, I want to say … fair play to ya ! As we say in Ireland. I think your videos etc are. Very very good. Your the one I look for for alot off my info . I’m just a beginner, I’m almost thinking of giving up at the moment. I have mostly contaminations but I’ve had. One work I only got 4. Shrooms in each of my 2 flushes but they where. Huge so that. Gives. Me a bit off hope. I’m looking for some reassurance I think.
I don’t have a .L F H or a 15psi PC . As I write this I’m thinking omg what should I expect right ? Brimming idiot! Haha but evceryone must. Start like this do they ? I’m completely confused with the flow. Hoods its. Very confusing trying to make graph charts. Can someone just please say … get this. Fan and that filter and. The size off the box.?
I made petri dishes with your recipe Tony and. Followed all your instructions and. Made some. Spore syringes and ….. iv 2 thirds came. Out really well. So I’m just going to make more . Its my rye grains mostly going pink. And. Green. All of my liquid cultures went alien on me. But I didn’t follow. You on that so..
Ooooo I didn’t mean to say all that.🤐
Well thank you again x
Hi – very helpful guide. One question…why do you add natural yeast if you then sterilise the mix? Surely the high temperature kills the yeast?