Growing Blog
How To Inoculate Grain Jars and Make Any Grain Spawn You Want
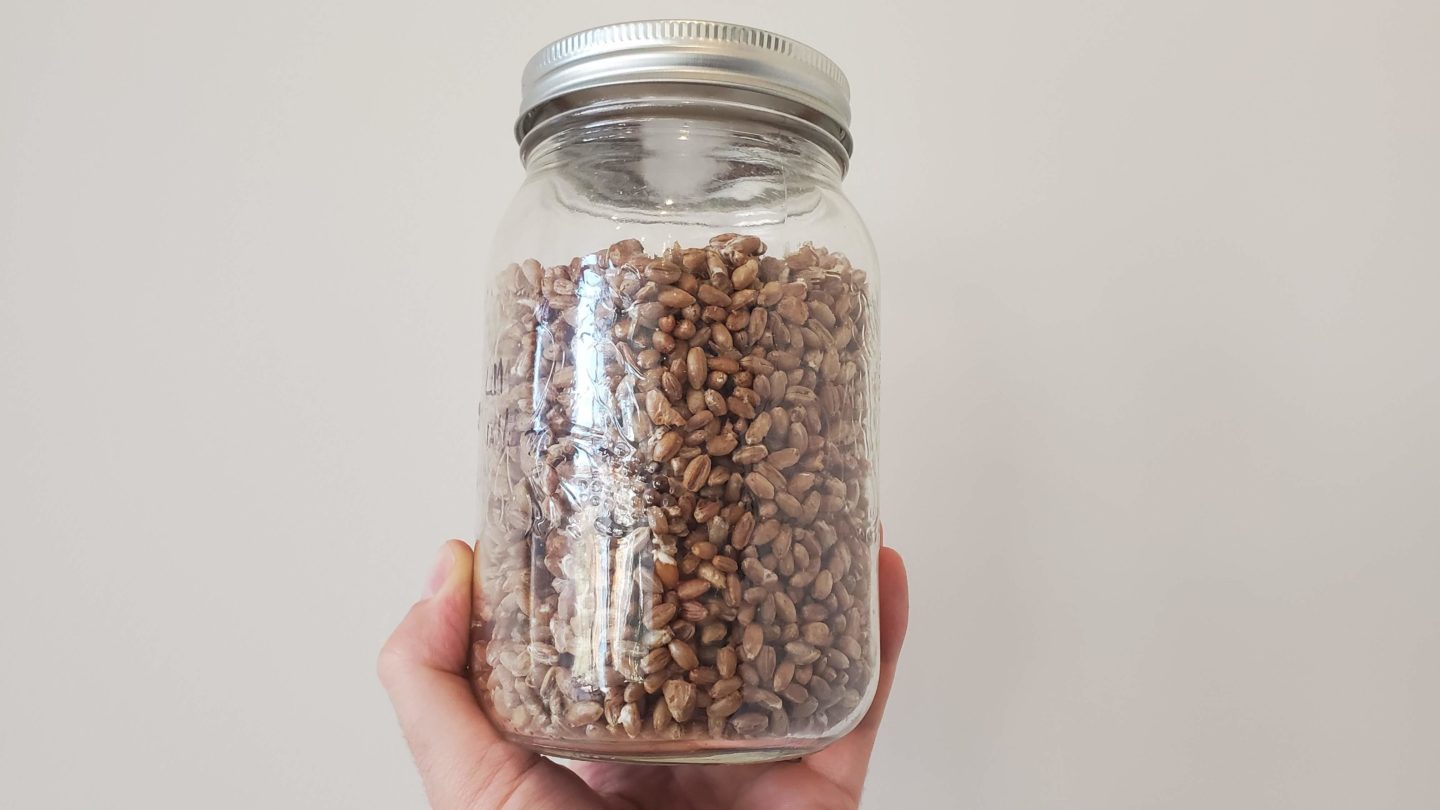
One of the first steps to growing mushrooms from scratch involves making your own grain spawn.
Luckily the process of inoculating grain jars is pretty simple!
Once you have a viable mushroom culture ready to go, either grown out on agar or in liquid culture form, you can go ahead and add it to sterilized grain. Over the next week or so, the mushroom mycelium will work its way through the grain, eagerly devouring the nutrition and moisture held within the grains.
Once the grain is fully colonized (meaning the mycelium has completely covered the grain) you can either make more spawn with a grain to grain transfer, or you can add it to a bulk substrate to grow mushrooms right away.
So, let’s look at the steps and materials needed to inoculate sterilized grain, and make first generation grain spawn.
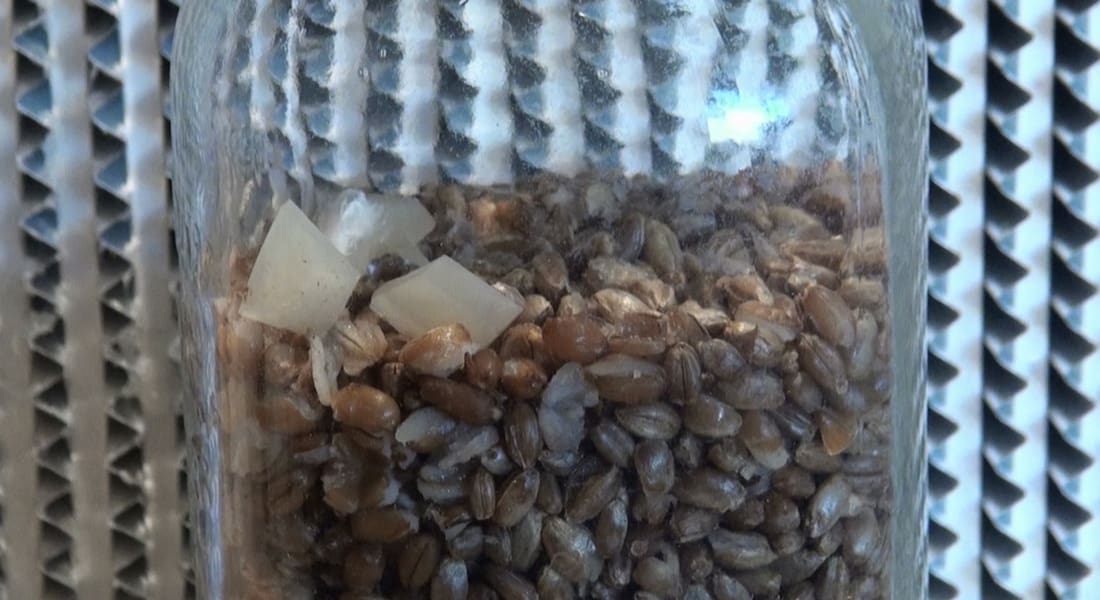
What do you need?
- A viable mushroom culture, either on agar or in a liquid culture syringe.
- A jar of properly prepared sterilized grain with a breathable filter lid.
- A laminar flow hood or still air box.
- A scalpel or sharp knife, and a flame.
- Doesn’t hurt to have gloves and rubbing alcohol.
Inoculating Grain Jars from Mycelium on Agar
Step 1: Gather Your Materials
In order to make first generation grain spawn, you first need to get some properly prepared and sterilized grain. It’s a bit of work, and you need some specialized equipment, but once you do it a few times, it’s not all that bad.
You also need a viable mushroom culture, either on agar or in a liquid culture syringe. There are a number of reputable suppliers online where you can by cultures. Check out this article for information on how to properly transfer and store cultures.
Step 2: Set Up in a Clean Environment
I like to do any contamination sensitive work in front of a laminar flow hood, in which inoculating grain spawn definitely qualifies. If you don’t have a laminar flow hood, then try and at least make a “still air box.”
Wipe down your grain jar and your agar dish with alcohol, and set them in front of your hood. Loosen the lid on the top of the grain jar for easy access, but keep it closed.
Step 3: Grab some mycelium
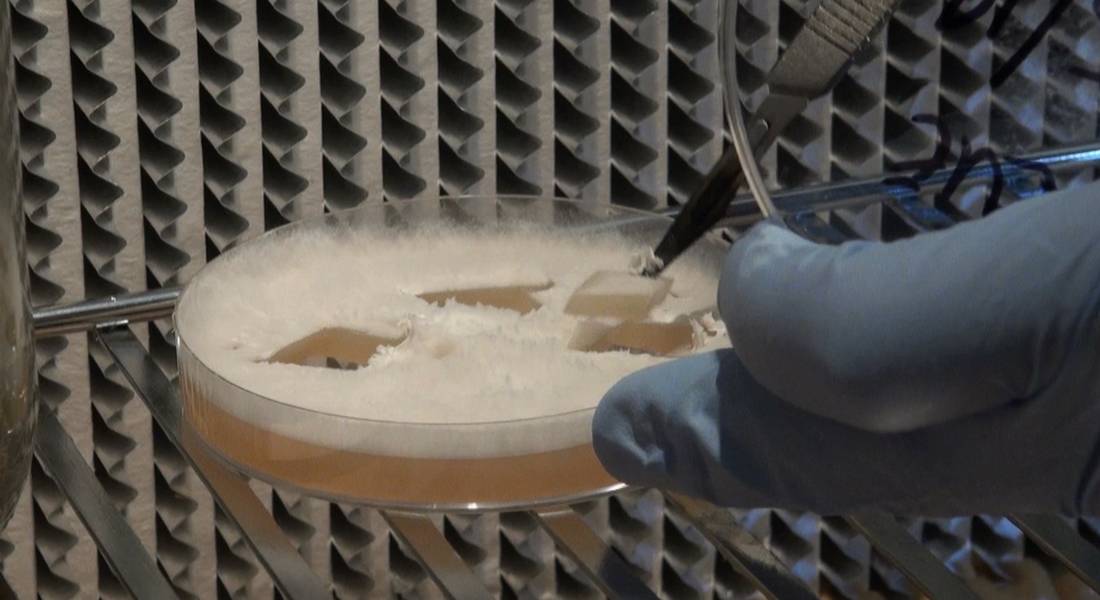
Flame sterilize your scalpel or blade until it is literally red hot. This will kill off any potential sources of contamination on the blade. Quickly cool the blade off by dipping it into the side of the agar dish. You should hear an audible sizzle.
With your cooled blade, cut a piece of mycelium out of the agar dish approximately 1 cm x 1 cm, and stab it with the tip of your scalpel.
Step 4: Inoculate
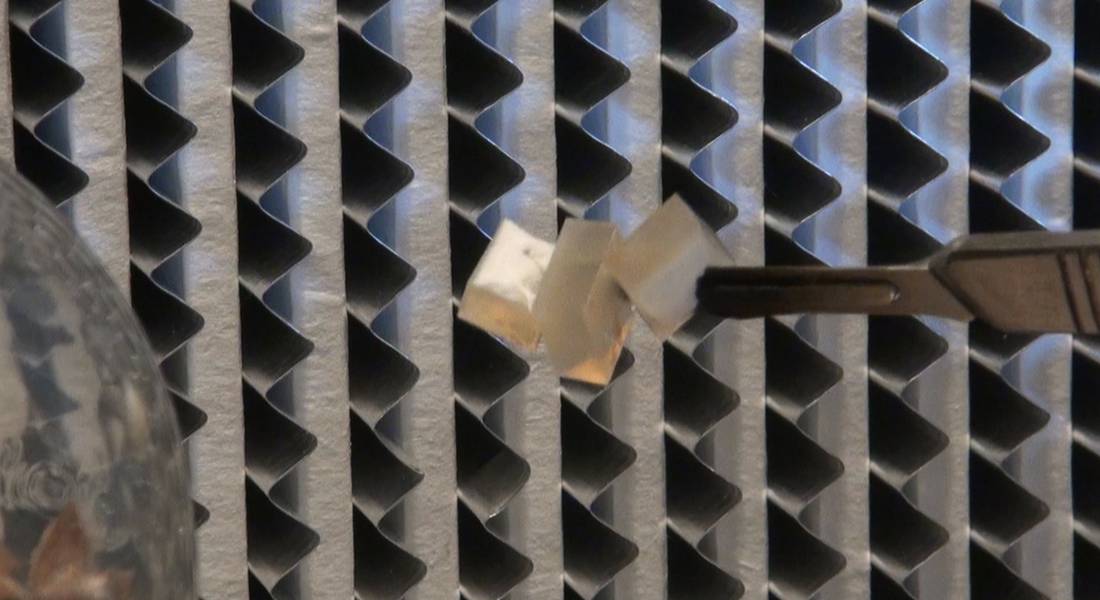
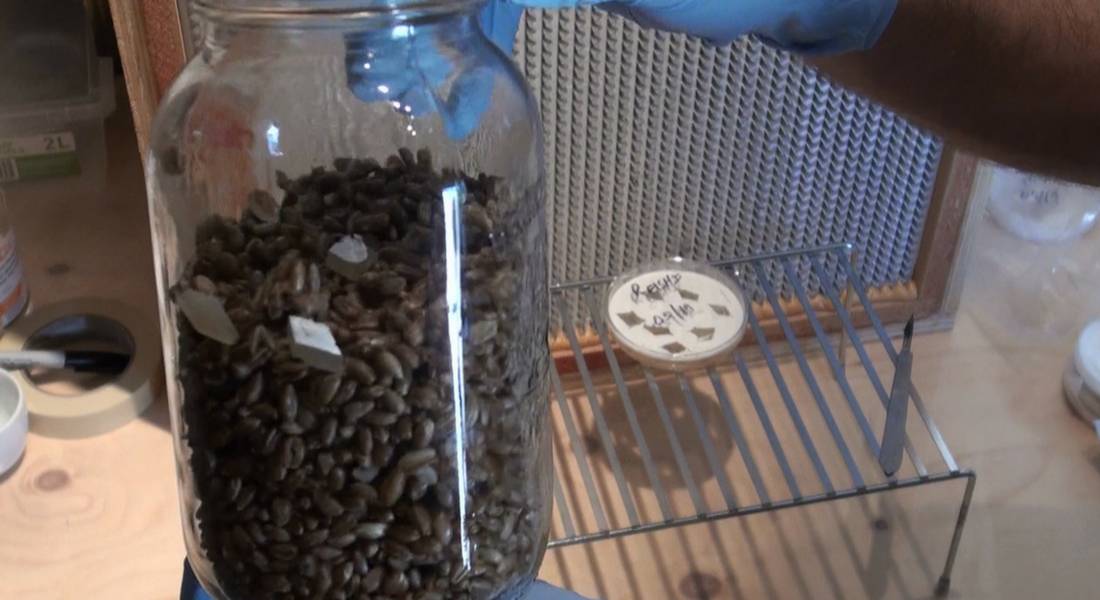
Remove the piece of mycelium from the agar dish and throw it into the jar. Try to keep the piece of mycelium upstream of all other materials throughout the process. You should try to have the lid of the jar open for as little time as possible.
I usually like to place at least 3 pieces of mycelium into each jar. This allows for more inoculation points, and should speed up the colonization process. The faster the jar is able to colonize, the less likely it is to contaminate.
Repeat steps 3-4 to add extra pieces.
TIP: If you want to improve the efficiency and further minimize the time that the jar lid is open, cut a grid in the agar dish so that you can pick up 3-4 pieces at once. Doing it this way, you only have to open the jar once, greatly reducing the chances of contamination
Step 5: Shake the Jar
Shake the newly colonized grain jar in order to spread the pieces of agar throughout the dish. This is important for the same reason as inoculating with multiple pieces of agar- it increases the number and spacing of inoculation points, which speeds up colonization.
Step 6: Allow to Colonize
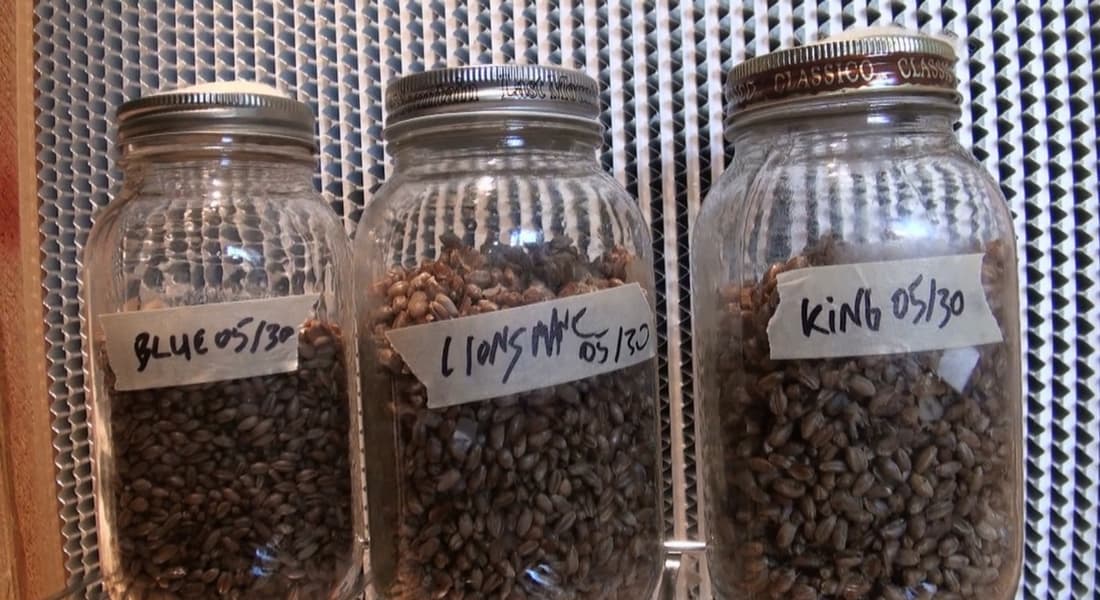
First, don’t forget to label your jars! Especially if you are inoculating a number of different species. It’s easy to forget what is what after inoculatinon.
Put your newly inoculated jars on a shelf at room temperature and away from direct sunlight. There is no need to “incubate” grain at warm temperatures in the dark, since the mycelium will grow happily in normal room temperature conditions.
You should shake the jar at least once during colonization. I like to do this when the jar is about 25% colonized. Shaking the jars at this time will evenly spread out the grain, which allows for faster overall colonization.
Depending on the species of mushrooms, it can take about 1-3 weeks before the jar is fully colonized.
At this time you can either add it to a bulk substrate or do a grain to grain transfer to make even more spawn!
Inoculating Grain from a Syringe
You can also inoculate sterilized grain from a syringe- either a liquid culture or a spore syringe.
In order to do this, you first need to flame sterilize the tip of the syringe until it is red hot. Then you can quickly lift the lid of the grain jar and inject the syringe. The first bit of liquid will cool down the syringe.
Usually about 1 – 2 CC’s of liquid culture is sufficient per quart sized grain jar.
You can also inoculate the grain jar without even opening the lid, by simply injecting the liquid culture right though the filter on the top of the jar. This is especially effective for people who do not have access to a laminar flow hood.
First Generation Spawn
When inoculating grain from pure mushroom culture on agar, we call the resulting grain “first generation spawn”. This is because it is only one step away from the original mushroom culture and still has plenty of potential growth before it starts to decline in vitality
For this reason, first generation spawn isn’t typically added directly to a bulk substrate, but is instead used to make even more grain spawn.
This is done by performing a grain to grain transfer, were first generation grain spawn is added to additional sterile grain in a ratio between 1:10 and 1:20. In this way, you can increase the amount of grain spawn exponentially.
A Word on Cleanliness
Newly sterilized grain jars are very susceptible to contamination. This is because the grains are high in nutrition and vulnerable to a whole host of potential competitors that can easily outgrow mushrooms, such as trichoderma molds, cobweb molds and other project-ruining contaminants.
For this reason, it is imperative to follow proper sterile procedure, and always be cognizant of any potential source of contamination. Especially important is to not open the jar unless in a completely sterile environment and leave it open for as little time as possible.
If you are following all proper sterile procedures and still getting contaminated jars, then either the culture is contaminated or the sterilization process for the grains is not effective.
Next Stop: Mushrooms!
Once you can inoculate grain jars and make your own spawn, the possibilities are endless. You can either make a ton more grain spawn, or add it to a bulk substrate to finally get some mushrooms!
Is there anything else I can use besides filter paper to cover my jars? Working from syringe.
Hey Amanda! Sure, you can use poly stuffing, the needle can go right through it!
Sorry for the long post here, but I felt it was the best place to ask those 4 in 1 out.
I used filter disc made of cellulose and have 0.3 micron pores for my first generation jars, but the visible top became covered in mold !? … Apparently, the Oyster and Lion mane strains are doing just fine in rye grain. However, I lost some transfers, do you have experience with this type of filters ? Should I allow the sterilization any longer, or is it normal for those to be partially digested in between batches ?
Furthermore, I wanted to use 125 mL small mason pot in order to reduce the use of petri dish… I used the same filters and all the agar plate went catastrophic. I think that the sterilization process is not adapted.
I put them empty, sterilize, than I pour them in a SAB (by the way thanks for the bottle technique out here its awesome !). Using this technique, water flow trough the filter… I let you imagine the contamination level…
I wanted to use poly stuffing on both grain jars and small mason ‘petri’ with foil cover, but it did not seem to work … Any hint would be fine here, I just don’t get why ?
Finally, I heard of using wild spore print via a sandwich of agar to purify it, but isn’t the agar pouring temperature way to high to mix in spores, and if not, would you care to detail how ?
Thanks, I know it’s a lot, but the site is awesome and I really think that growing on a budget should be rendered easier with those answer !
Hey Michael,
Thanks for reaching out! I don’t use filter discs for the most part- i prefer to use poly stuffing that is pulled through a 1/4″ hole. Works every time! It is possible that the filter discs stayed wet and had some form of nutrition on them- a perfect environment for mold. You could definitely use the same method for 125 ml mason jar “petri dishes” just make sure you use a proper lid, not foil. As for the agar solution coming through the lid of the bottle- this is likely from “boil over” and it happens when the area around the agar cools down faster than the agar itself, which causes the hot agar solution to boil through the filter. You can solve this by making sure you have enough volume of water in your pressure cooker to maintain consistent levels of heat as the cooker cools. Finally, not sure what you mean by the sandwich technique with spores, but generally spores are added to the dish after it has cooled and solidified and often takes a number of transfers before you arrive at a pure culture. Hope that helps!
Thanks you, that sure help to clarify the moldy experience ahahah.
About the sandwich, I read it in a couple of forum and in the Stamets book. The idea is to bring spore in between two layer of agar in order to purify the culture with less transfers… However, I cannot imagine how to so it without pouring way too hot agar on top of spores.
I think I will work with more transfer but if you’d have a way to work it out i’d like to know.
Thank again !!
Yeah the lid. I always used the actual canning lid itself because it seals. Never had any contamination always sterilized everything and I did it with a pot on my stove ghetto but not stupid.
Tony,
When using a syringe to inoculate grains, when you flame sterilize how how long do you have to wait (cool off) before you can inoculate.. I have read in many forums and there are so many opinions. Some say just squirt a few drops and thats it, some say after its red hot wipe it with an alcohol soaked cotton ball etc.. In your professional opinion how would you do it for the highest success rate… And do you have to flame the needle between every jar you want to inoculate..
Thanks
Hey Michael! Most of the time I will flame sterilize between every single jar… but I have gotten away with not doing that before. In my opinion, you should go straight from the flame to the jar, without wiping with alcohol. The first few drops of liquid going through the needle will cool off the tip.
I appreciate the reply. I have self healing ports. If I go straight from flame wouldn’t port possibly melt into the needle? I agree on not using any wipes etc. I think dispensing a drop or two right after flame then immediately into the injection port is my only option.. Idk thoughts……..
You could certainly try that! Self healing ports might be able to easily withstand the heat. Ones I have used before have been made of High Temp Cilicone, which wouldn’t melt from the needle. Your idea of dispensing a small drop before placing in the injection port might work aswell. Mycology requires sterile technique and mindset… but it is also an art, and you can often get away with side stepping procedure. You never know until you try!
yes use the flame it doesnt hurt. if you only knew how many contaminates are in a cubic of air its would amaze you
How wet/dry should the sterilized grain be?
Hi Naomi! It should be full on water on the inside, but completely dry on the outside. You will get a feel for it once you do it a few times. I like to pre-cook my grains before sterilization so that they can soak up water, then steam dry them so that they completely dry off on the outside. Hope that helps!
I use micro pore tape, it will help with gas exchange and keep out airborne contaminants.. I inoculate my jars with 5 holes I cover afterwards with breathable micro pore tape.
Hi ,
I am looking at developing packaging material from mycelium and saw dust .How to use mushrooms to inoculate saw dust and create thermocole like packaging.
i run a business doing just this, ill fill you in ,i started using mycelium for many industrial applications
Tyvek works as a jar filter.
Sure does, thanks for sharing!
i use coffee filters 2 of them per lid works great
Hi Tony,
I want to first off say your website is awesome and has helped me so much in getting my indoor operation set up. Thank you so much for the valuable information!
My question is how many times can you do a grain to grain transfer for making spawn? I have 6 syringes I purchased and am hoping to making as much spawn as I can from them.
Hey Tara! Glad you like the site 🙂 You can usually do 2-3 grain to grain expansions before running into issues- If I were you, I would start with LC to grain in mason jars, then expand that 10X into 5 lb bags. That should provide you with a lot of spawn!
Using a Multi spore syringe on grains is a hit or miss thing in my experience. Using minimal spore solution and a self healing Injection port ups the chances of succeeding though. Too much spore solution can cause bacteria to flourish and offsets the H20 content in the jars. I use 1cc per quart jar. On my lids I’ve installed injection ports so the lid doesn’t need opened to inoculate. I have a suspicion that before I used ships, opening the jar aloud contams to enter off the bat, so I purchased SHIPS from an online site to eliminate the problem.
I would rather inoculate jars with agar wedges or liquid cultures. But that’s not always feasable. Using a small amount of spores is the easiest method for me to properly inoculate my grains, rye berries usually. I have syringes I’ve made myself from prints so I can control how much spores I use and control proper sterile techniques. I don’t believe any of my contamd jars came from dirty syringes, or dirty spawn. I PC them for 90mins @15psi. The small amount of contams that are always present in syringes only gain control if i use to much spore solution, which causes bacteria to flourish, and mold spores germinate, and are sometimes present in the syringe or spawn (most likely the prior), if conditions are suited for them better than for the mycelium. No syringe is 100%clean. It’s about giving the mycelium the upper hand and allowing it to get a foothold over the grains.
I’ll be pressure cooking rye berries today and inoculating them tomorrow morning with multi spore inoculation. The key I’ve learned is using minimal amounts of spore solution and using injection ports or polyfill hole to knock up the jars, keeping contams from infiltrating the grains. Just some info I’ve learned.
Why do we need the intermediary step of using grain spawn? Why can’t I just innoculate masters mix with a spore syringe or a piece of agar? What problem is it solving?
Also, how long could I keep inoculated grain spawn in the fridge? I’d like to grow throughout the year and not have to buy fresh grain spawn every time I want to start a new batch.
Thanks for the amazing website, it’s really given me the confidence to try to grow on my own.
Good question! The grain spawn serves a couple purposes…. first of all, the grain contains tons of nutrition that is important for fruiting- kind of acts like supplementation. Secondly, the grain has a huge amount of “inoculation points”, individual kernels of grain which can be mixed around the substrate and allow for faster colonization. You could actually inoculate masters mix with a culture syringe (spore syringe might not work that well) but results would be less than ideal. You can keep grain spawn in the fridge for a long time, depending on the species. I have kept king, blue oyster and shiitake in the fridge for over 4 months and it remained viable. Glad you like the site!
Do i need to shake the jar after i inoculate with liquid culture? I’ve made some with wheat and some with popcorn. First 14 jars i inoculated with 5cc and the other 14 with 10cc because i’m not sure how much it takes. Some I’ve shook after inoculation and some i dint. What is the best approach?
Hello I had a quick question about sterilizing the jars. I would put the soaked substrate drip dried into the jars, drill a quarter inch hole and stuff with poly stuffing before screwing on the top. cover the top that’s on the jar with aluminum foil, then place the entire jar with cap, foil, and substrate into the pressure cooker and then it should be ready for inoculation correct? ( I want to know if this procedure is correct? do I add water around the jars in the pressure cooker? do I wipe out jars with alcohol before the pressure cooking?) and then after inoculation in front of a Flow hood do I leave the tin foil over the top of the jar still?
I know this is on a slight different message board but I am using dowel rods for my spawning
Hi There,
Amazing website, so much great information, thank you so much.
I have a question regarding the grain to grain process please.
Is it possible to use this method if I am inoculating the grain with spore syringe? Is it still classed as first generation spawn?
Many thanks and I look forward to hearing from you
xx
Hi ! I collected the spores from store bought mushroom and I mixed them with distilled water that I had sterilize “( I had it as liquid culture)” with 4% honey.I had the spores and the water mixed for about 3days and then I injected them to my sterilized grain. It has been more than 10 days since I injected them and still I haven’t seen mycelium growing ! How long it might take to see results, or is anything that I might done wrong ?
While mycelium is colonizeing the grain do i need to keep a certain level of humidity?
Tony
Is it possible to make substrate material spawn rather than the grain spawn? If it is possible, then it means that the difference between grain to grain method to make spawn and growing mushroom colonizing substrate is in the usage of closed jars that don’t allow fruiting as apposed to the bags with the holes? Am I right?
Tony
I inoculated the jars with a spore syringe. 5 days and no growth. I followed the receipy completely with rye flour and vermiculite.
Was I supposed to vent the jars? There’s only needle holes in them.
How long until I start seeing mycelium after innoculating my jar? This is my first grow and I’m eager to see signs of success!
HI TONY,
I am following all the steps INOCULATING GRAIN FROM A SYRINGE. THE PROBLEM I AM FACING IS THE GRAIN SEEMS TO BE DRY (ALMOST DEHYDRATED) ONCE I HAVE PLACED THE JARS IN THE PRESSURE COOKER FOR 90 MINS.
NOT SURE WHAT I AM DOING WRONG AND WONDERING IF YOU HAVE ANY POINTERS FOR ME TO CHECK?
THANKS,
NICOLA
Hi tony,
You go into a lot of detail about contamination and creating the first generation spawn but when you take spawn from first generation and put in the other mason jars with the pressure cooked rye, how do you make that transfer? do you just pour some in? i feel like i am missing something. Thanks!