Growing Blog
The EASY Way To Make Mushroom Grain Spawn At Home
Making grain spawn at home doesn’t have to be that complicated.
If you can make spawn yourself, it allows you to grow basically any type of “cultivatable” mushroom you want.
Read on to find out how you can make your own grain spawn easily at home without needing too much space, or without the need to invest a bunch of money into building out your own lab.
You will still need some equipment (most notably a pressure cooker) but you won’t need an expensive laminar flow hood, which is usually the biggest barrier to entry for new growers.
Making grain spawn can be broken down into 6 easy steps.
- Hydrate Grain By Soaking
- Make Specialized Lids
- Simmer, Drain and Dry The Grain
- Sterilize
- Inoculate With Liquid Culture
- Colonize
Step 1: Hydrate The Grain
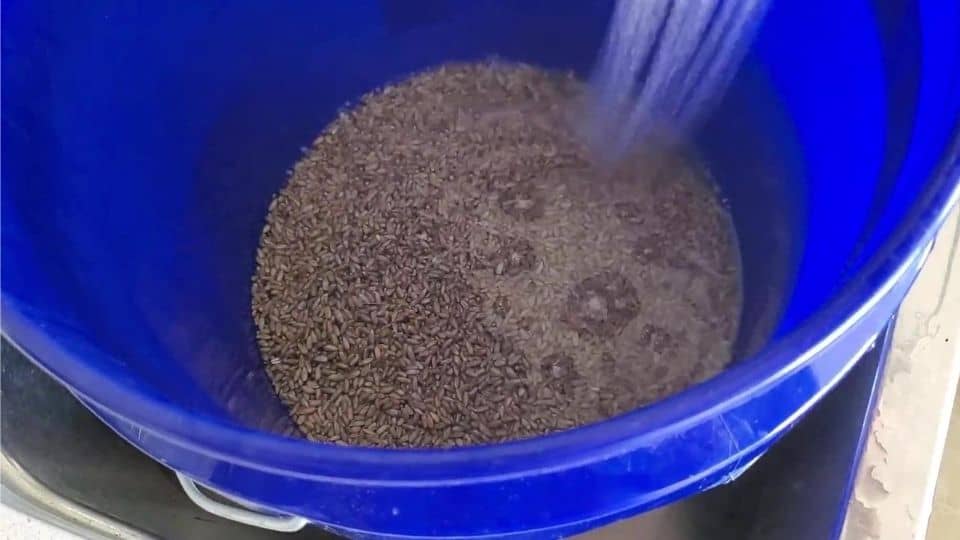
The first step to making grain spawn is to soak some cereal grain.
I like to use Organic Rye Berries, but you can also get away with wheat berries, or brown rice. Rye berries are definitely the best though, so that’s what I recommend if you can get them. (for other options, check out this guide to different types of grain spawn)
Soak the grain by simply placing it in a bucket or bowl, covering in water, and leaving it for 12 -24 hours. If you leave the grain for too long, it will eventually sprout- so try not to soak it for more than 24 hours or so.
Remember that the whole point of soaking is for the grain to absorb water and become hydrated. As the grain absorbs water, the volume is going to increase by a lot. Think of it like cooking rice on the stove- it doesn’t look like much, but once it’s cooked, it takes up the whole pot.
Depending on the grain you use, it should increase in volume between 2- 3 times.
For rye berries, use 1 cup of dry grain for every 3 cups of spawn required.
For example, if I am making 10-quart jars of spawn, I’ll just use an empty quart jar to measure out about 3 full jars of dry grain, and that will end up giving me about 10 jars of grain spawn once all is said and done.
Step 2: Making The Lids
While your grain is soaking, it’s a perfect time to make your specialized lids.
These lids are what will allow you to inoculate the sterilized grain WITHOUT the use of a laminar flow hood.
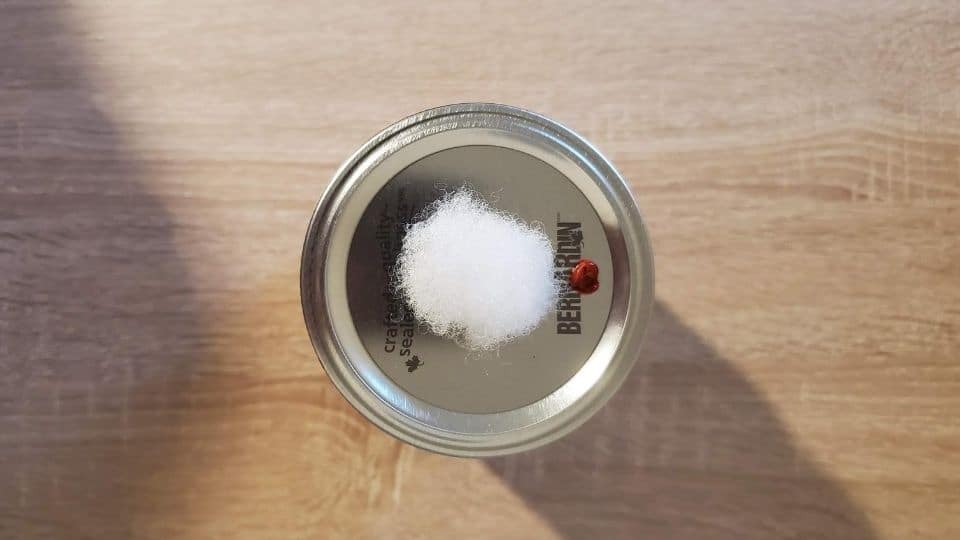
Start by drilling two holes in the top of the lid. One hole should be drilled right in the center that should be (about ¼” in diameter), and the other hole should be drilled closer to the edge of the lid, and should be 1/8″.
The smaller hole is what is used to create a “self healing injection port” and is the secret to being able to inject with your liquid culture syringe in open air. Once the smaller hole is drilled, cover it with a small dab of high temperature silicone sealant, and leave it overnight to dry.
High temperature silicone is typically used for gasket applications in high temperature environments.
It is important to get the high temperature stuff, because regular silicone will melt when put into a pressure cooker, but the red high temp stuff doesn’t melt.
This works because it allows you to inject directly into the jar without having to open the lid. As long as the needle is sterile, you can inject right through the silicone, and when you pull the needle out, the hole seals right back up again, without introducing outside air or other contaminants.
That is why it is called a “self healing injection port”.
The final step to making your jar lids is to pull through a small wad of pillow stuffing. This allows for the mycelium to breathe as it is working its way through the grain.
Step 3: Simmer, Drain and Dry
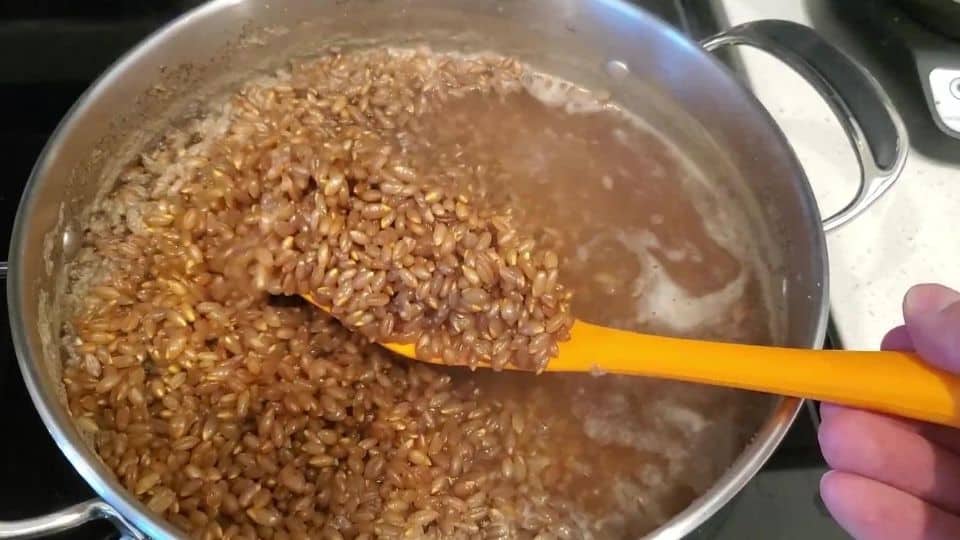
The next step is to simmer the grains on the stove. This will thoroughly hydrate the grains, and will soften them to make them easier for the mushroom mycelium to consume.
To do this, simply cook soaked grain on the stove for about 15 minutes. You don’t want to cook it too long, because eventually all the grain will crack and you’ll get some mushy grain spawn.
After the grains have simmered on a low boil, you’ll need to drain them off.
In a previous video, I showed you how to drain them on a big screen, which is still a really good way to do it, but honestly, there is no need when doing smaller batches.
You are better off to just drop them in the sink with the drain cover on. The grains will drain over an hour or so, after which you can go ahead and fill your jars.
Fill them about 2/3 – 3/4 full. This allows you to more easily shake your jars half way through colonization to speed up the process.
Step 4: Sterilize
Once your jars are filled, they need to be sterilized.
This kills off all the other nasty contaminants in the grain that will out-compete your mushroom culture. This is the point that most people get turned off because of the need for a pressure canner or pressure cooker.
But it really shouldn’t be.
Yes, unfortunately, grain spawn still does need to be sterilized- but you can get a pressure cooker relatively inexpensively that can last a long time.
For example, this presto pressure canner can hold up to ten jars, and will last a super long time if you take care of it… and can purchase for about $100.
You can also use it to sterilize fruiting blocks, and agar, and really is a gateway into mushroom growing that is totally worth the investment if you want to grow mushrooms at home.
It is loud though… so be prepared for that.
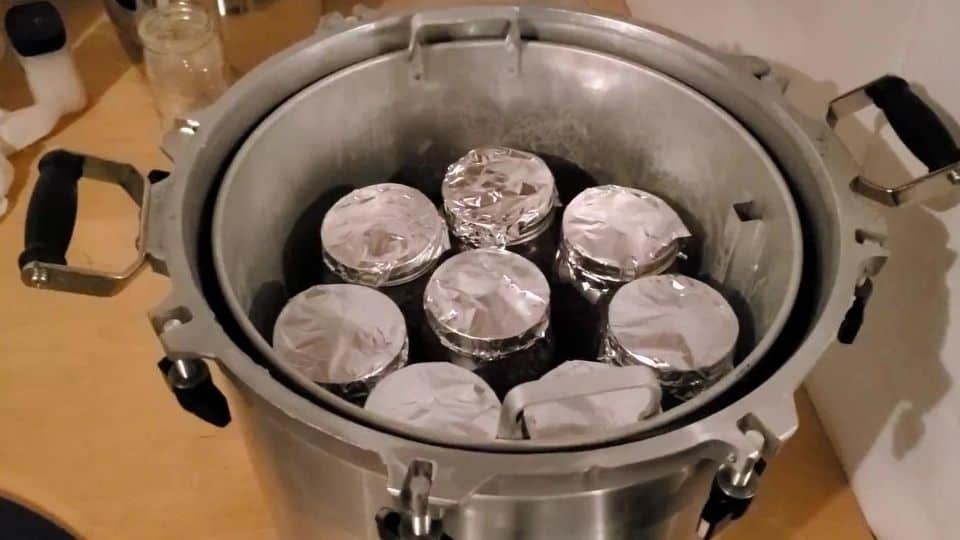
Once the jars are filled, cover the lids in tinfoil (to prevent water dripping into the lid) and then just pressure sterilize them for about 90 minutes at 15 psi.
Step 5: Inoculate
This is the fun part!
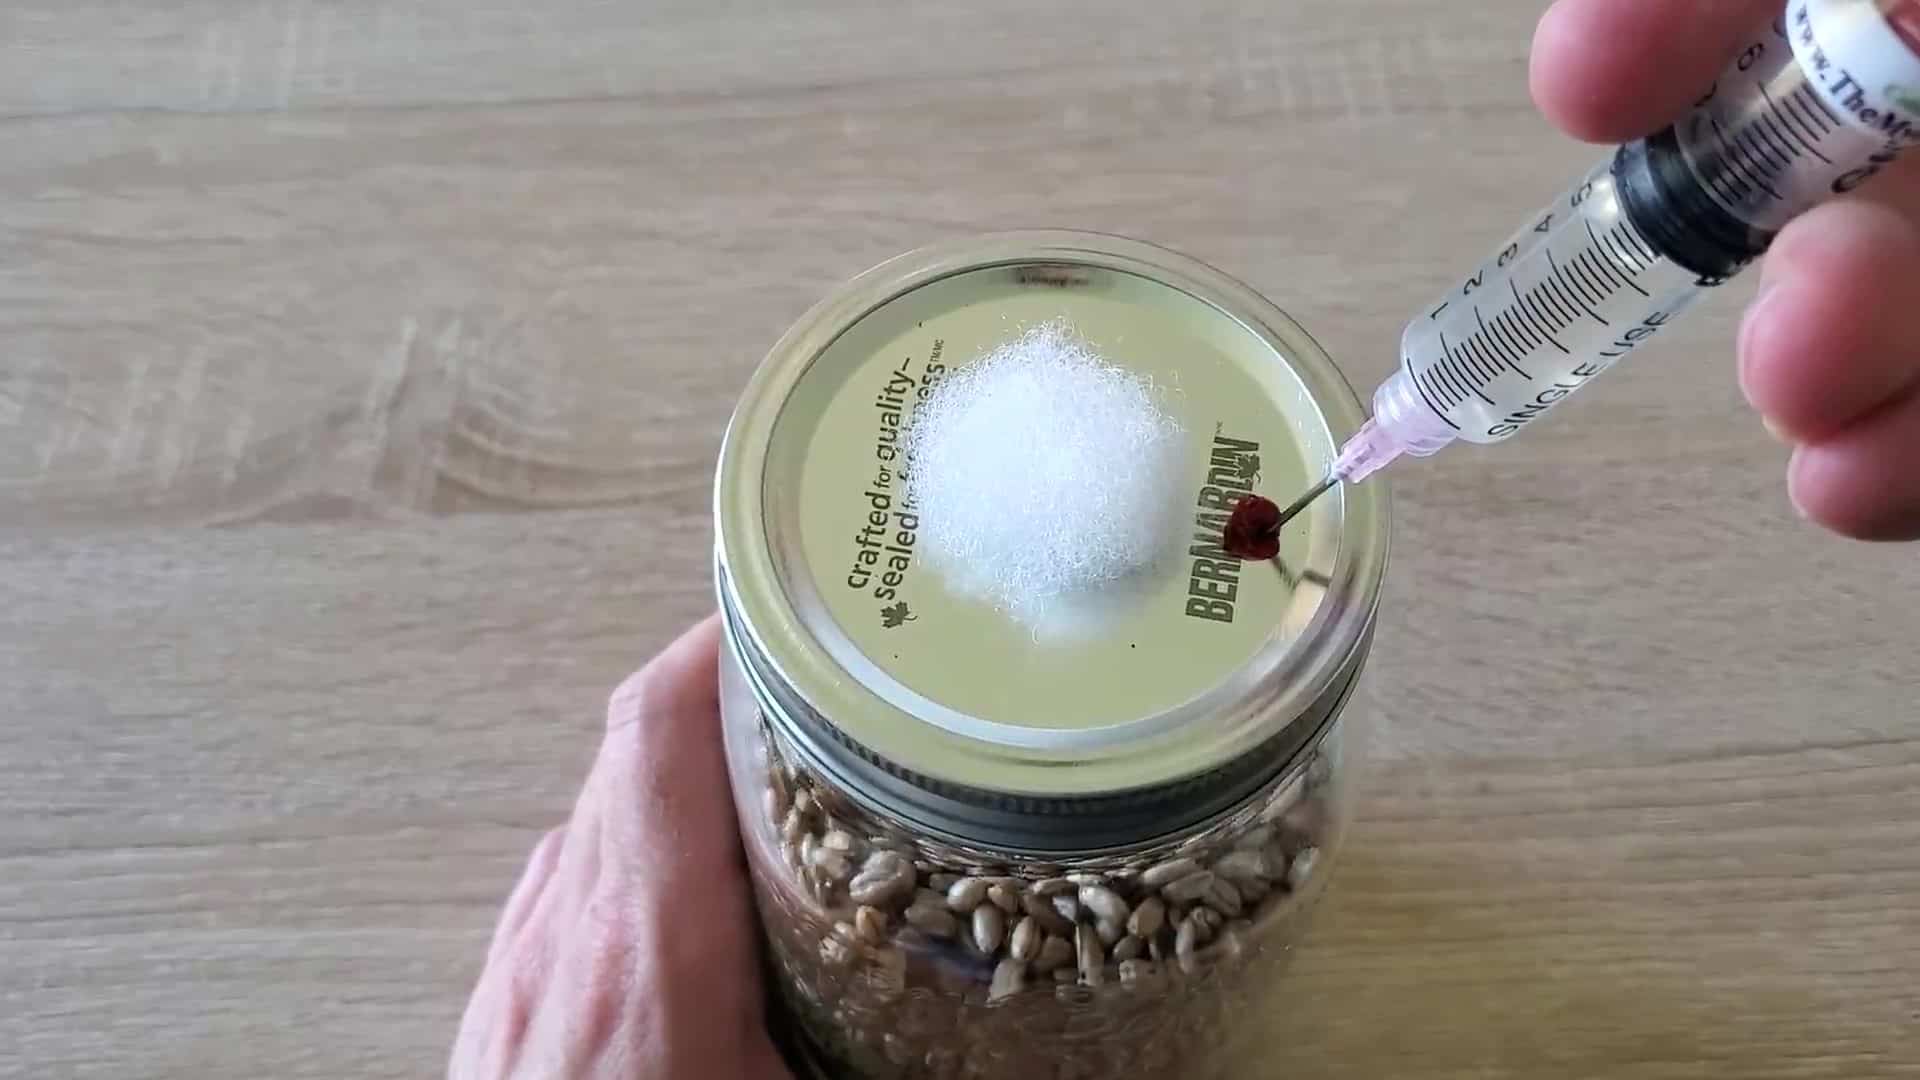
You can inoculate the jars directly through the “self healing injection port” (ie. small dab of silicone) without having to open the jars.
Since you aren’t opening the jars, you can do it in open air- no need for a laminar flow hood or still air box.
Liquid culture syringes can be found at various places online, and they are available in lots of different species. I have used Mycelium Emporium before with great success.
The liquid culture syringes will be sterile when you get them. Start by cleaning off the top of the jar lid with alcohol. Then, install the needle, and inject about 1 -2 CC of culture in each jar.
If you want to be extra sterile, take a lighter and flame sterilize the tip between every injection. I do not think this is 100% necessary, but it doesn’t hurt and is easy enough to do.
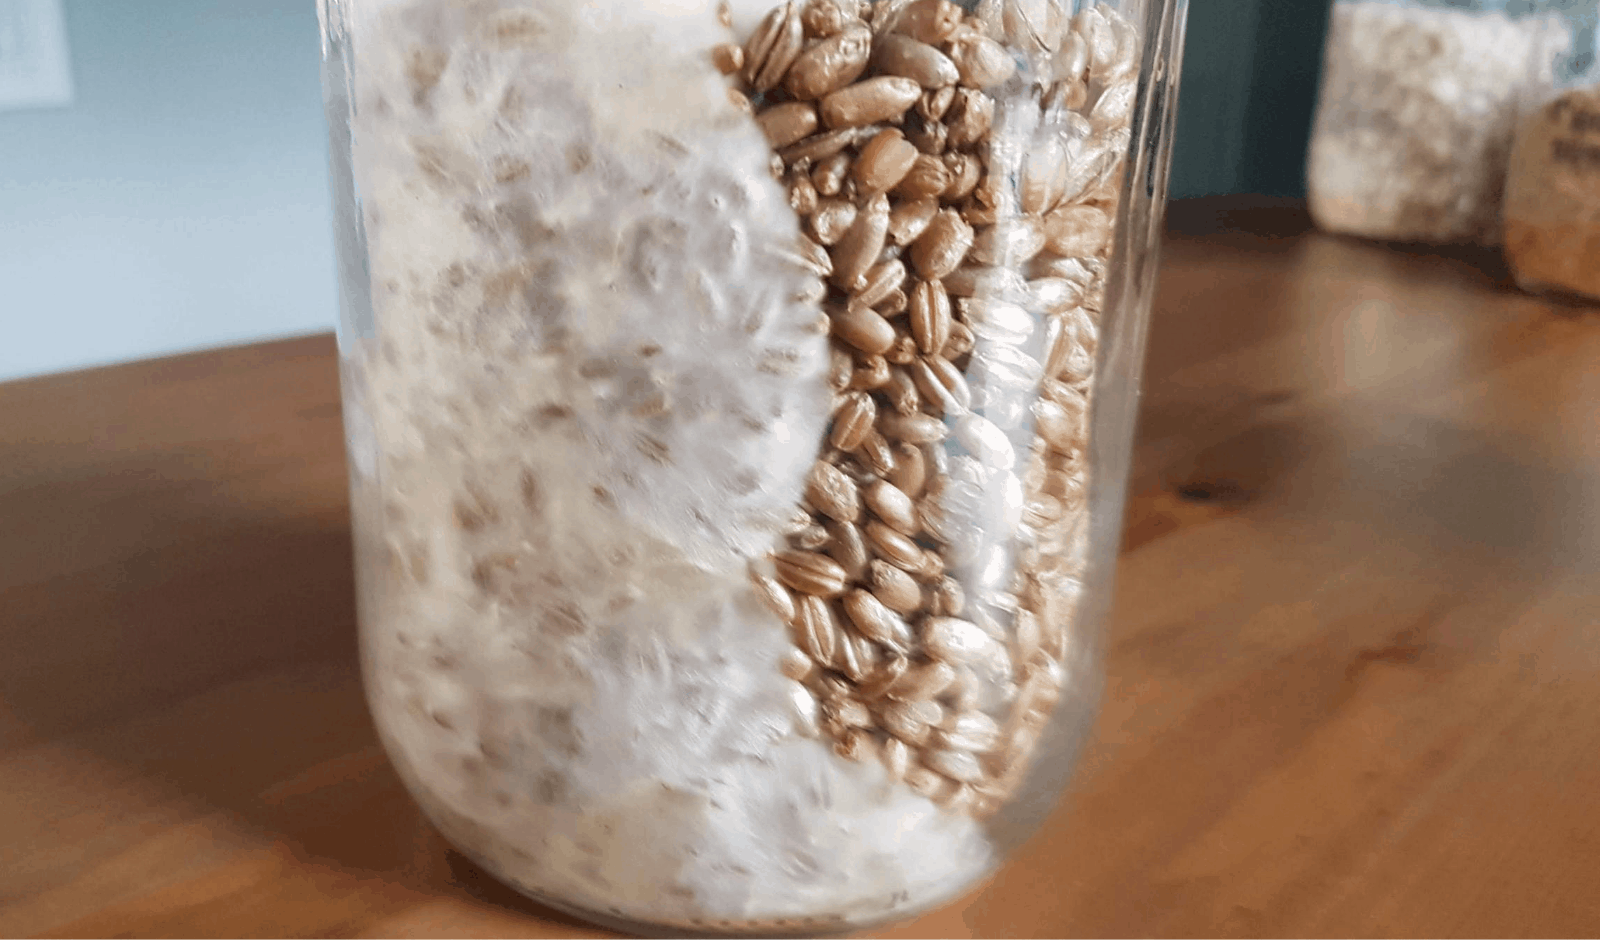
Step 6: Colonize
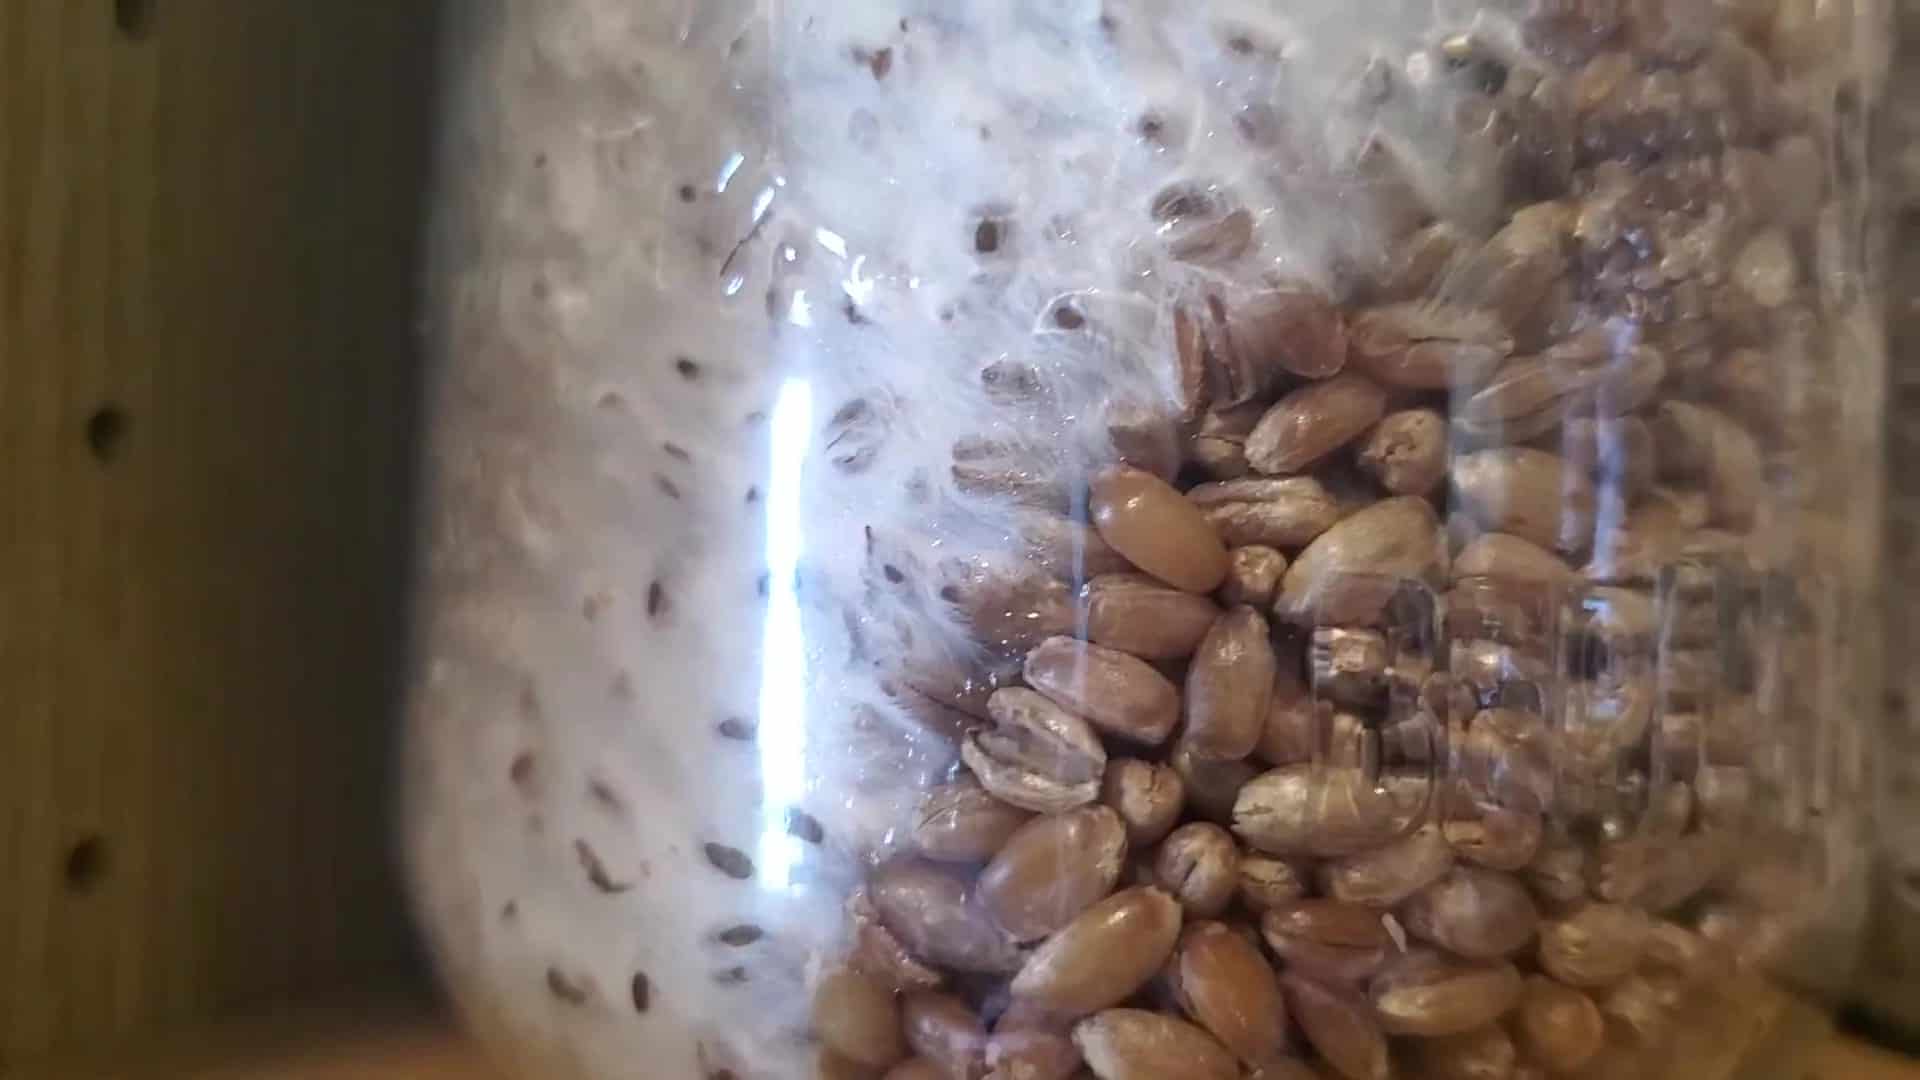
Once the jars are inoculated, you can just place them somewhere out of direct sunlight and allow the mycelium to do its thing.
Check them every once and a while to see how the mycelium is growing and make sure that no contamination is shows up in the form of bacteria or trichoderma mold. Bacteria will look like wet brown sludge, and trichoderma looks green. Either one of those things is a sign that you probably didn’t sterilize properly or your culture was bad.
If you want to speed up colonization, you can shake the jar once it is ⅓ colonized and spread out the inoculation points, but this isn’t 100% necessary.
After 1 -2 weeks, your jars will be completely colonized, and you have your own grain spawn!
Grain spawn can be used to inoculate fruiting blocks, to inoculate straw or wood chips in a bucket, to inoculate monotub, or even to make more grain spawn with a grain to grain transfer.
So that’s it!
Using a self healing injection port allows you to make grain spawn without a laminar flow hood, or other fancy equipment. You just need some grain, some jars, some high temperature silicon, and of course a cheap pressure cooker.

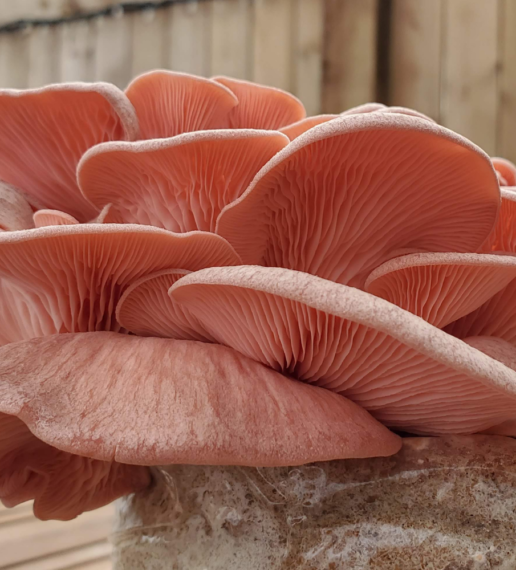
Growing Pink Oyster Mushrooms At Home (Easy Backyard Grow)
Pink Oysters mushrooms are one of the easiest species to grow. They are fast to colonize, produce a ton of fruits and aren’t at all afraid of less than perfect conditions. I just recently finished a fun backyard grow, and wanted to share how easy it is to produce a fresh bounty of one of
7 Tips for Beginner Mushroom Growers
New to growing mushrooms? If so, you may just be a little mystified – which is totally understandable. There is a ton of information to try and digest and make sense of. Terms like inoculation, agar transfers, laminar flow- what does all of this mean? And what of all this do I really need to know? I just want
This was a very clear presentation and easy to follow but how do you make the liquid culture
Liquid Culture Media for Wood Decomposers :
1,000 ml water
40 grams barley malt sugar
3–5 grams hardwood sawdust
2 grams yeast
1 gram calcium sulfate
Source :
Stamets, Paul. Growing Gourmet and Medicinal Mushrooms (p. 272). Potter/Ten Speed/Harmony/Rodale. Édition du Kindle.
You guys are the best!
Hi Tony! Your videos are excellent! In my country, PCs (with monomer or 15 PSI range) and autoclaves are very expensive for enthusiasts. Standard PC (PSI range 8-10) has low volume capacity and might not work for longer time of ‘sterilization’ to compensate low PSI (will run out of water). So, I was thinking in alternatives that I would like to share and hear your opinion: (1) bleach solution treatment (2.5% 10-15min) after overnight soaking of grains, (1b) rinse well grains with tap water, (2) cooking steps, (3) let the grains dry at room temp., (4) move the grains to the glove box in a plastic container and expose to UV-C germicide light (15-20min), and then transfer grains to the jars inside the glove box. Of course, I have not tried it YET, but I think this might work…
Rafael, the grain needs to be sterilized after it goes into the jar so that it creates a closed sterile environment. If you sterilize it before putting it in the jar, it will simply get recontaminated by ambient bacteria or mould spores as you transfer it to the jar. You’d probably have better results using your standard pressure cooker at 10PSI, and repeating the sterilization process a second time if your pc runs out of water.
I’ve recently seen an instapot that has a sterilize setting. Instapots won’t run dry as the pressure and temperature are precisely controlled. I can only fit 4 half litre Mason jars in my 8 litre instant pot and I’m not sure how much extra time might be adequate at 12 psi it runs at… I used 3 hours hoping for the best.
Did it worked?
I’ve just started growing mushrooms and did use my 8 quart instant pot for sterilizing the first 8 fruiting blocks, 6 liquid culture pints, and probably 10 pint grain spawns. It seems to have worked fine, and I have got mushrooms off the first block and the rest are getting nice mycelium development and no signs of stray bacteria, etc.
Standard PC will do, you don’t need 15PSI for sterilization
Hello, i belive i inject to mich culture in it 3, 5ml per Jar i was to quick and it was in 🙁 than i don’t do it with a pressure cooker ore silicon gel i open the lid but in a hopefully clean area with alcohol spray everywhere. Good i have 10ml left do it tomorrow with litte les ml 1-2ml like you say but how good is the chance that is doing fine. I will buy tomorrow the high temp silicon gel and make new jar for safety.
Add more sterilized grain in the most clean environment possible, quickly . It will gradually grab the new dryer grains and be less gooey and overpowering.
Please share how you make the liquid culture.
Hi Tony – thanks so much for making all of this information available and presenting it so accessibly! A question: I have synthetic filter discs (the size of a wide mouth jar lid) rather than polyfill. I’m wondering how to make this work with the self-healing injection port you describe.
Should I punch a hole in the filter disc the size of the injection port and fit the filter on top of the lid and caulk? Should I cut down the filter disc to the size of the fresh air exchange hole (if so, can I use regular scotch tape to keep it in place)? Or can I inject the syringe through the filter disc (in that case, can I put the filter disc under the metal lid rather than on top, so that the caulk doesn’t form a bump)? Or something else?
Thanks so much for any help you can provide.
Hi Tony, im Dominic from Ghana. Your videos are very clear and informative. I have an interest in growing mushrooms and i have watched your videos a number of times to get the skills of mushroom cultivation. However im about to start my first experiment and looks like i have a little challenge which i need your advice. Interestingly, im about to make my own agar plate which of course, ive learnt that from your video. My question is after you have acheived the solidified agar plate, how do you intend to get a specific mycelium specie, like the blue oyester, the shitake, the lions mane and the like for innoculating a grain to form a spawn. Thanks in advance.
Hey Mushroom Community,
I trying to figure out how long to wait between sterilization (pressure canning/cooking process) and inoculation. Is the grain supposed to cool down before inoculation? Is it supposed to be room temperature grain?
Hi Crystal, yes the grain needs to cool down to around 75 degrees F (24 degrees C) or less before you inoculate or you will risk killing the culture.
Room temp
Pressure cookers pasteurize, not sterilize. Sterilizing kills contams in their spore form, while pasteurizing kills them in their vegetative stage. This is why we soak grains to germinate contams so they can be killed in the PC. Spores survive the PC, which does NOT sterilize.
You should also rinse grains before doing this process
The spores aren’t even in the jar at that point anyway
Hey Tony, love the website and video. I have a question though. When you fill the jars with the grain, and sterilize them in the pressure cooker, is this done with the lids fully tightened on the jar?
Yes
No, or they will crack\explode. The lids are on but not tightened up. That’s why we pull a sheet of aluminum on them.
I’ve always snugged them before pressure cooking, and snugging them again afterward, and they are usually a little loose afterward. I’ve never had one crack.
how much inoculated spawn do you put in the substrate? it seems it’s possible to inject liquid culture directly into the mushroom bag?
How much water do you put in the pressure canner?
How long will the grain spawn last before it can no longer be used? (Similarly, how long does liquid culture last if refrigerated – say I only use part of a syringe?)