Growing Blog
Growing Mushrooms Using a Casing Layer

If you’ve ever seen pictures of a button-mushroom farm, you might be asking yourself … why does it look like all the mushrooms are growing out of the soil? Aren’t mushrooms supposed to grow from a substrate, different from the way that plants grow?
Many moons ago, button mushroom growers discovered that adding a layer of organic material on top of the compost could have a huge impact on yield. This layer of “soil” on top of the mushroom beds is referred to as a “casing layer” and has a number of important benefits.
In fact, some mushrooms won’t fruit at all without the application of a casing.
What is a casing layer?
In basic terms, a casing layer is a layer of moist material – either organic, inorganic, or a combination of the two – placed on top of a colonized substrate prior to fruiting. The main function of the casing layer is to aid with moisture retention in the substrate. Some casings also contain biological components, microorganisms that are necessary for fruitbody formation in some species.
Benefits of A Casing Layer
Colonized substrates exposed to the environment have a tendency to dry out rapidly if the humidity falls below a certain threshold. Even small fluctuations in humidity can prevent a fruiting block from achieving a full and even pinset.
A casing layer is able to provide a consistently humid environment at the interface of the substrate and the environment (where pins form), which can often make up for less than ideal environmental conditions. Once the mushrooms pin completely- and start to develop into more defined fruitbodies that protrude through the casing- they are less susceptible to fluctuations in humidity.
A a good casing is one that is excellent at holding moisture and slow to contaminate.
Downfalls of A Casing Layer
Casing layers do involve an extra step in the growing process, which means more time and resources to get the job done. Since not all mushrooms really benefit from a casing layer, using one can sometimes be counterproductive.
They can also be susceptible to contamination, especially in fruiting environments with limited amounts of fresh air. Typically, casing layers used for moisture retention should be either pasteurized or treated with hydrated lime in order to ward off contamination.
For certain species, such as Wine Caps (Stropharia rugosoannulata) the casing layer should only be lightly pasteurized- in order to retain the beneficial bacteria that is necessary to initiate fruiting.
Eventually, any casing layer will contaminate if it remains moist for long enough – but the grower should be able to get a number of flushes before this happens in most situations.
Types of Casing Layers for Home Growers
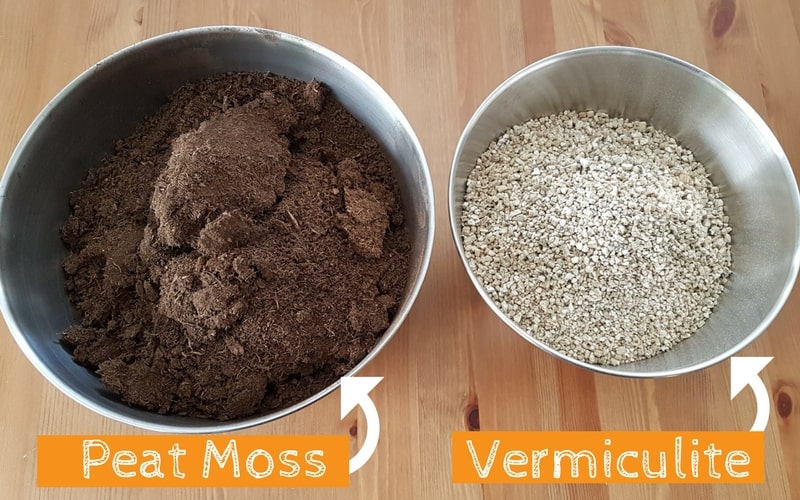
Many different materials can be used for a casing layer- including garden soil, sphagnum moss, coco coir- but the most commonly used is material for casing is peat moss. Peat moss is cheap and widely available, and is excellent at retaining moisture.
Another excellent casing material is vermiculite. Vermiculite is an inorganic material typically added to soil to help potted plants retain moisture. It’s also very resistant to contamination, meaning it can be added directly to the top of the substrate without any consideration for sterilization or pasteurization.
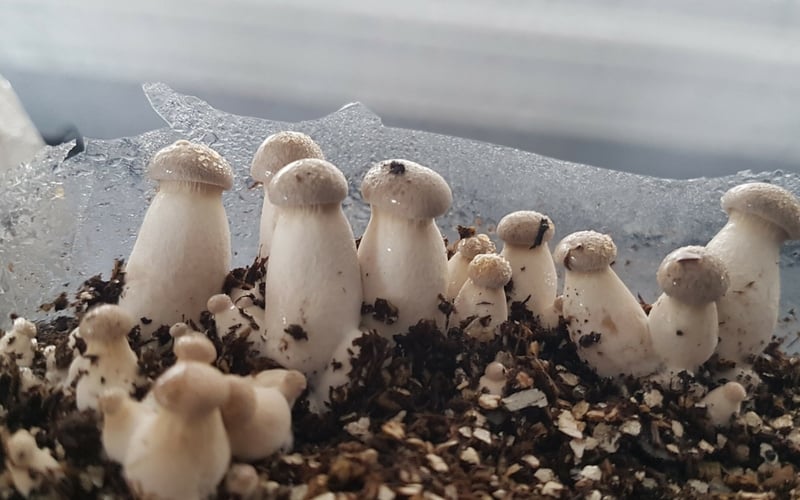
Making A Casing Layer for King Oyster Blocks
My personal favourite casing layer (which I use for King Oysters) is a 50-50 mixture of peat moss and vermiculite, moistened to “field capacity” and pasteurized for 30-40 minutes.
Field capacity is kind of hard to define- but it basically means that the mix has just the right amount of water in it- not too dry, but not completely drenched.
What You Need
- 5 gallon pail or large container
- Polypropylene bag
- Large pot or pressure cooker
- Temperature probe (optional)
- Vermiculite
- Peat moss
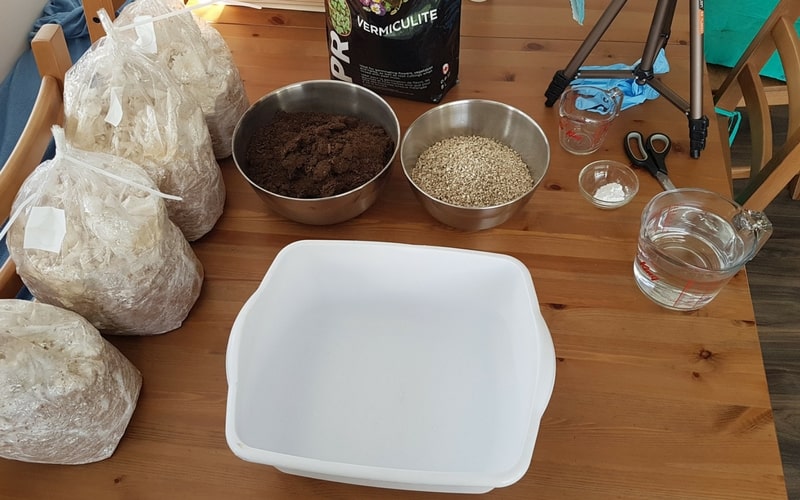
Step 1: Mix up Ingredients and Add Water
Add Peat Moss and Vermiculite in a large container, mixing bowl or 5 gallon pail. Try to use a 1:1 ratio (a 50/50 split), although it doesn’t have to be perfect.
Once mixed, start to add water until the casing layer has reached “field capacity.” A good way to test for this is to grab a handful of the mixture and squeeze it in your hand. If you are unable to squeeze out any water, it is too dry. If a light squeeze causes a stream of water to come out, it’s too wet.
You want to be able to squeeze the mixture as hard as you can, and only have a few steady drops come out.
Step 2: Pasteurize
There is not much nutrition in a 50-50 mix of peat moss and vermiculite, so full sterilization is not necessary. That being said, any casing layer is prone to some form of contamination, so it is generally a good idea to pasteurize it before applying to the top of the block.
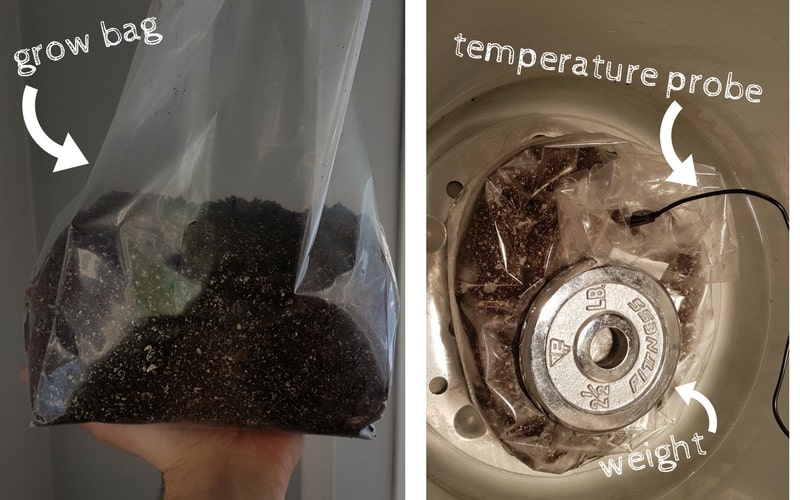
In order to pasteurize without changing the moisture content, I like to place it in a mushroom grow bag and simmer the mix in a pot for 45-60 minutes. You’ll need to put something heavy on top of the bag, as the casing has a tendency to float.
For best results, use a probe thermometer– the kind that is typically used for testing the temperature of roasts. This will help you determine when the mixture reaches pasteurization temperature, and eliminates the guess work. You want to see the center of the mixture reach a temperature of between 65-80 deg C, and stay there for about 30 minutes.
Step 3: Cool and Apply
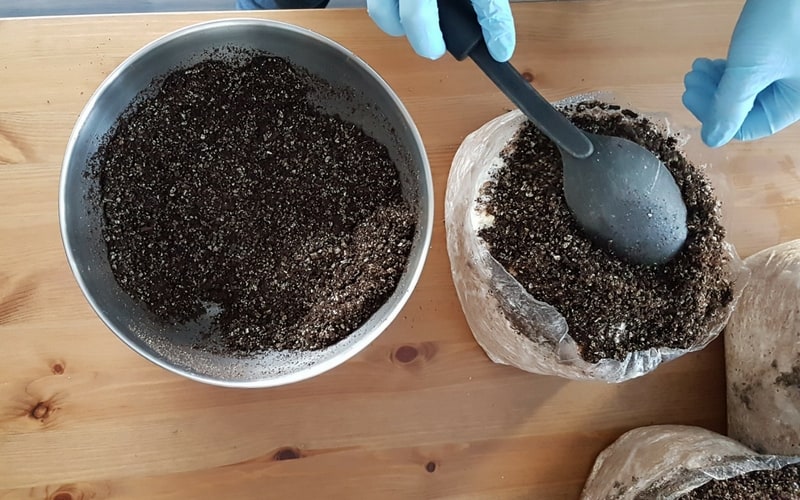
Once the mixture is sufficiently pasteurized, pull it out of the pot, and allow it to cool until it returns to room temperature. If you add hot casing directly to the block, there’s a good chance that you’ll kill the mycelium, preventing it from fruiting.
Add casing about ½”-1” thick across the top of the block. There is no need to be super sterile during this process- but it always helps to wash your hands well. Even better, wear nitrile gloves.
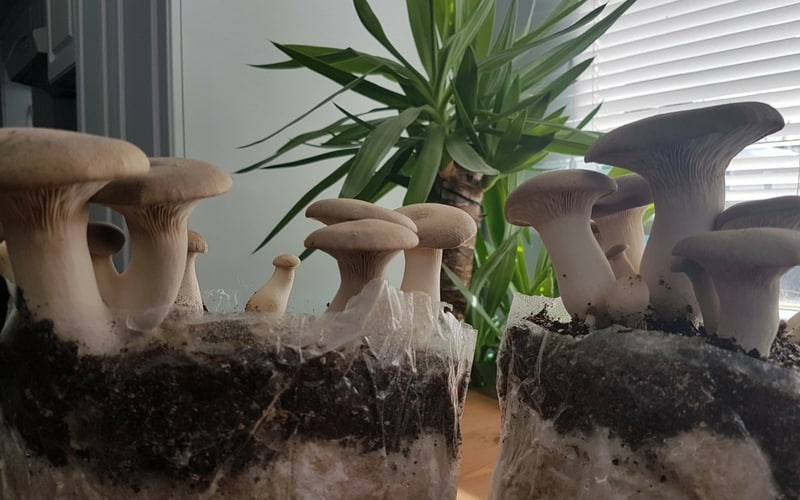
Step 4: Place in Fruiting Chamber and Wait
Once the casing is applied, you can simply place the newly cased blocks in the fruiting chamber and wait. The humidity doesn’t have to be as high as it would if there was no casing, but be sure that the casing layer doesn’t dry out completely.
After 4-7 days, you should start to see pins coming through the casing. At this time, you want to make sure that the humidity is dialed in as the mushrooms continue to grow. If it gets too dry at this point, the pins will abort. In the winter where I live, this can happen pretty quick!
Step 5: Harvest and Harvest Again
Once the King’s have grown to a reasonable size, it’s time to harvest. Simply cut the mushrooms off at the base of the stem, as close to the top of the block as you can. You will undoubtedly have some excess casing stuck to the mushroom, but it’s easy enough to just brush it off.
After the initial harvest, you have a couple of options to get a second flush:
The first option is to simply place the block right back in the fruiting chamber and wait for new pins to form. This usually takes another 4-5 days. The remaining mushroom “stumps” won’t generally cause any issues, and typically just get covered in fresh mycelium. There is the possibility however, for the freshly cut stems to be excellent opportunities for contamination to take hold, although it is typically not an issue if only doing 2 flushes.
The second option is to remove the entire casing, scrape the top of the block with a fork, and re-apply a brand new casing layer. New pins should form in about a week or so. The scraping freshens up the top of the block, and might allow for a higher yielding second flush, since there are more opportunities for new pins to form.
I am not convinced that this is true, although it certainly sounds reasonable. The downside is the extra work involved in making a new casing layer. You could avoid this by simply re-applying the original casing layer, but again this may be more work than it’s worth.
Other Mushrooms that Benefit from a Casing Layer
It’s not only kings that seem to benefit from a casing layer.
Piopinno (also known as Black Poplar, Reishi, Nameko, and the Paddy Straw Mushroom can all benefit from the addition of a casing layer. Again, this is typically because of the moisture retaining capabilities of the casing layer.
Some mushrooms will not fruit at all if a casing layer is not applied. This includes Agaricus bitorquis / brunnescens (button mushrooms), Agaricus blazei, Shaggy Mane, and the King Strapharia (wine caps). This is because these species are dependent upon certain microorganisms- namely bacteria- in order to form a fruitbody.
For these species, casing layers should not be pasteurized, since doing so would kill off the necessary flora required for fruiting.
Special techniques have been developed to optimize for certain microorganisms which aid in fruiting, but that is beyond the scope of this post.
Additives for Casing Layers
Peat moss is naturally acidic, so growers often add calcium carbonate to the mixture in order to buffer the pH. This helps to mitigate the chances of contaminates flourishing in the moist casing layer. A typical ratio of calcium carbonate would be 2-3% calcium carbonate by wet weight of the casing layer.
Many home growers will use hydrated lime (calcium hydroxide) as a way to buffer the casing layer. Calcium hydroxide is not fun to work with, and can cause serious bodily harm if not used properly, so I tend to avoid it.
There seems to be no real benefit for the small scale home grower looking for 1-2 flushes to use a buffer, so the extra effort is not worth it in my opinion.

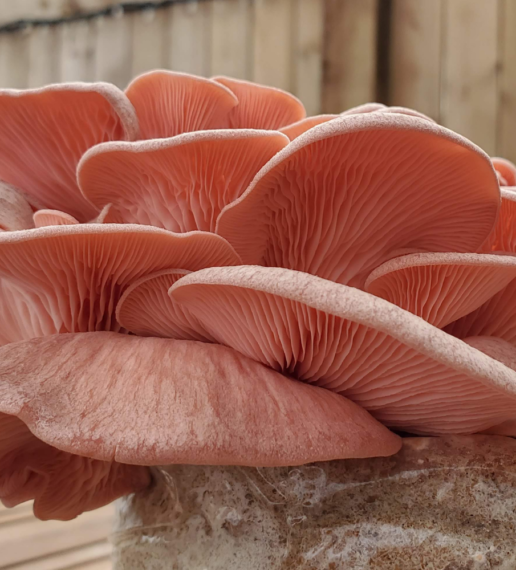
Growing Pink Oyster Mushrooms At Home (Easy Backyard Grow)
Pink Oysters mushrooms are one of the easiest species to grow. They are fast to colonize, produce a ton of fruits and aren’t at all afraid of less than perfect conditions. I just recently finished a fun backyard grow, and wanted to share how easy it is to produce a fresh bounty of one of
7 Tips for Beginner Mushroom Growers
New to growing mushrooms? If so, you may just be a little mystified – which is totally understandable. There is a ton of information to try and digest and make sense of. Terms like inoculation, agar transfers, laminar flow- what does all of this mean? And what of all this do I really need to know? I just want
I have a lot of lovely sheet moss growing in my unsprayed natural forest land. I would like to use that as a casing for oyster mushrooms, with an aged chicken manure/straw/ etc compost (sterilized preferably by cold method) that my chickens make for me. What do you think? Any input is welcome. TYIA
Hey Mobius! Sounds like a great source of peat moss! Oysters are primary decomposers, meaning they grow on wood/straw ect. and do not need composted substrate. If you have a composted substrate you may be better off trying to grow an agaricus species (buttons) or shaggy mane. The peat will work great as a casing for King Oysters though.
Would you recommend a casing layer for King Oysters grown on a straw substrate? Thanks for your “learn” button!
Hey Dennis! I have used that when growing outside, just put a casing layer of peat moss on top of king oyster “straw discs” it worked really well. Again, it depends on your conditions, if you have really good humidity control a casing layer won’t be needed.
Hi I m trying to grown king oyster on hardwood sawdust it’s been 15 days since I inoculate them they colonize well in the beggining day 12 without full colazision I discover pin heads in the plastic bag mostly on sides not on top today day 15 I wonder what should I do now should I open the bags or wait longer for full colonize I really need help here
Thank you
If they have not fully colonized, I would wait to fruit. How large are the fruits that already formed? You could always wait a few more days until full colonization, pick off the old fruits, case, and place in fruiting conditions. If colonization has completely stalled out, you may have a contamination problem in the substrate.
They are actually very small and too many of them I actually did open the whole bag removed the plastic totally it’s been 3 days more pin heads appier they are growing but all are very small I have another bag still on incubation inoculation 1th august not able to find peatmoss but I have vermiculite can I use it as casing?
Do you sell spawn? Ooh well I live in the Philippines I don’t think able to ship here 🙂
Thanks for your help I really badly want to grow king oyster and shiitake working on it
Yes, vermiculite will work as a casing layer. Just hydrate it. Also, if you remove the whole bag the King Oysters will fruit all over. Too many pins mean not many actual fruits will form. I call it “over pinning” although there might be a more technical term. Yes, we sell spawn, but sorry, do not ship to the Philippines. Keep at it!
HI Mr Tony I m here again my king oyster growing attempt failed going to do it again may need bit of help a few questions I m using hardwood sawdust not pellets is that ok? I am not able to find any wheat or soy bran over here can I use rice bran instead? do I need to do fermentation after mixing with lime and bran withsawdust or can make the bags immediately right after mixing them I will really appreciate your help
Thank You
Hey Hakan! Yup, sawdust will work great, try to find stuff that is a mix of coarseness, not just the fines. Mix some chips in there if you can. And yes, rice bran can work well instead of wheat or oat bran no problem! Not sure what you mean by fermentation, are you sterilizing with heat? If so, the bags are ready as soon as they cool down to room temp.
Hello Tony,
Would lawn turf work (as in the rolls of turf you can purchase) as a casing layer for wine caps?
Cheers
Hey Mark! Not really sure… definitely possible but I can’t say for sure. Best to just use wood chips- they are likely cheaper as well! You can even get big bags of wood chips (make sure they are hardwood) at the pet store for cheap…
Casing blocks with sterilized damp vermiculite works best for me, it doesn’t contaminate very easily. Instead of mixing Peat and lime and all that just use vermiculite. It’s excellent at holding moisture and is contam resistant.
Hi! First, congrats and thanks for all the amazing information you post. I work in an Agaricus farm in Chile, and two months ago I got some pasteurized compost (wheat straw, chicken manure, ammonia sulfate, urea), I got it just after it was taken out from phase II tunnels. I’ve the compost in a plastic bag, closed with some duct tape. What do you think if I re-pasteurize it? It’s only for experimenting, not a big deal if I fuck it up. The formula is completely perfect, that’s why I don’t want to loose it.
Thanks a lot
Casing type
Mushroom casing methods
Does vermi compost can be mixed for soil while casing
Hallo Tonny, thanks very much for your useful advice ! it is just great to learn from an experienced person. I tried also to do my own Oyster spawns from the grains after watching you do it at home . and the response was great. This has helped me cut down the cost of buying the spawns.
I ma just wondering if I can try the same ( taking a piece of flesh from fresh button mushroom or scrapping the gills and tries to grow the spawns in the grain. Any experience on that?
Hi Tony, great post. I live in Nigeria and there is no way I can get peat moss. I plan on growing some Agaricus bitorquis and Agaricus subfrustecens. Can I use coco coir and perlite as a casing or coco coir and soil? Will I need to pasteurize it or just add it on?
I look forward to your reply.
The peatmoss and vermiculite is just for casing or layer 2. What about the layer 1?
Hi Tony, excellent article. I have been following your page for a while. I live in Lagos Nigeria and I am interested in growing Agaricus bitorquis. I have already gathered fresh horse manure, rice straw and I have gypsum at home. I will be grateful if I can have the correct recipe for the compost. I also have cocopeat for the casing layer.
Any ideas, information or tips on the proper composting for the mushrooms to grow will be appreciated.
I look forward to your response.