Growing Blog
Grower Profile: Bottle Farm Mastery at Mycopia

I knew I was in for a treat as soon as I pulled into the parking lot of Mycopia Mushrooms, a venerable oasis of fungi located in California’s bay area.
For a mushroom grower like myself, there is no greater thrill than the anticipation of touring a mushroom farm – especially one so impressive as Mycopia.
But I was even more assured that it was going to be good day after meeting David Law, CEO of Gourmet Mushrooms, Inc. (the company that owns the Mycopia brand), and all-around fun-guy.
Although David has been expertly growing mushrooms in California for over 40 years, he still seems to radiate with enthusiasm for the everything fungal.
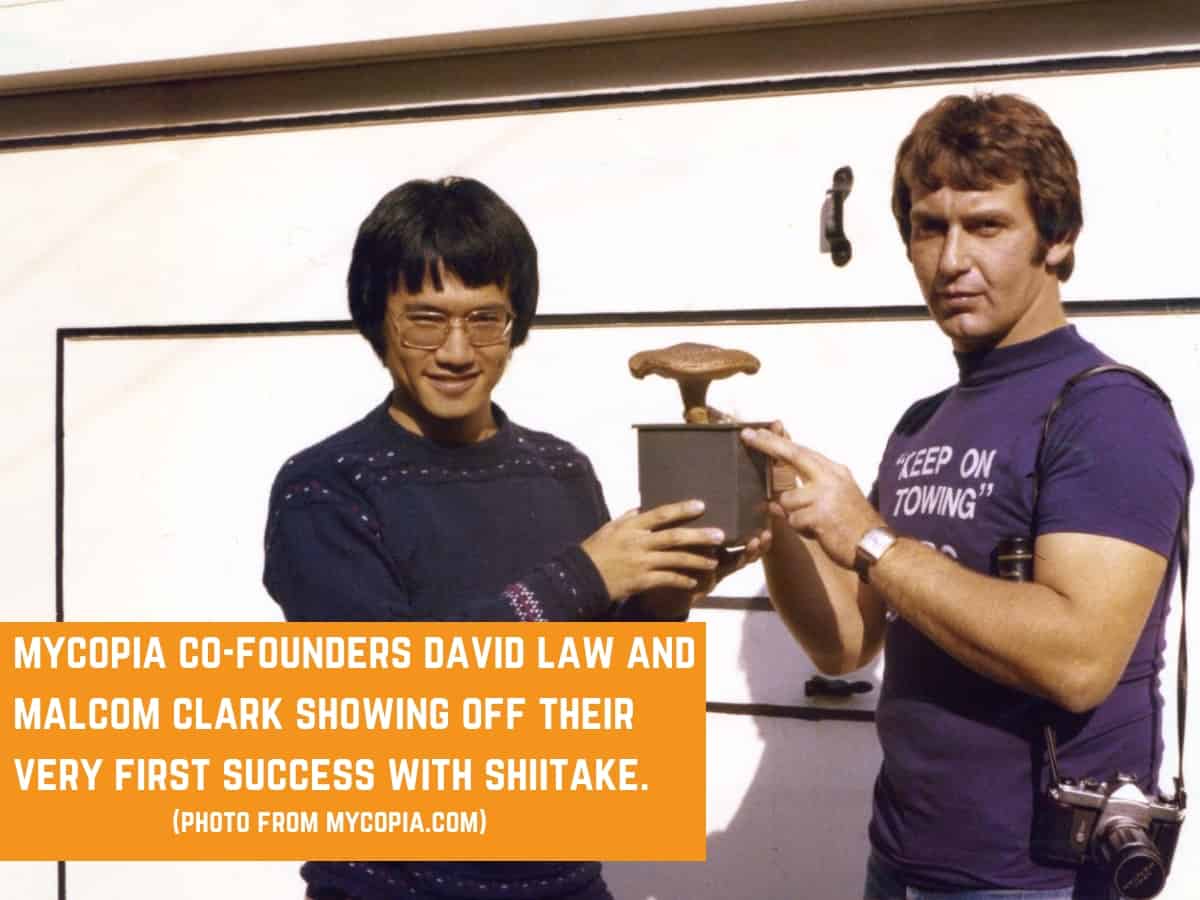
David Law is legendary in the world of mushroom cultivation.
His farm started from rather humble beginnings- by converting an abandoned chicken farm into a “wall-culture” Shiitake Operation and selling to local restaurants.
But over the years, a mindset of continuous improvement and innovation has turned Mycopia into an extremely productive and highly mechanized operation, producing seven varieties of specialty mushrooms at a rate of over 20, 000 lbs per week.
That’s a lot of mushrooms!
Even at these volumes, there is a strong emphasis on “quality over quantity,” which is evident throughout every step of the operation.
Growing Mushrooms In Bottles
So how does Mycopia manage to pump out such massive amounts of high quality mushrooms on a relatively small footprint?
The answer is growing mushrooms in bottles, a method of cultivation implemented at Mycopia in 2001.
You see, many farms today choose to use mushroom grow bags as their main method of cultivation. It’s a perfectly fine way to grow mushrooms, especially for smaller scale operations. It also doesn’t require much capital in order to get started.
But bag cultivation is extremely labor intensive. There is limited opportunity for mechanization, and it requires lots of manual handling.
Anyone who grows mushrooms in bags knows it can be a labor of love!
Bottles, on the other hand, are perfectly suited for mechanization. Many steps in the process- from packing the bottles with substrate to inoculating with grain spawn- can be done by machine, making for a more efficient (and profitable) operation
Bottle farming is also seen as a much more environmentally friendly way to grow mushrooms. Made from Polypropylene, the bottles can be reused over and over for many years before needing to be replaced.
This is in contrast to bags, which are one-time use. Any bag operation quickly produces mountains of plastic waste.
Although the start-up costs of bottle farms are much higher, the long-term benefits- both environmental and operational– need to be considered.
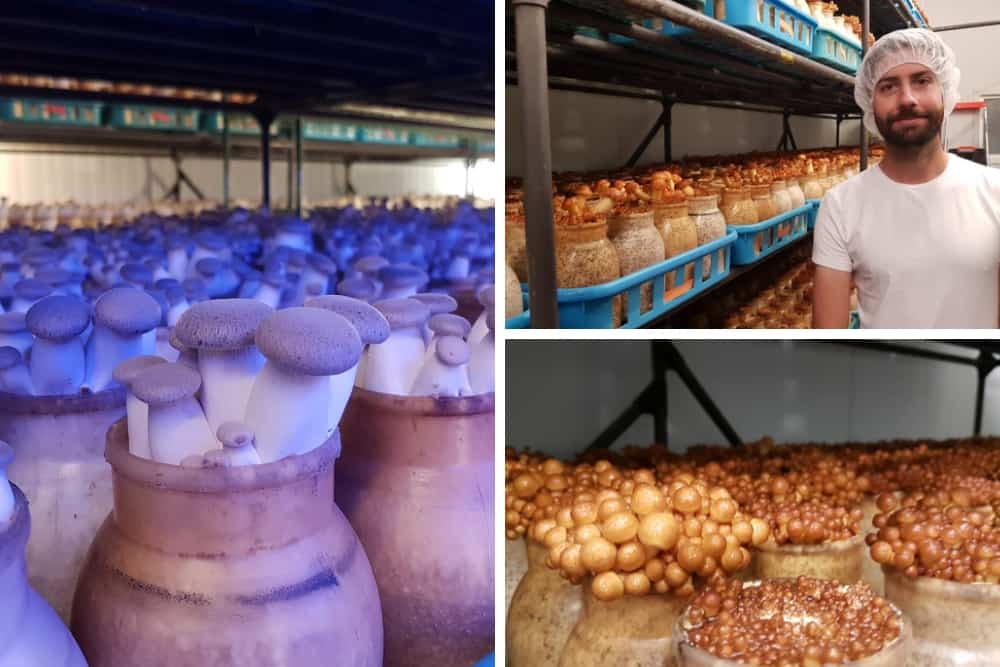
7 Species of Mushroom
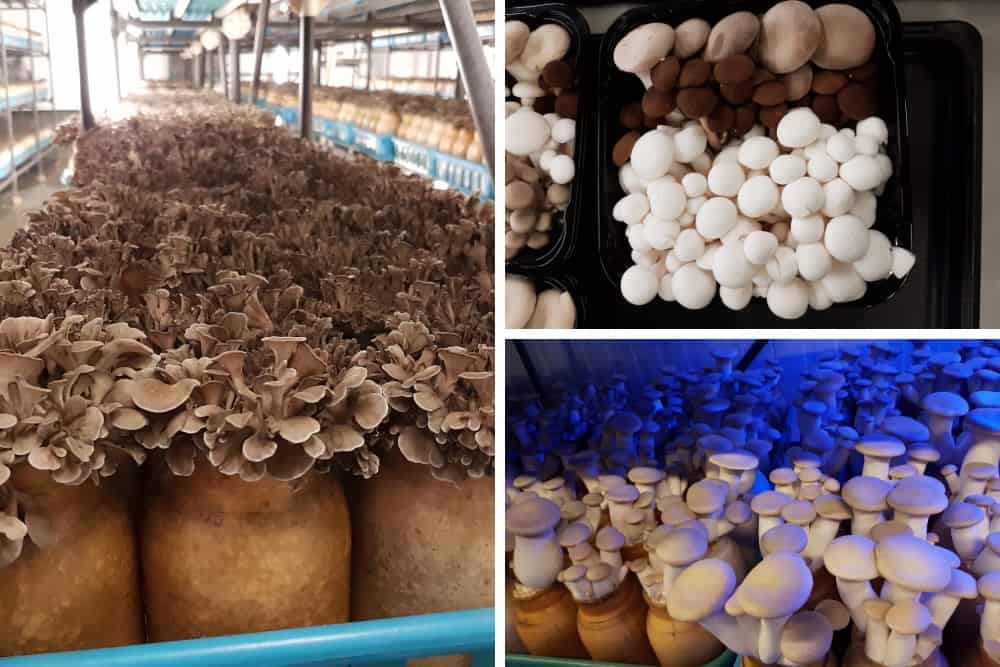
Mycopia grows 7 different types of mushrooms, including Shimeji (both white and brown), Nebrodini Bianca, King Oyster, Maitake, Piopinni and Nameko.
When David told me this, he admitted that they are “a little bit crazy” for trying to grow so many varieties at this scale.
Crazy or not- the operation runs so clean and smooth, you’d never guess that it could be difficult to manage.
But growing so many species does have challenges.
King Oyster
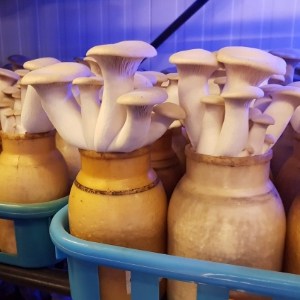
Also known as King Trumpets or Pleurotus eryngii, this mushroom is one of the most popular species grown at Mycopia.
Nebrodini Bianco
Mycopia is the only farm currently cultivating this close cousin of the King Oyster, also known as the “White Elf Mushroom.”
Nameko
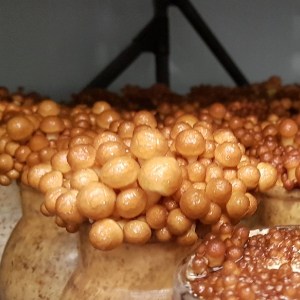
A delicious gourmet mushroom with a viscid layer on the cap, making it perfect for thickening soups.
Velvet Pioppini
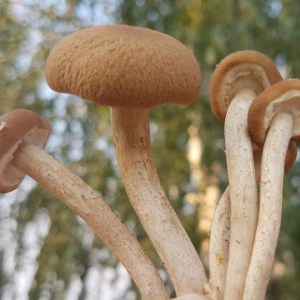
Also known as the Black Poplar Mushroom (Agrocybe aergerita), this mushroom is a chef favourite and can be added to any meal.
Brown Shimeji
Mild flavored and a nice crunchy texture after cooking. A popular and versatile mushroom that can be added to many dishes.
White Shimeji
A specially developed “albino” version of Shimeji, also versatile and can be added to many dishes.
Maitake
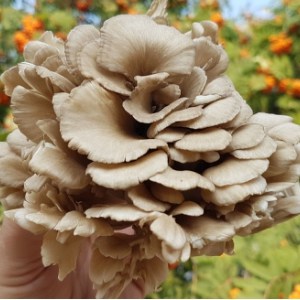
A FreshCap favorite, Maitake is both a culinary delight and a medicinal powerhouse. The bottle grown form of Maitake is usually quite a bit smaller than the bag form.
Using Grain Spawn
Quite often bottle farm operations will use liquid culture as an inoculum. This allows for an easy and sterile addition of mushroom culture to the substrate.
But with so many species, you’d need many large inoculation machines for a liquid culture to be an effective process. At Mycopia, they use grain spawn for inoculation, and have a special machine that is able to process four bottles at a time, all day long.
Another challenge of growing multiple species is the need for a variety of different grow rooms. Not all mushrooms have the same requirements for temperature and humidity, and maintaining so many rooms can be tricky.
Not only that, but all these mushrooms grow at different rates, so Mycopia needs to expertly time production cycles to ensure a constant supply of mushrooms.
Luckily, they’ve been doing it for a long time- and have their systems dials right in.
Growing mushrooms in bottles produce smaller fruiting bodies than their bag-grown equivalents. This is because of a relatively small amount of substrate in the bottles. That being said, the bottle grown mushrooms are also more uniform in shape and size, and are easier to harvest.
Bottle operations are also typically limited to one flush. Multiple flushes introduce the possibility of contamination and result in diminishing returns.
A Story Of 4 Machines
This efficiency at the farm is primarily achieved through the use of 4 specially designed machines, each either completely replacing or drastically improving the requirement for manual labor.
The Bottle Filler
The main job of this machine is to fill the bottles with substrate. It also bores a small cavity in the center of the substrate to make room for grain spawn.
This machine is directly loaded by a conveyor belt that carries substrate from a large hopper into the machine.
The Inoculation Machine
This machine adds grain spawn to the substrate in a sterile environment, and prepares them for colonization. The lids are removed, the jars are spawned, and the lid is replaced… 4 at a time!
The Scraping Machine
This machine is used to remove the top layer of mycelium from the top of the substrate which helps initiate fruiting. After this process, otherwise known as “Kinkaki”, the bottles are kept upside down for a day or so to allow for the correct amount of moisture at the mouth of the bottle.
The Bottle Cleaning Machine
As a final step, this machine is used to remove the spent substrate from the bottles after harvesting so that they can be cleaned and reused. The spent substrate can then be sold and used for other agricultural purposes.
Mycopia Mushrooms Cultivation Process
Let’s take a closer look at how these machines fit into the overall process flow at Mycopia Mushrooms.
STEP 1: MIXING SUBSTRATE
It all starts with the substrate.
They use hardwood sawdust as a base material, but include a variety of different agricultural materials including corn cobs, peat moss, and more.
Mycopia uses a unique mix of substrate materials for each species that they grow, and they are always testing and playing around with different experiments. David believes that constant testing and good record keeping is key to continuous improvement.
In fact, David has a long history of recorded data. He can look up yields across the entire operation, for individual species, individual strains, and different substrate combinations going back 10 years.
It’s this attention to detail and data that allows them to continue pushing the limits of both efficiency and quality.
The substrate is mixed in a large container, then moved by conveyor belts to the bottle filling machine.
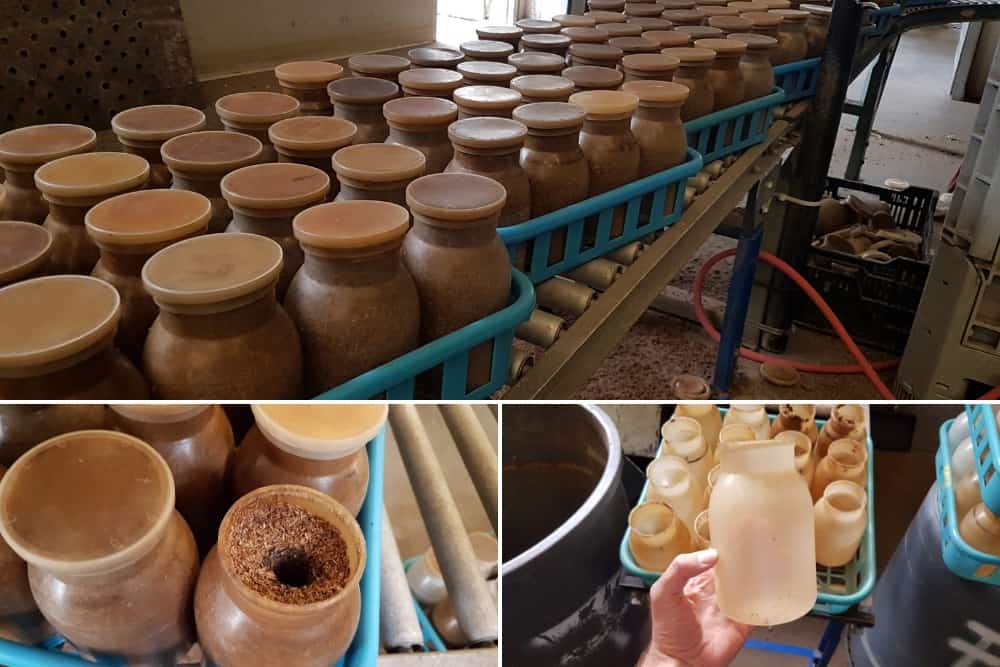
STEP 2: FILLING BOTTLES
The bottle filling machine accepts the substrate, and automatically fills the bottles 16 at a time. The substrate is also slightly compacted by a plunger.
The bottles move along the machine in a tray, with minimal input from the operator.
The machine also bores a small hole through the center of the substrate. This is done to allow for a space to inoculate the bottles with grain spawn.
Without the hole, the bottles would have to be “top-spawned” and would be much slower to fully colonize, if at all.
Once the substrate is ready to go, the bottles are fitted with a lid, and the outside is quickly cleaned of extra debris with an air hose.
The lids for the mushroom growing bottles are specially designed with filters to allow for air flow to the substrate while preventing contamination.
This is a similar concept to drilling a hole in the top of mason jars, and stuffing with poly-fill… albeit much more effective. These lids can be re-used for many years without needing to replace the filter.
From there, the bottles are stacked together and sent to the autoclave.
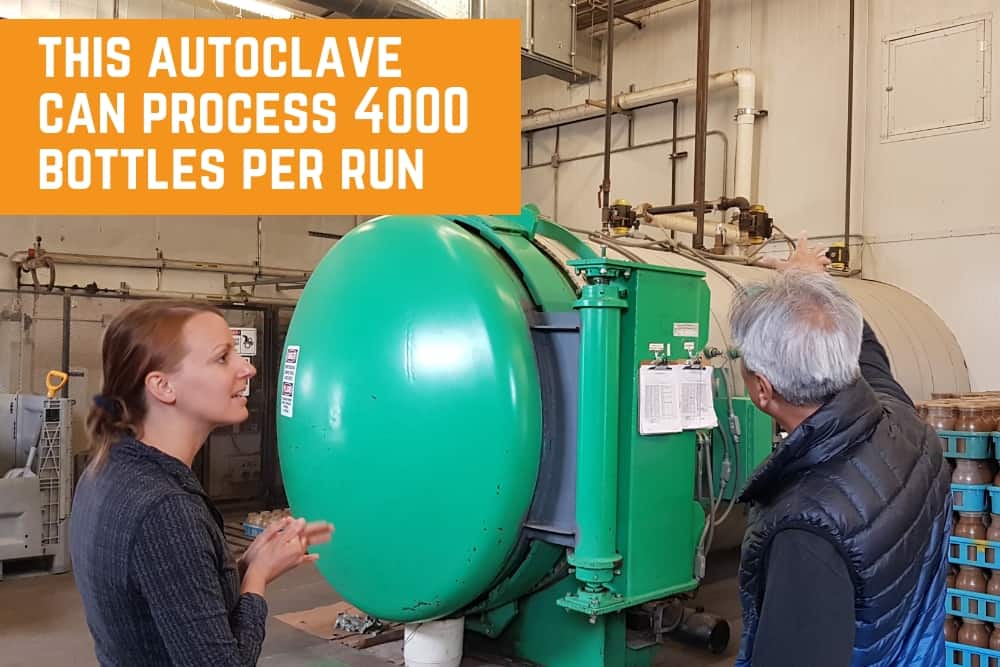
STEP 3: STERILIZE AND INOCULATE
Mycopia has a large double-ended autoclave, able to sterilize 4000 bottles at a time. The sterilization cycle is done at 15 PSI and takes about half a day for each cycle.
The autoclave is fitted with two doors at opposing ends, essentially splitting the operation into a “dirty” area before the bottles are sterilized, and a “clean” area after the bottles are sterilized.
On the dirty side, the substrate is mixed and the bottles are filled, and there is no need for sterile procedure.
However, once sterilization is complete, the bottles are unloaded directly into a clean room, where they can be inoculated by another machine.
To do this, the inoculation machine holds four master grain jars upside down, feeding the freshly sterilized substrate-filled bottles underneath, and dropping just the right amount of spawn into each one.
Watching this is a thing of beauty.
Inoculating bottles at this rate would be almost impossible to do without a machine. You would need a whole team of people specially trained in sterile procedures in order to even come close.

STEP 4: COLONIZE
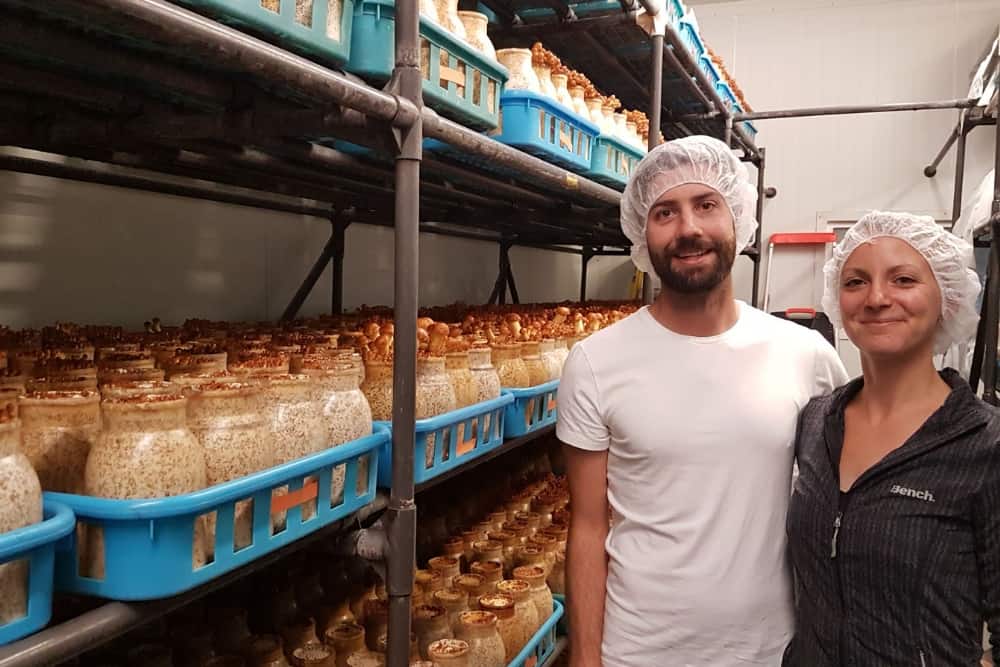
Once inoculated and secured with a filter lid, the bottles are transported to another area for colonization. Walking among the stacks of pallets is quite awe inspiring.
You can almost feel all the mycelial energy ready to burst into mushrooms!
This is where boring the hole through the center of the substrate really pays off. It allows the bottles to colonize from the middle-out rather than from the top-down. This greatly reduces the time required for colonizing, and minimizes opportunities for contamination.
Different mushrooms species will colonize substrate at different rates. Interestingly, David says that Maitake bottles will colonize the quickest, although they take the longest to actually fruit.
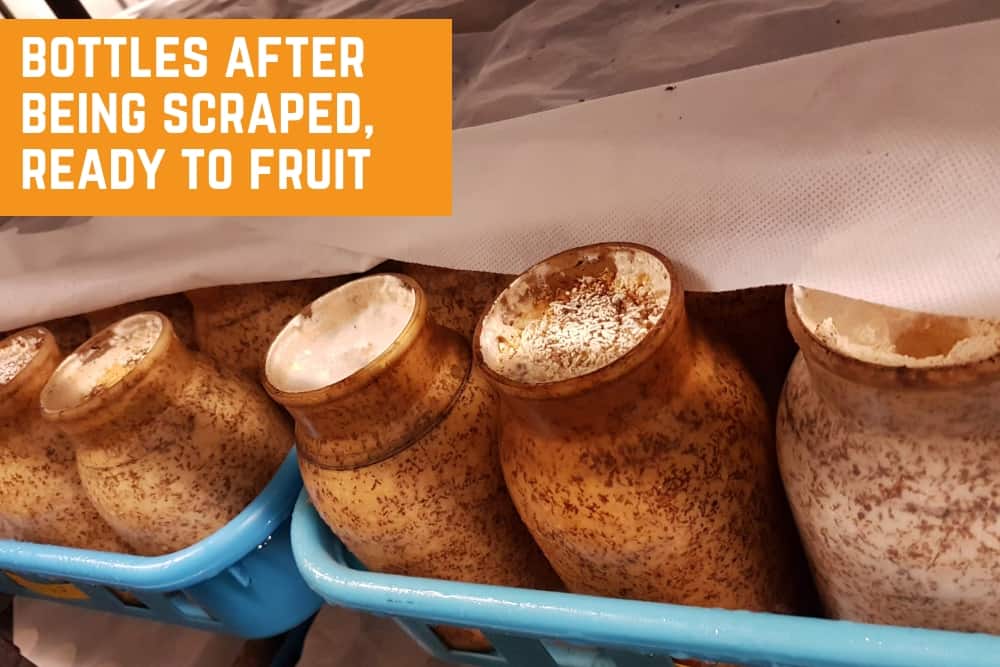
STEP 5: SCRAPE
Once the bottles are fully colonized, they don’t go directly into fruiting conditions.
That’s because they first need to be processed by another machine which scrapes the top layer of mycelium from the substrate in the bottle. This process is also known as “Kinkaki”.
This is done to help induce pinning, and it re-invigorates the mycelium.
After scraping, the bottles are left upside down in an open air environment, sometimes for a day or two. This allows for just the right amount of moisture to migrate towards the mouth of the bottle by gravity.
Finally, the bottles are ready to be brought into specially designed fruiting rooms.
STEP 6: FRUIT
There are ten grow rooms at Mycopia.
All of them are individually controlled for temperature and humidity, and usually only one species is grown in each room at any given time. This allows them to optimize conditions for individual species.
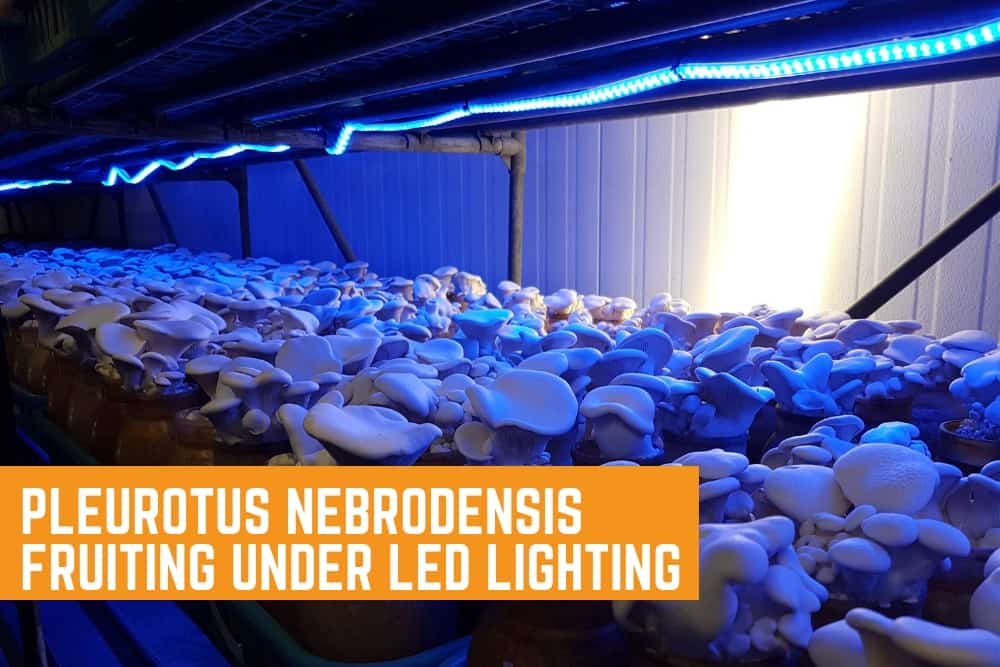
That being said, I did see Pleurotus eryngii and Pleurotus nebrodensis fruiting in the same room- but that makes sense because both these species have very similar growth parameters.
Environmental conditions are maintained by a combination of central air (heat pump), central misters, and evaporative coolers.
It definitely felt very “mushroomy” in those grow rooms!
Outside of each grow room is a foot bath, which helps to reduce potential contamination from workers entering the grow rooms. The rooms are also cleaned top to bottom after each harvest to ensure contamination keeps to a minimum. David says the contamination rate at the farm is well under 1%.
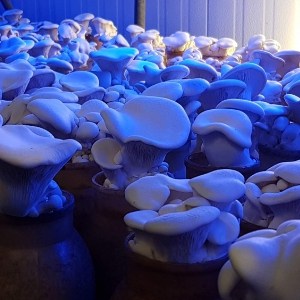
Light is provided by central lighting on the ceiling of the grow room, and for some species (King Oyster for sure) they use supplemental lighting in the form of LED strip lights underneath each shelf. This additional light helps to form more natural looking fruit bodies.
STEP 7: HARVEST AND PACKAGE
Once the mushrooms fully grown, they are harvested by hand. Even though this process is not mechanized, it is still made much easier due to the use of bottles.
Workers can simply cut the mushrooms off the top of the bottles, or tear the clusters off and trim by hand.
Bottle farming produces slightly lower yields and smaller fruit bodies than would be produced by bag culture- but the mushrooms grown in bottles are much more uniform and way easier to harvest and package.
In Fact, Mycopia has another farm in Michigan which grows Maitake in bags instead of bottles. The Maitake produced from those bags are much larger, and the yields are likely better- but the operation might not be as streamlined and efficient.
Further, Mycopia only harvests one flush from their bottle operation, instead of the 2-3 flushes you might see in a typical bag operation.
When I asked David why, he said that the first flush is by far the best, and subsequent flushes produce diminishing returns.
Waiting for additional flushes also increases the chances that the substrate falls prey to contamination- which, for any farm, is something that should be avoided to the full extent possible.
At the end of the day, it just makes way more sense economically to only harvest one flush- so that’s what they do.
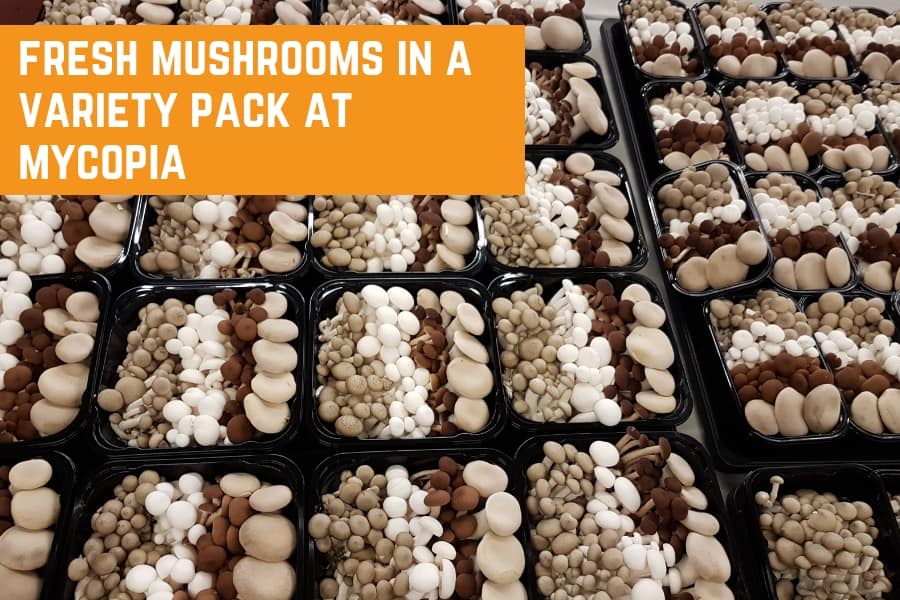
Once harvested, the mushrooms are packaged up either as individual species, or as specialty mixes and medleys.
When the farm started, they were only selling to a select few restaurants, but not they are sold to restaurants across the country through distributors, and at large retailers like Whole Foods
Because the mushrooms grown are such high quality and harvested and packaged with care, Mycopia is able to distribute their mushrooms to pretty much anywhere in the US- with the mushrooms even travelling as far as Florida from their home base in Sebastopol, California.
Even with this wide distribution, their mushrooms are typically in the hands (and stomachs) of consumers within one week of harvest.
STEP 8: CLEAN BOTTLES
After harvesting the mushrooms, the bottles are transported back to the start of the operation, where another machine uses a corkscrew-like mechanism to remove the spent substrate.
The substrate is conveyed into a large hopper, where it can be used for a whole array of agricultural purposes. The bottles are then cleaned, and ready to be used again.
This is one of the best parts of Mycopia’s bottle operation.
Instead of producing mountains of plastic bags fit for the landfill, the bottles can be used for many years before needing to be replaced.
This is a much more sustainable method of mushroom production- and is likely the best way forward for many bag operations today.
Can This Be Done At A Smaller Scale?
As mentioned, this is a large operation, with nationwide distribution and large retail customers. For this type of operation, the high initial costs of all the machinery seem appropriate.
But if you’re a smaller grower, or have ambitions to grow mushrooms commercially one day, you might be wondering… how this is relevant to you?
The start-up cost for getting these machines would be in the hundreds of thousands of dollars, which might turn a lot of people off from considering a bottle operation.
And although it’s true that this can’t be done on a small scale, keep in mind that Mycopia didn’t start this way.
They got started by growing Shiitake in bags, and selling to local restaurants.
Only when it made economic sense did they make the leap to a highly efficient and mechanized bottle operation that we see today.
Quality Over Quantity?
One thing that really blew me away while hanging out with David was the overall cleanliness of the farm.
In fact, the whole operation was immaculate.
Every step in the process seemed to be choreographed to perfection. This is the result of constant improvement and attention to detail over many many years.
David mentioned that a mantra at Mycopia, is “Quality over Quantity”.
At first, this makes sense, since the quality of their mushrooms really is exceptional.
But at 20,000 lbs a week? Of course, he is being humble.
From what I saw, David has found a way to produce both QUALITY and QUANTITY- true Bottle Farm Mastery at scale.

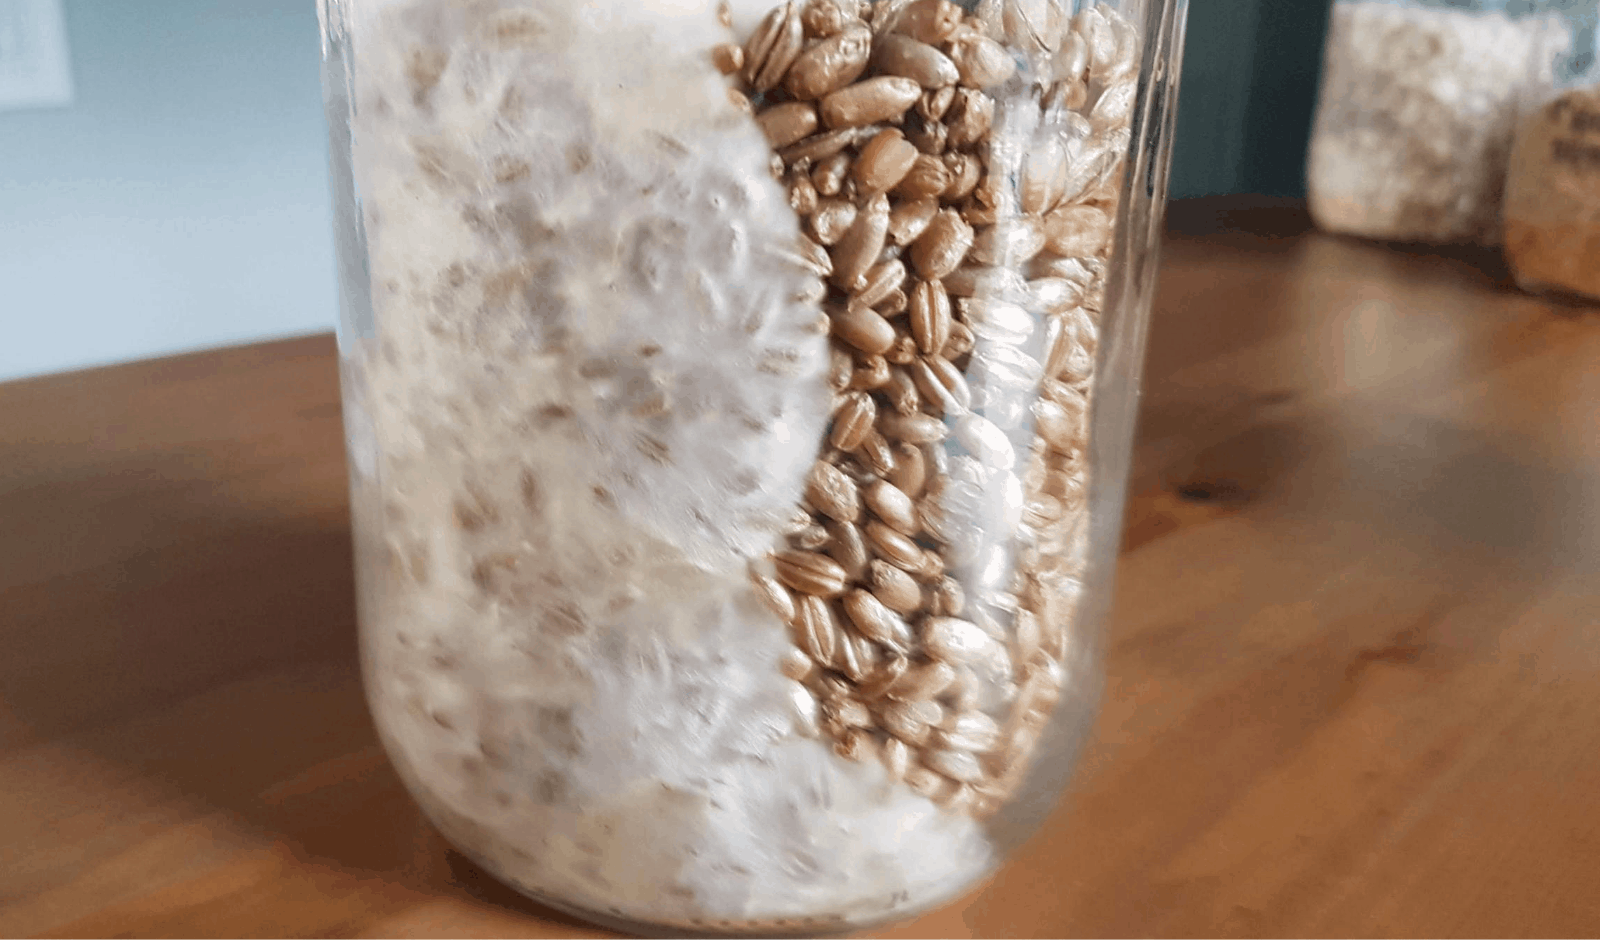
The EASY Way To Make Mushroom Grain Spawn At Home
Making grain spawn at home doesn’t have to be that complicated. If you can make spawn yourself, it allows you to grow basically any type of “cultivatable” mushroom you want. Read on to find out how you can make your own grain spawn easily at home without needing too much space, or without the need
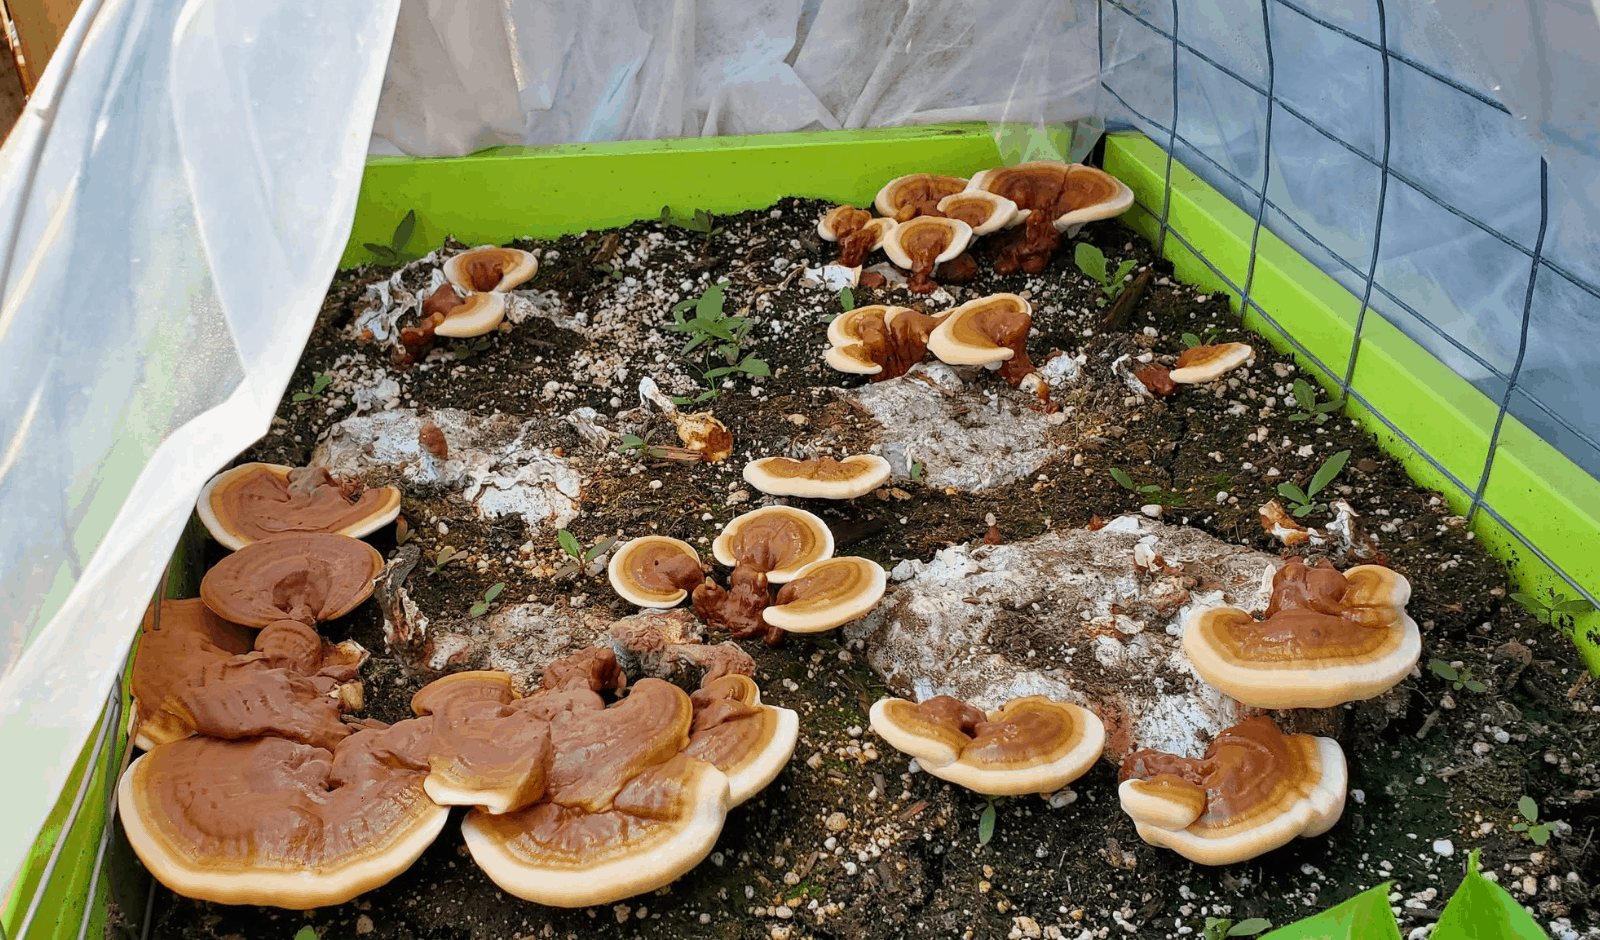
How To Grow Reishi In A “Mini Greenhouse” – Backyard Reishi Cultivation
Believe it or not, it’s actually not that hard to grow your own medicinal mushrooms. Of course, it can be complicated- but I wanted to show you an easy way to grow your very own Reishi mushrooms using the “mini-greenhouse” method. This method works so well because it mimics the traditional method the Reishi is
Thanks for this inspiration. I have bought bulk boxes of oyster mushroomsand got nervous by the white fungus and was alarmed by this “ mold” mycelium! LoL! I live on a rural island and operate a small vegetarian cafe and mushrooms are an important staple to my menu, so I will try this project out. Thanks.
S
Another excellent information,i leaned and inspired by your excellent information. Thank you very much.
Wow-what an informative article! There were several innovations that I thought might be useful for smaller operations, and I’d be interested in your thoughts.
First off, the bottles vs. bags question is really interesting. The advantages of the bottles are outlined above, but I wonder if a similar concept could be scaled down? For instance, instead of bottles, perhaps metal tubing could be used, cut into lengths of about 12-24 inches? It would need to be fairly wide, with a flat bottom that screws on. I see stainless steel piping is available, 5″ wide with threaded caps that can be bought commercially. If both ends were threaded, it would be possible to have bottom caps that are flat, along with a top cap with some sort of breathable material (polyfil?)
I’m thinking that the process described could be modified to be used with such containers, and being stainless steel, the containers could be sterilized and re-used multiple times. With both ends being accessible, this would simplify packing and extracting the medium with some simple lever-actioned machines that could be fabricated for a few thousand dollars, rather than hundreds of thousands. It’s not ideal, but I think it would be more efficient than packing bags by hand.
One of the machines, (or a hand tool like a planting plugger), could be used to quickly carve a cavity down the middle of the medium, which would allow quicker innoculation and growth.
The rest of the process would have to be done by hand, of course, but I like the idea of uniform flushes being more appealing to the general public and easier to package.