Growing Blog
Growing Oyster Mushrooms Outside
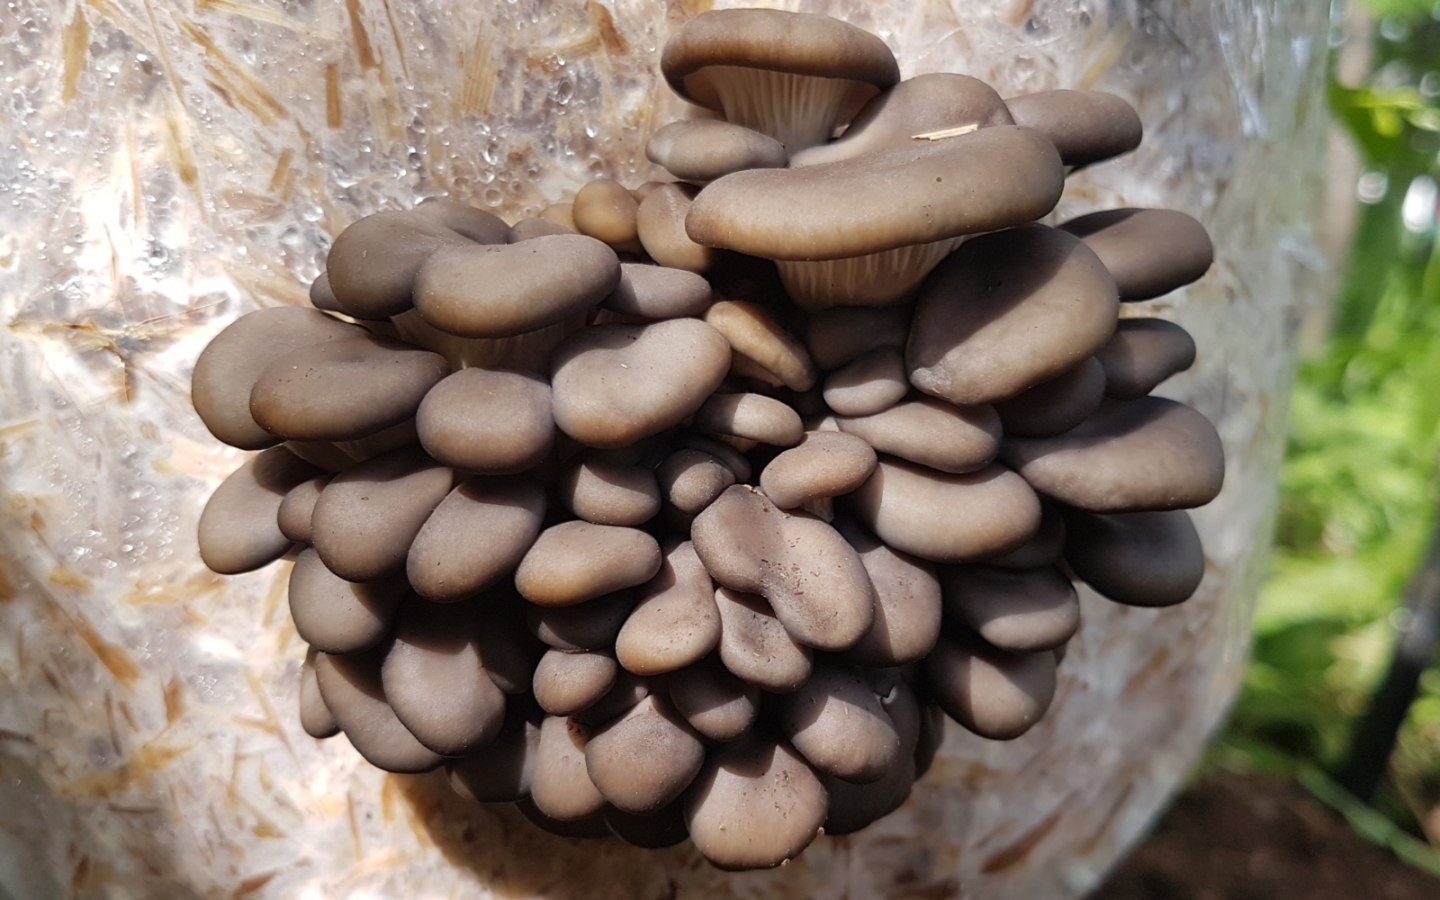
Growing oyster mushrooms doesn’t have to be complicated.
Sure it’s fun to have a highly controlled grow room, to monitor the environment and to try and optimize to perfection things like humidity, temperature and fresh air.
But sometimes, we just want to grow some mushrooms. And I can’t think of a better way to do that than to grow oyster mushrooms outside using the straw log method.
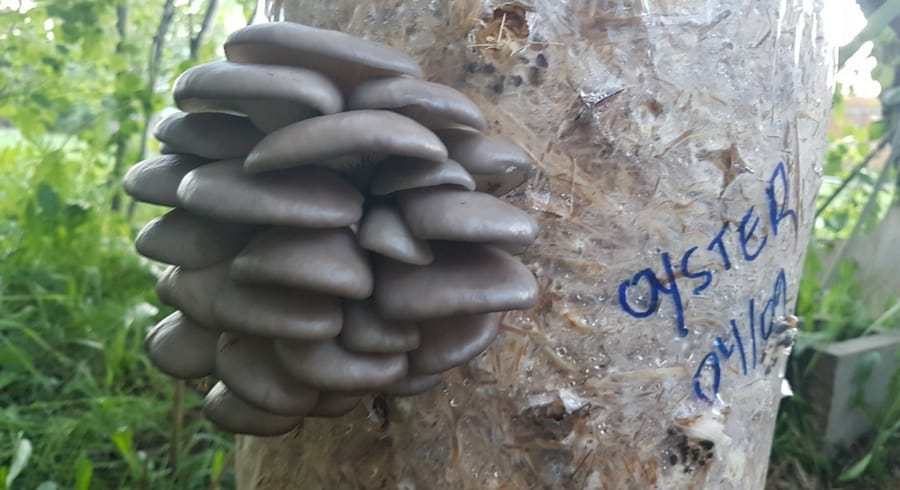
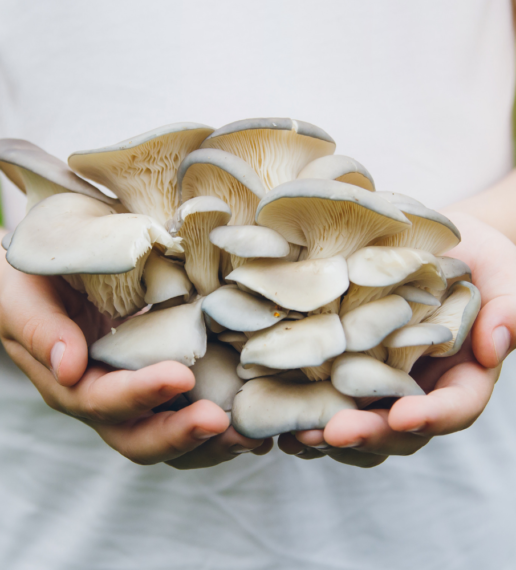
I just finished up harvesting a beautiful bunch of blue oysters from a spring-time oyster log, and I wanted to share the results!
Why Grow Outside?
Personally, I like to grow outside as often as I can. There is something easy and stress free about the process. Expectations are a little lower than when growing in controlled conditions- which means the pressure is off…. and I’m not usually all that concerned about how well it turns out.
That being said, the results are usually fantastic!
You see, mushrooms love growing outside. In fact, a big part of indoor cultivation is just trying to mimic conditions that mushrooms experience in the wild. This is especially true for oyster mushrooms.
Fresh Air
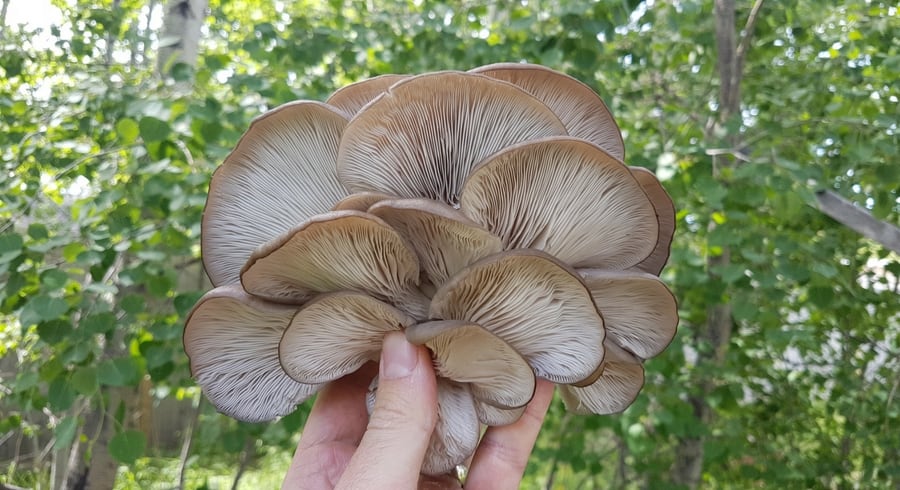
This is a big one. Oyster mushrooms (especially blue oysters, which is what I was growing here) require a ton of fresh air to produce normal looking fruits. If they don’t get enough, they will form long chewy stems and small little caps.
This totally makes sense if you compare it to how mushrooms grow in nature. Ideally, they want to be in open air so that releasing their spores will have the greatest dispersal potential. If they sense that CO2 levels are high, the will put a lot more energy into growing long stems to try and get away from the tree, and into the open air.
I am not overstating this. It’s really difficult to try and get enough fresh air in an indoor grow room in order to get large caps, while maintaining adequate humidity.
On the other hand, if you are fruiting outside- it’s a breeze.
Light
A common misconception is that mushrooms need to grow in the dark. Although some mushrooms can indeed grow without light, most require some form of light in order to grow normally. Growing indoors requires the cultivator to try and mimic the natural light cycle with artificial lighting- which is obviously a lot easier to achieve if growing outside.
That being said, you don’t want your mushrooms in direct sunlight. An ideal location is hidden among some trees, low to the ground and with diffuse natural light.
Temperatures
This might be totally anecdotal, but I have found that lower temperatures overnight seem to produce thicker, meatier mushrooms. I am not quite sure if it is due to the low temperature itself, or just the swing between night time and daytime temperatures.
Either way, growing outdoors definitely produces nicer clusters.
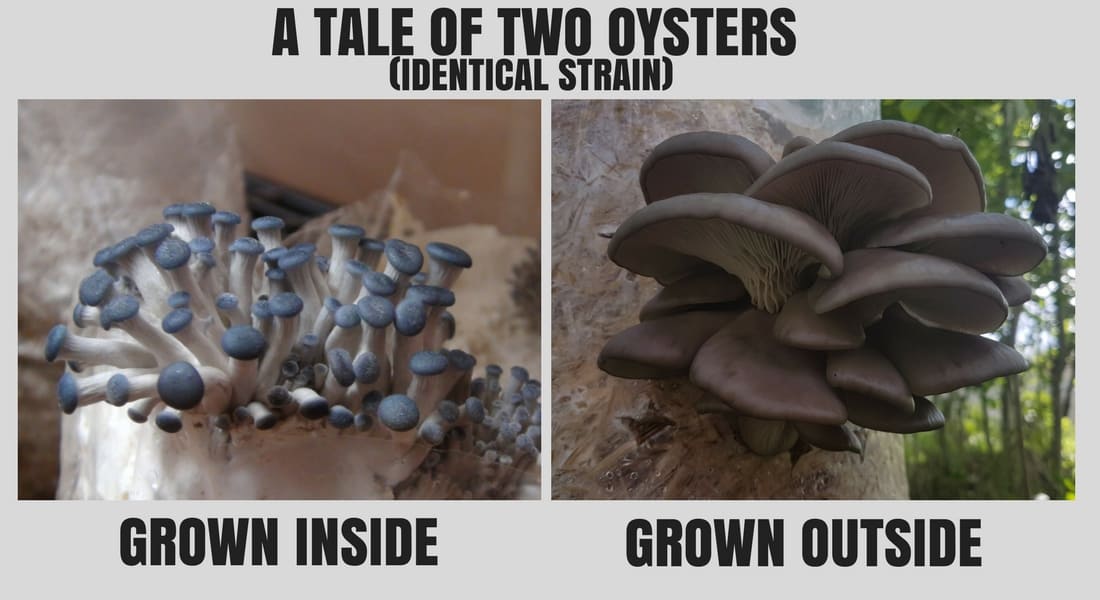
The difference between oyster mushrooms (identical strains) grown indoors versus outdoors are substantial.
Bugs
The downside to growing oysters outdoors is the bugs. Bugs love mushrooms. And if they get a chance, they will burrow into your mushrooms and lay eggs that eventually turn into larvae. Either that, or the bugs will just eat the mushrooms before you get a chance to pick ‘em. For this reason you need to pay close attention to your outdoor grow and harvest the clusters as soon as they are ready.
When to Grow
When to grow really depends on where you live. Here in central Alberta, Spring and Fall are definitely the best times for growing oysters outdoors. I prefer the spring, because the constantly wet ground helps to maintain higher levels of humidity.
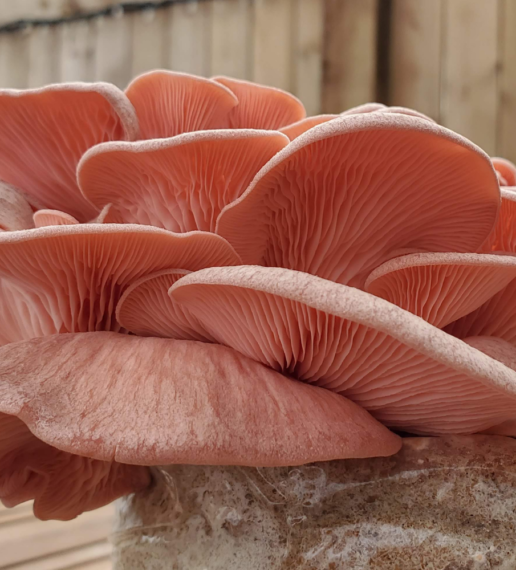
You can definitely try to grow outdoor oysters in the middle of summer aswell. If temperatures are too high, you might not have much luck without taking extra measure to ensure your log stays moist and relatively cool. You can however increase your chances of success by growing a tropical species of Oyster, such as Pink Oyster or Yellow Oyster, which actually thrive in warmer temperatures.
The time it takes from spawning the log to harvesting the first flush of mushrooms takes anywhere from 2-4 weeks, so keep that in mind when trying to time your grows for the seasons.
Prepping The Log
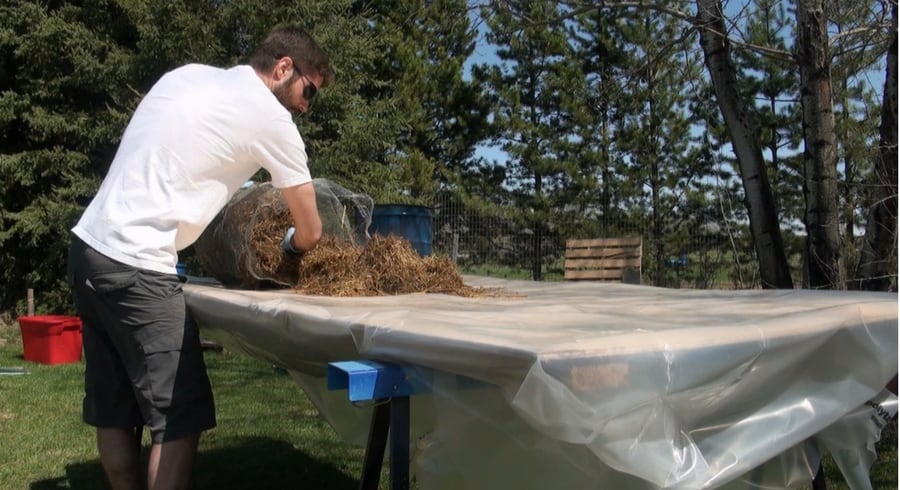
Prepping a straw log is simple, but it does take a fair amount of work.
First, the straw needs to be cleaned, chopped and pasteurized. Then you can add grain spawn and stuff the mix into some poly tubing with holes cut into the bag. You can also use a 5 gallon bucket with holes drilled into it as a fruiting container.
The process is way easier if you use ready-made grain spawn, otherwise, you will have to make grain spawn from scratch- which is a pretty involved process.
This particular log was made with wheat straw pasteurized for 1.5 hours and inoculated with blue oyster grain spawn (sorghum) at a spawn rate of about 10-15%.
I have already put together some guides for making straw logs, so be sure to check that out if you are new to growing mushrooms. Alternatively, you can watch the video here:
Once the log is prepped, you need to allow time for it to colonize. This is best if done inside in a stable environment.
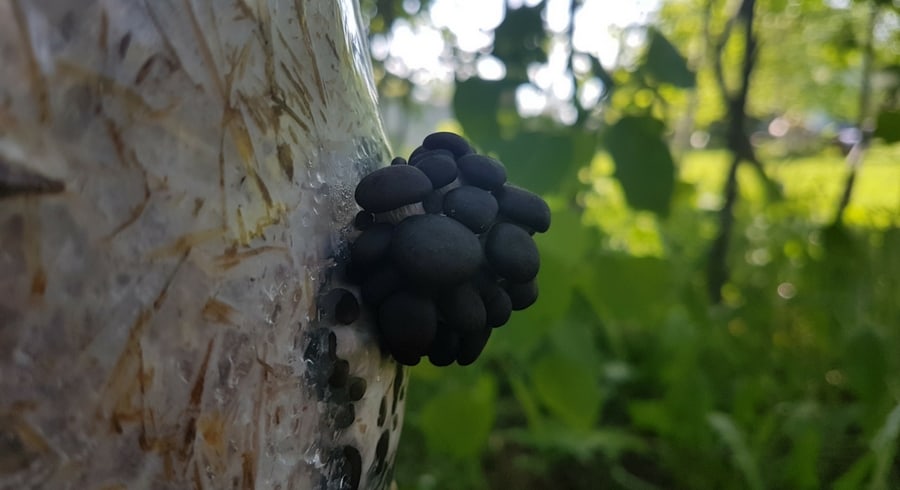
For this log, I placed it in my garage, with temperatures steady at about 15-18 deg C. The log was hung and I didn’t touch it until it was ready to fruit. It took about 2 weeks until the mycelium had worked it’s way throughout the straw and I could see little pins starting to form at the opening in the bag.
Fruiting the Log
Once this log was ready to go, I took it outside and hung it on a branch in the forest. It was about 5 or 6 feet off the ground, and out of direct sunlight.
Right away, however, I could tell that it wasn’t a great spot for the log. It was a little too exposed to the wind, which caused the pins to dry out- and would eventually cause them to abort the fruiting process.
I ended up taking the log to a new location, closer to the ground and better protected from the wind. I also made a point to water the grass and ground around the log so that it would be wet and keep the area humid throughout the day.
This worked fantastic. Within a few days, real true pins appeared and began to show signs of growing into large clusters.
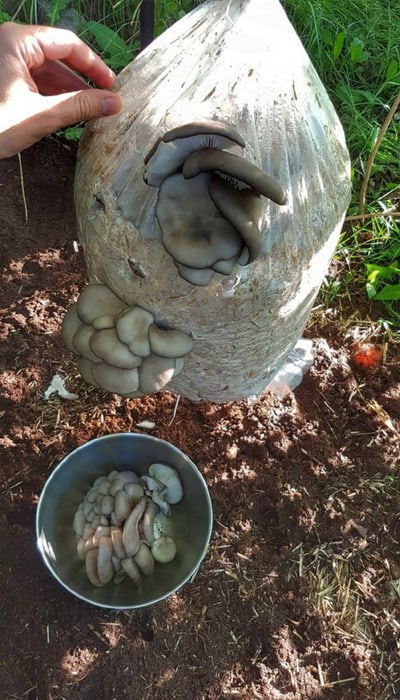
At this stage, oyster mushrooms grow quick- sometimes doubling in size overnight. You really have to watch and make sure that you harvest them before they drop spores and are past their prime. I was harvesting the mushrooms within a week of placing the log in its new location.
Expectations
Growing outdoors usually produces fantastic results, but unlike indoor grows, exactly how the mushrooms grow is relatively unpredictable.
When logs are grown in a controlled grow room, the flushes are often even and prolific, with every single hole being home to a nice little cluster of mushrooms.
When growing outdoors, the clusters will be more erratic.
Often there will be fewer clusters because some of the perforations will fail to grow any mushrooms at all.
That being said, overall yield is generally the same. That is because outdoor logs commonly form fewer but way larger clusters, while indoor logs will form multiple, evenly distributed but way smaller clusters.
Pins will also commonly form under the poly tubing- nowhere near a hole- so be sure to check your log to see if there are any trapped clusters. You can free them by making a small cut near the trapped cluster, which should have no problem finding its way out of the bag.
Harvesting the Mushrooms
You want to try and harvest the mushrooms before they drop there spores, after which the mushrooms will be past their prime. You’ll know that the mushrooms are ready when the cap of the oyster just starts to curl upwards.
I usually like to harvest the mushrooms a day or two before this happens, as I find that they are meatier and firmer, and will last longer in the fridge.
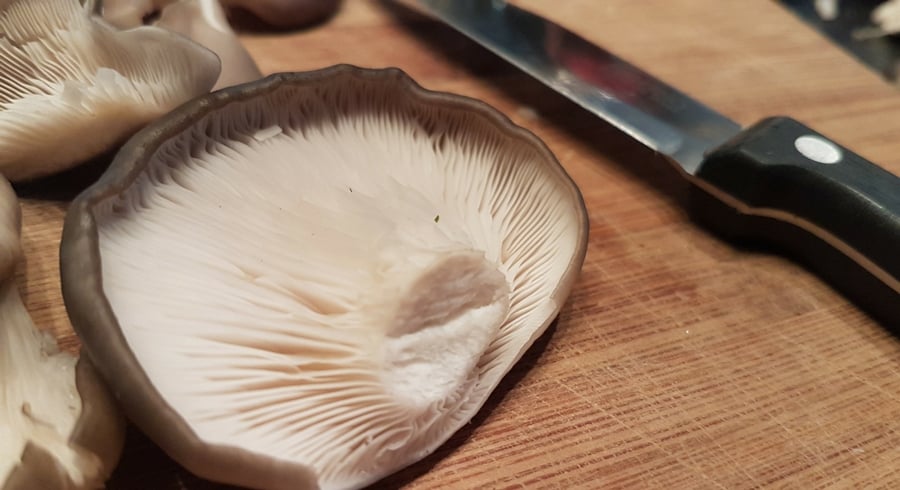
To harvest the mushrooms, take a sharp knife cut off the entire cluster at the base near the face of the log. Try not to pick off individual mushrooms, as every bit of extra handling will greatly reduce the shelf life of your mushrooms. Plus, big clusters look cool! You gotta be able to show them off!
This log produced just over 3 lbs of fresh oyster mushrooms on the very first flush. Not too bad! Depending on where you live, oyster mushrooms typically go for anywhere between $9-$15 per pound… so you could imagine it might be inciting to try and make a whole bunch of these logs and try your hand at the local farmers market!
Cooking and Preserving
You are unlikely to see fresh oyster mushrooms like this at your local supermarket- for a couple of reasons.
First of all, Oyster mushrooms are delicate and typically don’t transport well. Unless you have a local growers in your area, the mushrooms either won’t look as good as these- or they won’t be there at all!
Further, Oysters don’t have a very long shelf life, so they won’t stay good all that long in the produce department.
Oyster mushrooms are best if they are eaten right after harvest. If you let them dry off a little and place them in the fridge in a breathable container, they should stay pretty fresh for 2-3 days, and you definitely want to eat them within a week.
You could also dry them in a dehydrator for long term storage, but I find dried oysters to be pretty chewy and unappealing, even after being re-hydrated.
There are millions of ways to enjoy oysters- and I am definitely not the best person to give advice on what to do in the kitchen. I like to simply fry them in oil or butter with garlic, salt and pepper, and eat them as a side dish to any meal. You can also add them to soups, pastas, pizzas, and anywhere else you might put regular button mushrooms.
Multiple Flushes
Your oyster log should produce multiple flushes over a number of weeks. After the first flush is harvested, let the log rest and don’t do anything except keep it in a relatively humid environment out of direct sunlight. Basically just leave it in fruiting conditions. You will likely see more mushrooms appearing within 2 weeks.
If you start to see contamination (trichoderma ect.) then you know the log has run it’s course.
Once the log stops producing mushrooms all together, either toss it into your garden, or add it to a compost pile. The mushroom mycelium breaks down the straw and it will eventually turn into a really nice compost.
Grow Oysters Outdoors!
Growing oyster mushrooms outside really is one of the easiest, most laid-back and effective ways of producing food at home. The joy of seeing mushrooms grow bigger every day is hard to beat. Plus, there is something special about growing your own food from scratch.
So why not give it a try!
I got a mushroom kit from everything mushrooms, and I tried to mix on pasturized straw/gypsum. I had left over spawn, so I added to a food container layered w wet cardboard. It gets dry on the top, bec it’s not corrugated one on top, so I misset it w filtered water but it’s not cook. will this contaminate my culture? Everyone said missed it, but they didn’t say if it needed to be cooked, or sterilize the sprayer. what’s the thought on that. Please tell me, what’s your opinion. thanks.
Hi Veronica, thanks for reaching out! It really depends- if you are growing outside, in a garden bed for example, this is a perfectly acceptable way to grow. You aren’t going to get amazon results, and may have some contamination, but it should still eventually produce mushrooms. If you are trying to gro in controlled conditions inside, then there is a decent chance that this could contaminate before it fully colonizes. You would be better off to add to some pasteurized straw and place in a container that can retain moisture while still breathing, such as a laundry basket, bucket with holes drilled in it, ect. Happy growing!
I really find this site great in presenting the things… I have few queries tony..
1- I had used polybag as the log exactly the way which you shown in the photo Oyster 04/09. My query is how do you water this log as the log is sealed from every side and just few holes
2- ILets say you get the second flush through the existing holes, should we be removing the polybag and keep the strawlog open or just keep continuing as it is for next flush
3- I am really not clear how we should treat after second flush specially when used in polybags..
Hey ashok!
Thanks for reaching out!
1- No need to water the log, the water is already in the straw from pasteurization.
2- Keep it in the bag, next batch will fruit through the same holes.
3- Just keep everything the same, second flush will come naturally.
Hope that helps!
Tony
What do you think of growing oyster mushrooms outdoors in a large pot using finely ground wood chips? We have a large source here. Would the chips need to be sterilized and how? They are probably quite fresh, but one could dig down for older ones in the pile. Multiple types of wood from the town wood and brush dump. Any advice appreciated. Thanks.
Yes, I have done something similar using aspen wood chips with awesome results! Pasteurize and spawn at a ~10% rate. Good Luck!
Hi Tony,
Any tips on keeping bugs off once the fruiting stage kicks off? Or does this just come with the ‘organic’ territory.
Hey Shannon! I would say use a screen or netting, but otherwise, it’s just picking them a little early before the bugs take over. I bet it has a lot to do with the time of year as well, but haven’t played around with that factor too much.
Hi, Tony: Being a novice, I have been closely following your Youtube videos about making grain spawn with great results. You explain everything so clearly and methodically. I’ve learned so much from you! Thanks a lot from Vancouver, B.C.
Awesome to hear!
I had a very good producing Blue Oyster bed outdoors approximately 2′ x 8′ on the north side of my shed. I added some fresh hardwood chips last fall and we did not have a particularly cold winter (Chicagoland). I was watching for mushrooms this spring but nothing appeared. I checked in a couple of places and did not see any mycelium. Does this type of mushroom survive the winter?
Hi Tony,
Just about to start my first ever blue oyster grow. Using buckets as I’ve seen in your vids. I’m a little concerned about overnight outside temps (I’m in Aus and winter is coming!). It gets frosty overnight but day time temps are still hitting 15-18 degrees C for the next couple of months. Is there any point in trying to do an outdoor grow in these conditions or should I set my buckets up in my shed?